
Catch A Moment by Gill Mumphrey
11:00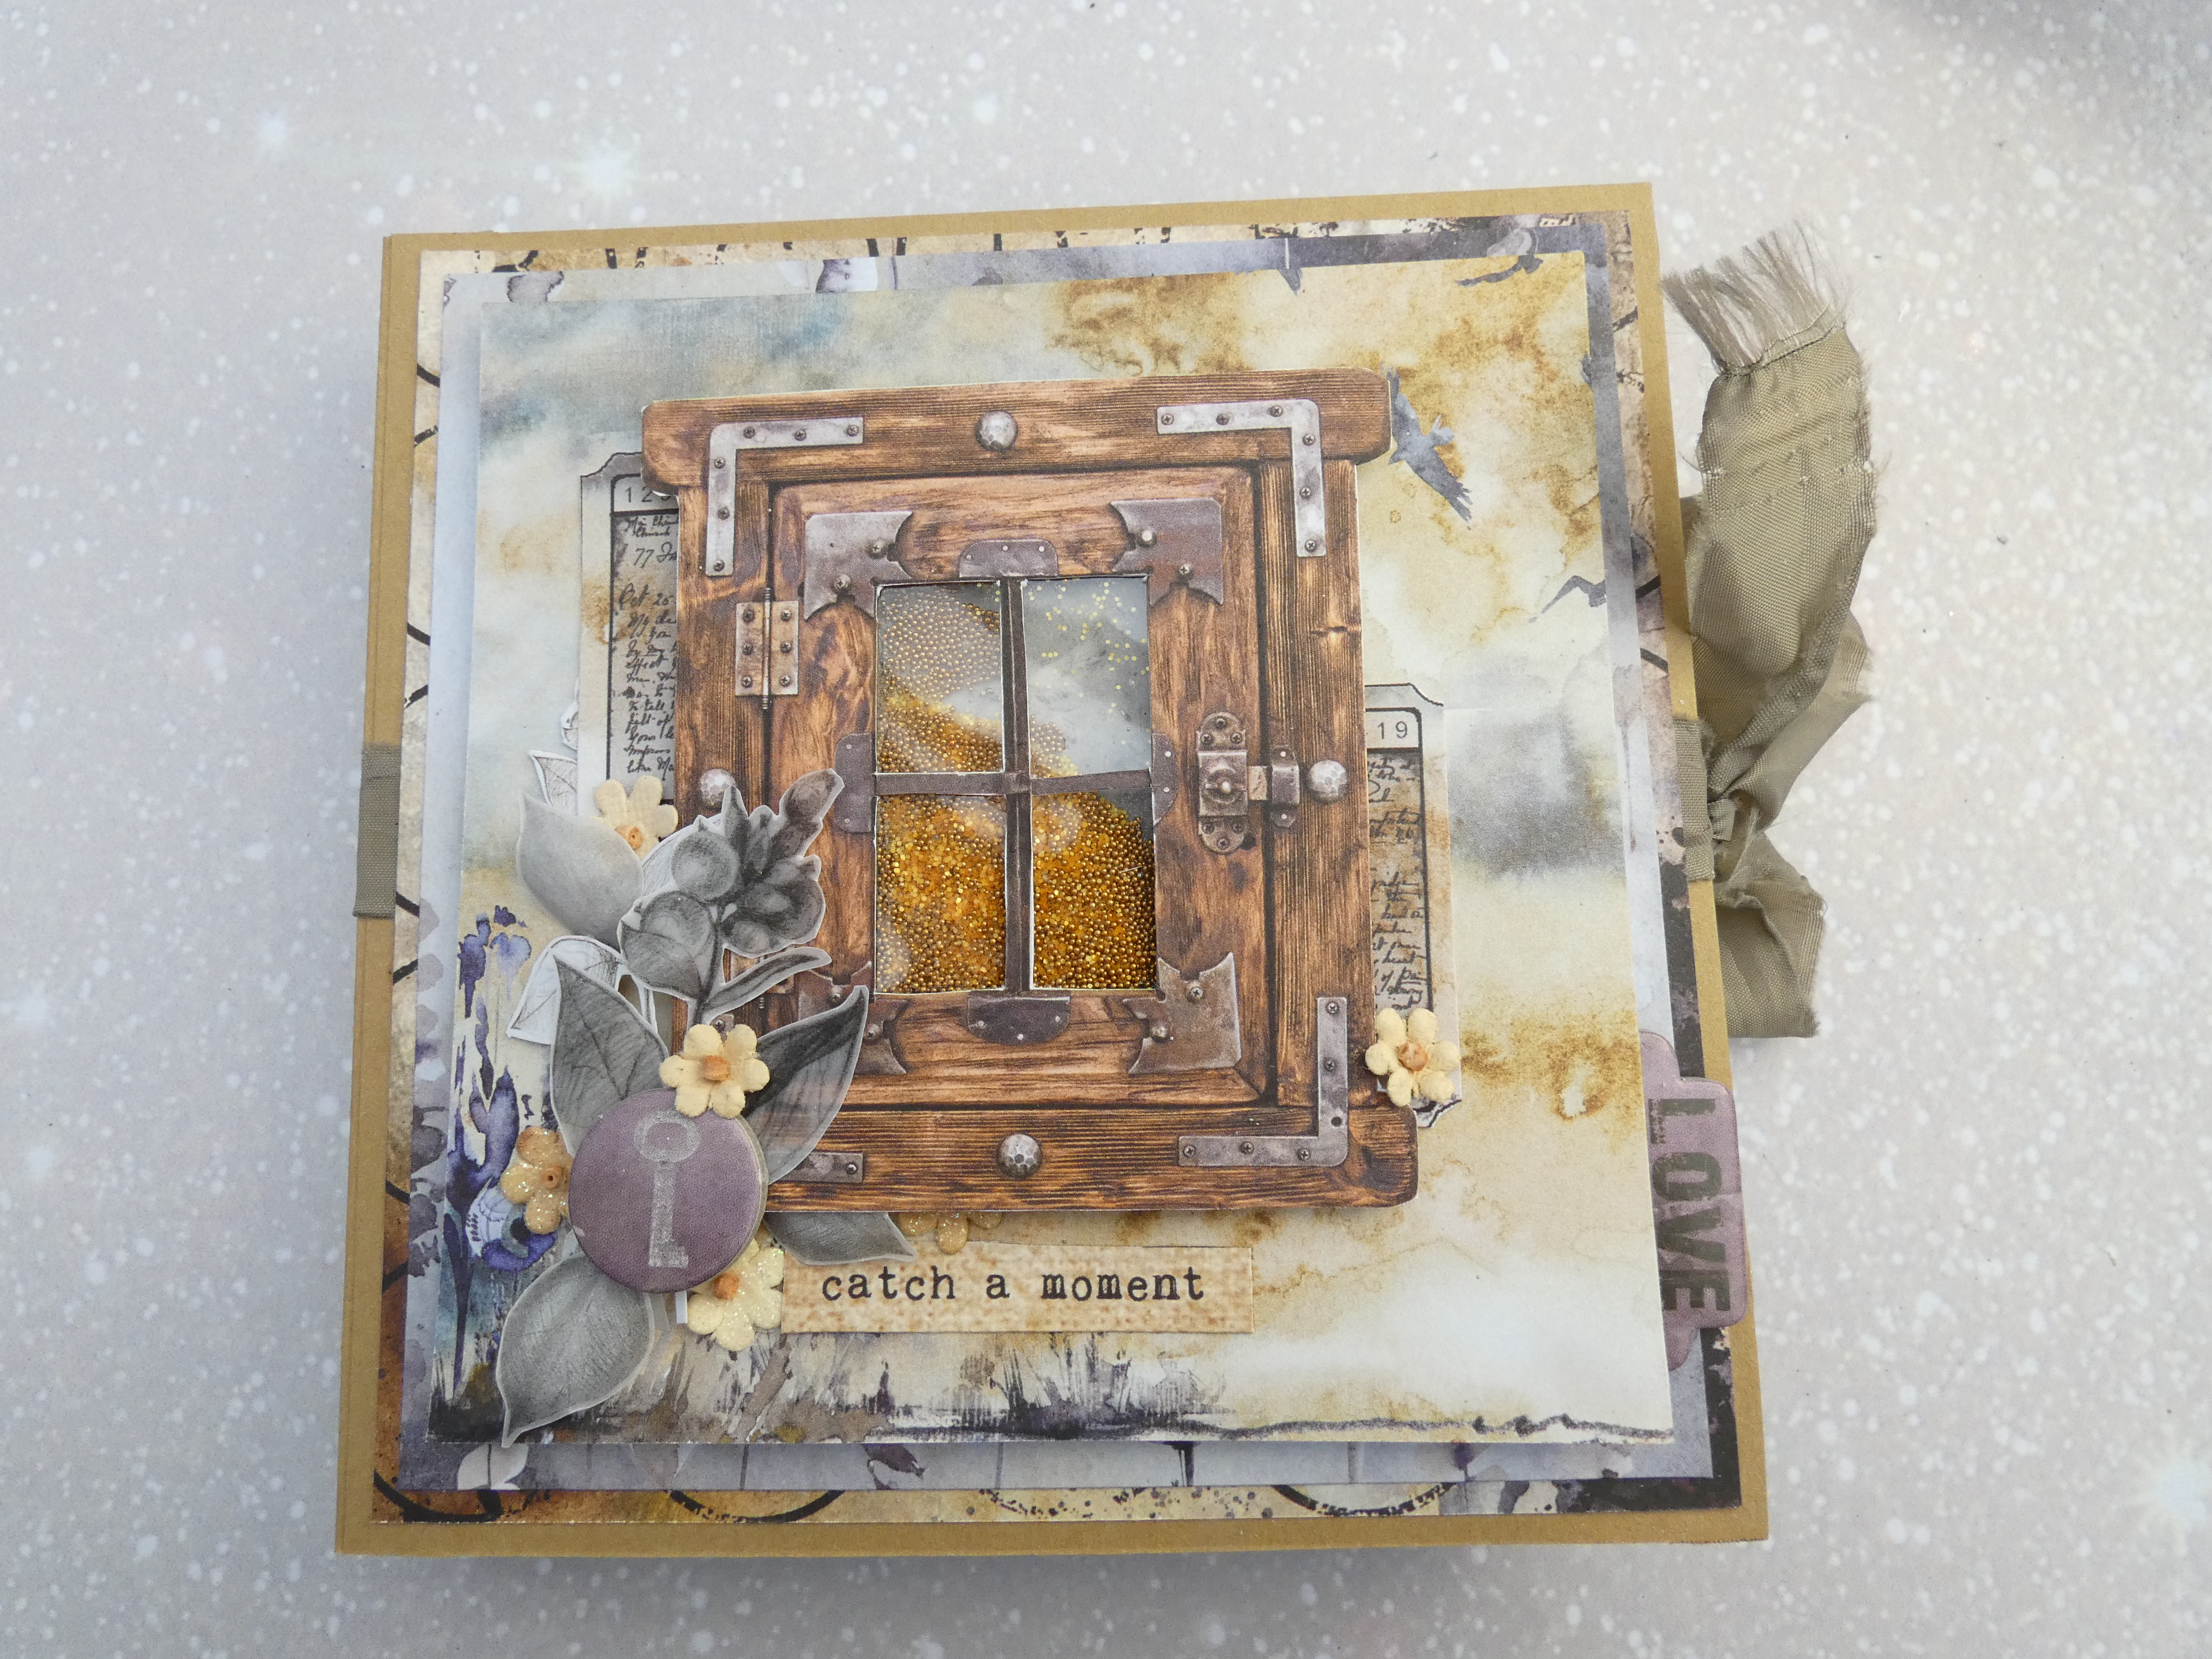
My first love in crafting is most definitely working with papers - be it making cards, mixed media home decor pieces or as in this piece mini-albums. Documenting the good the bad and ugly in life is so very important as it leaves a record of what has happened for others to enjoy or perhaps to learn from both sentiments which I think are apt as we look forward to a better 2021.
This accordion album is made with papers Beauty Restless 6 x 6 papers, Beauty Restless Journal Extras, Decorative Tracing Papers 2, Beauty Restless chipboard die cuts and Windows sheet of xtras all by Craft O'Clock.
I started by making my cover piece - cutting kraft card stock two 6" square pieces and a 2 " x 6" piece scored at 1/2" and 1 1/2 " before adhering the square pieces up to the line using That's Crafty! Multi Purpose Glue.

The accordion fold out element was made by cutting 5 3/4" panels of crafty card joined with strips of 5 3/4" by 1" card scored at 1/2". The panels were then attached to each other using the smaller strip of paper as a hinge, alternating valley and mountain folds so that the pages fold nicely on top of each other. It is important when you are attaching the panels you ensure that the spine piece still folds nicely and to do this I tend to adhere one side, let it dry completely then fold it to reinforce the crease before adding the adjacent panel with a tiny gap along the crease line. The beauty of this type of construction is you can add as many pages as you choose although you do need to be mindful of the depth of the spine as you want your folded pages to sit comfortably inside the cover once they are decorated.

My next step was to add papers to the inside of the cover - with separate pieces cut to leave a small border for the front, spine and back cover. Once these were adhered in place I added my accordion folded pages to the inside back cover.

I then adhered a piece of co-ordinating shabby ribbon on the outside of my album before adhering papers cut to fit the panels leaving a small border - I chose 1/8" borders throughout the book.

To decorate my pages I used a combination of elements from the journal extras papers and photomats. To achieve a cohesive feel I added Vintage Photo Distress Oxide ink applied with Cut and Dry Foam to the back of the fussy cut elements from the journal extras pads and also used the same ink to add text from the Textures Collection Set 3 and postage stamp from the Numbers and Script stamp set.

I varied the size of my photomounts as shown below - attaching some to folded elements from the journrl extras pack and some directly to the pages.


I then added lots of elements from the collection to decorate each page:


I created a shaker element for the cover of my album by choosing a window from the windows extra sheet - cutting out the window using a craft knife before adhering it onto acetate. I cut a piece of paper to fit the back of the window and then carefully poured over some microbeads before adhering the acetate backed window frame using dimensional tape. This was then adhered to my cover along with elements from the tracing paper pack and chipboard die cuts.
I hope this step by step will help you create your own mini album and that you find this design versatile and easily adapted to what ever style suits your own needs. There are tons of other pretty papers on the That's Crafty! Website which could just as easily be used to make special gifts for loved ones.


0 comments
Thank you for taking the time to leave a comment on our blog, we really appreciate it.
Note: only a member of this blog may post a comment.