
Time Machine by Gill Humphrey
11:00
The lovely Laura who of course owns That's Crafty! was kind enough to ask if I would do a Stamperia live and so this project was born. The lives last some where between one and two hours and having filled each of the pockets inside this album was I realised never going to be completed in that time frame although I have to say we did get an awful lot of it made during the live. For this post I am going to show you the contents of the pockets as the live can be watched back at leisure at https://www.facebook.com/231949420212531/videos/1204011476730991.

The live shows how the album was created using 8 x 8, 12 x 12, Collectables, die cuts, train greyboard and air balloon greyboard from the Voyages Fantastique collection and a small piece of rice paper from the Sir Vagabond collection but any text based rice paper in brown tones would work just as well. The mechanics of the ablum are made with greyboard, 6" square kraft card envelopes and gold stone paper although plain stone paper would work just as well.

To paint the grey board pieces I used Stamperia Allegro colours in Earth Brown, Cappuccino and Nougat and then added black pearl and gold waxes and some antiquing paste in a copper tone - Finnabair metallic waxes which are on the website would work just as well or even some of her matte waxes.
I used Glossy Accents to add durability to the clock pieces used as pulls for tags and also on lots of the watch and glass elements on the papers. All paper edges were inked with Versafine Clair Pine Cone.

As you can see the album is then filled with lots of additional pieces. Having used envelopes for the pockets I decided that I would use the cards to make different elements for putting photographs, ephemera and journalling on to. Of course many of the inserts could be used as cards or the whole piece gifted as a writing set. Some of these were made during the live but not all so here are the infill pieces with additional items needed to complete each set.

There are two tall tags in the album made by creating tags from kraft card and then layering papers which are 0.5cm smaller in dimension that the bases. At the top of the tags I placed back to back cogs/clocks and Glossy Accents.

This insert uses a card base orientated tent fold layered with paper and a topper piece fussy cut from the papers. The greyboard corner comes from Gears and Numbers Ggreyboard from Sir Vagabond collection painted and waxed in the same way as my other greyboard pieces. The metal cogs come from my stash. The inside is layered with paper from the collection and then a smaller piece of smooth stamping card which has been stamped with a flourish stamp in Ground Espresso Distress Archival ink, a small star stamp in Hickory Smoke Distress Archival ink both of which come from set 3 and the Stamperia Tapestry stamp in Peeled Paint.

The next card is orientated with the fold to the right and is simply matted and layered with papers from the collection. Two fussy cut locks were adhered flat to the card then a scrap piece of lace before the topper card was added using greyboard so it sits securely over the lace. Two cogs from the greyboard collections sit on top.

The inside is made in a similar way to the card above.

The next pocket holds a card with pockets to hold tags. The pocket was created using a 5" square kraft card envelope glued shut and then cut in half. Paper elements and a die cut adorn the front of the pocket and tags with neutral twine sit within it.

The reverse of this piece is created in the same way except that I added stencilling to the front of the pocket using Vintage Photo through The Traveller Stencil from Sir Vagabond collection before adding fussy cut paper elements.

The next page is formed from a card that has been glued closed leaving the top open to act as another pocket.On the front of the piece there is a pocket made from craft card that is the width of the base card.

The tag inside is simply made from a piece of the patterned paper topped with clocks in the same way as the previous tags.

This card is constructed by simply gluing the card base together before layering paper on the front and back. On top is an A6 Kraft card cut down to sit as shown and then decorated with papers and elements from the paper pad and a cog from my stash.

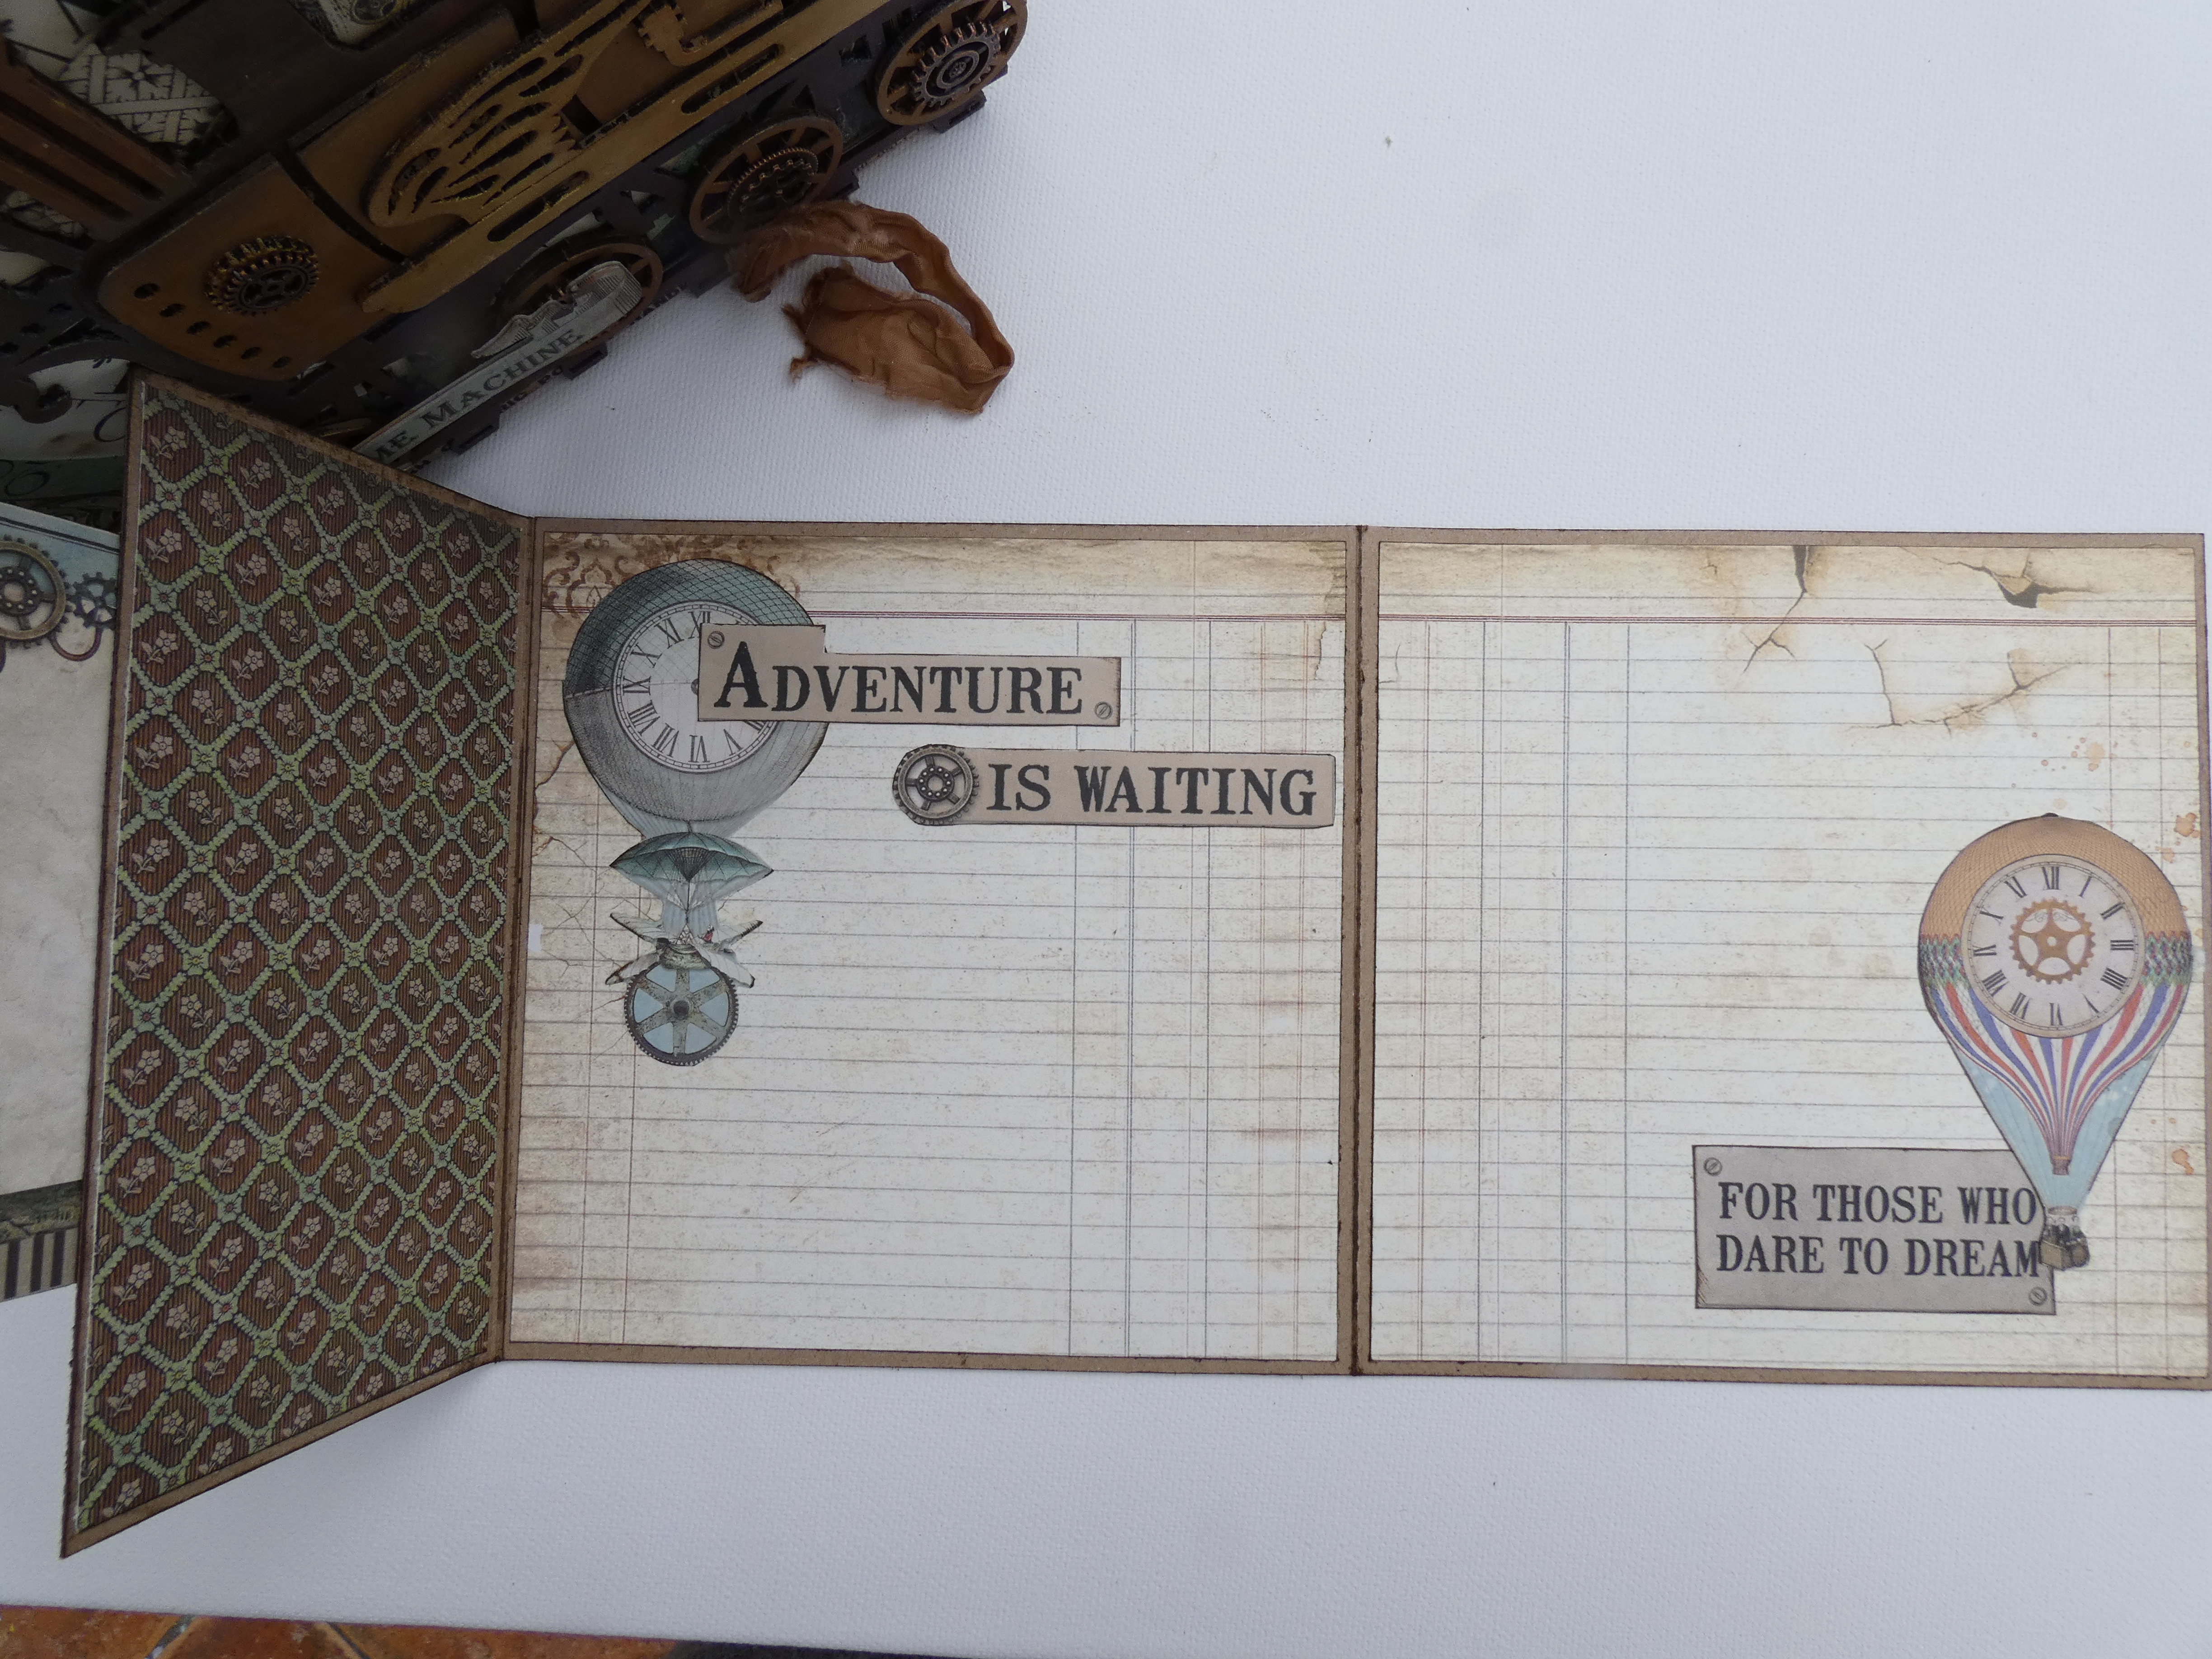
The next card is made from two card bases glued on top of each other giving a trifold panel. The top flap has then been cut removing the right hand half and decorated as shown. The balloons and sentiment were fussy cut from the papers and the word imagine comes from the die cut pack.


The next insert is made by trmming a 6 x 6 card blank to create a pocket on the right side of the page. I then chose paper from the 12 x 12 collection and cut it to fit the whole of the card piece before trimming the right side to create a piece that would sit nicely on the front of the pocket. The remaining piece was then secured on the panel before gluing down the flap to make the pocket. The gauzes were covered in Glossy Accents, cogs from my stash and a die cut element added. The pocket was then filled with tags from the papers and a topper piece.

Here I have used a tent fold card mat and layered with papers from the collection and then layered waterfall style tags to the left side - these came from the Collectables paper pad.


My final element is made from an A6 card glued shut to create a pocket. I then cut a semi circle from the top before layering papers. Finally I created a tag to sit inside the pocket.


I do hope you have enjoyed reading this blog. Please remember there is a video referenced at the top of the post on how to construct the base of the album and I look forward to seeing your makes based on this post.


0 comments
Thank you for taking the time to leave a comment on our blog, we really appreciate it.
Note: only a member of this blog may post a comment.