
Flip Flap Box Card by Gill Humphrey
11:00
Liz Wheeler has designed another template set (Journal It 3) and as ever they are really versatile so can be used in lots of different ways. The templates take the headache out of measuring and cutting the base pieces leaving you to decorate to suit your own tastes. This post is the Flip Flap Box made as originally intended however I have added elements from other template collections (Templates 2) for my decorations so it will double as a mini photo album. If you kept dimensional elements to the minimum the inside is big enough to hold a certain well known square chocolate bar that some of the value supermarkets often have in stock. For decorating this album because of its size takes a lot more paper than you might expect - a whole pack of 6" papers plus some from a 12" pack but I do think the end result is absolutely worth it.
Start by drawing round template 2A on to plain card stock and then cut out making the score lines to create the left hand spine. Then draw around template 2B and mark score lines - this will form the flap for the right hand side of the box along with the box wall. Adhere the flap to the side of the first piece - I chose to add this on the side that was going to be inside.


Now draw and cut around 2 of Template 2D (the template used above but rotated round so that the smaller spine is now on the left side as you are looking at your work). Cut out and adhere in place. You will now have your outer cover plus 4 flaps creating the walls of the box with all of the tabs on the inside of the box. Cut out one piece from Template 2E and use this to cover your tabs so that the box is neat and tidy.


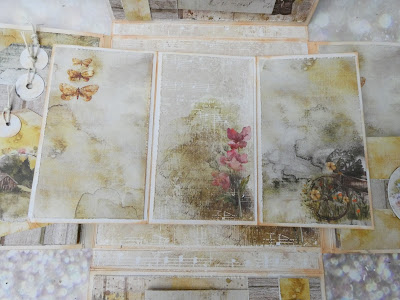
I chose to mirror my designs on the inside top and bottom flaps making pockets with the paper that I could slip paper elements into. I adhered a trifold paper piece cut using the template form collection 1 to the top of the right hand flap.

To the inside of the of that flap I adhered an ambassador pocket cut using a template from collection 2. The tops side of the left hand flap was left plain (ideal for a photograph or for you to write your message.

On the inside of the left hand flap I added a pocket taken by drawing round the pocket template from set 1 and folding the sides to create a gusset into which I added another trifold element.
It is important to remember when adding dimensional pieces that the box needs to close neatly so you do need to be mindful of how many layers you add which is why I have left some pieces with a simple matted layer.


The flaps for 2 C and 2 D create two different spine widths allowing the pieces to tessellate together smoothly - this is an ideal feature for other designs and of course you can orientate the outside opening so the box is top opening rather than side ways opening.


0 comments
Thank you for taking the time to leave a comment on our blog, we really appreciate it.
Note: only a member of this blog may post a comment.