
Perfect Day by Gill Humphrey
11:00
Special days are frequently celebrated over the summer and so many will have photographs that deserve to be off our cameras and out of the ether and an album is just the right place to hold them. Created with love it also makes a very special gift.
For this make I have used the Canvas Album Set, this time making it up with the correct number of pages - if you did not see my earlier blog the kit says use fabric to cover the inside spine BUT actually there is a set of cards with 2 vertical lines on them in the set and it is the larger one of these that needs to be adhered to the inside spine area once you have added the canvas cover. Then you adhere the two plain card panels to each side of the book covering the join made by the first piece. The rest of the construction is as the instructions. A word to the wise make sure all of the open ends of the pages are at the top and also when you come to decorate that you have them accessible from the top as this gives you pockets into which you can add additional photomats and tags.
Having made the book base I then used the You and Me 12 x 12 Background and also a couple of sheets from the main 12 x 12 paper collection which is not in stock however I also used lots of imagery from the 8 x 8 papers meaning if you bought both the background and the 8 x 8 decorative paper and also the 8 x8 backgrounds set you would have more than enough paper to complete the album. I cut strips off the 12 x 12 papers to give me a piece that was 20.5cm high and divided it into 2 and then used the small strips cut in two to give me pieces to use for flaps through the album.
For my embellishments I cast lots of hearts from Hearts mould and a few pieces from the Plates mould using Amazing Casting Resin. Once set these were painted with Allegro Old Ivory and then the details highlighted with gold metallic wax. Whilst I had the wax out I edged 4 x 6" pieces of watercolour card which were then used as photomats in the album.
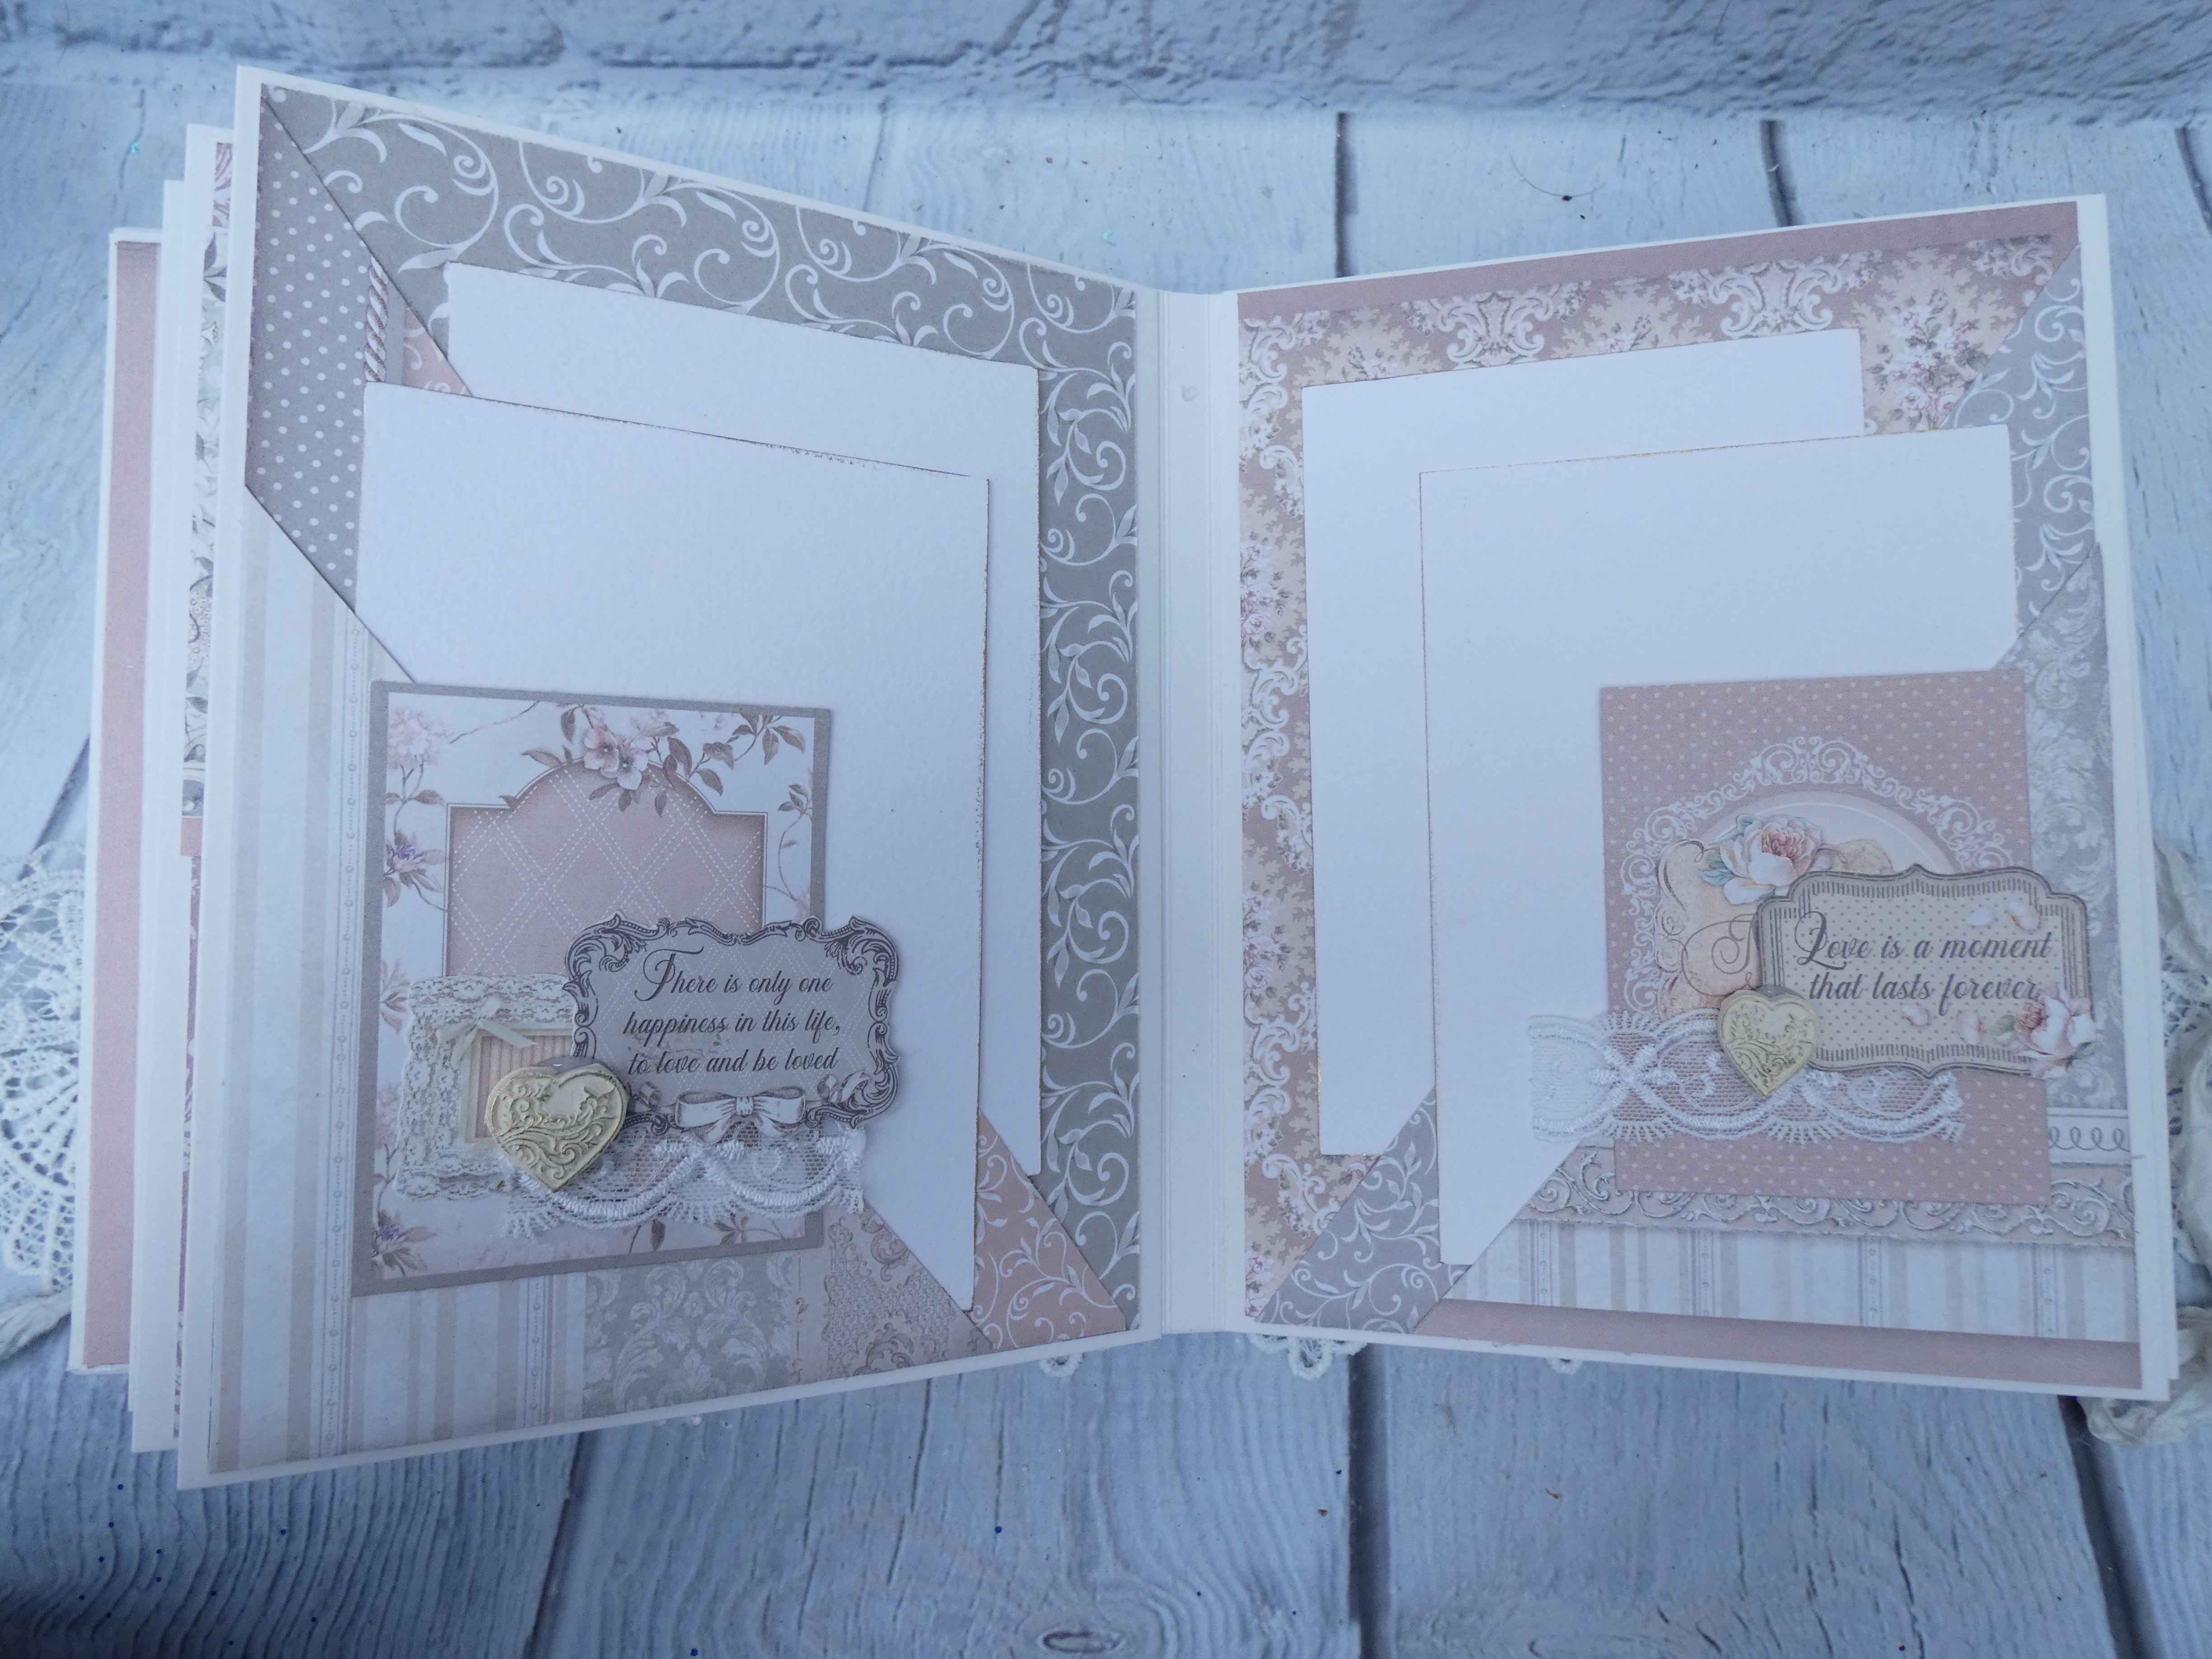
The inside front cover has two pockets one created with a strip of paper 10 cm by 20.5cm and the other 7cm by 20.5cm adhered on three sides. I then used cut out elements from the papers a piece of lace and a resin heart as an embellishment before tucking photomats into each pocket.

The first page has two flaps, one opening to the right and the other to the left. The smaller strips cut when making the base pieces were scored at 1" and the flap created tucked behind the main piece of paper before it was adhered to the base of the album page. more fussy cut elements, lace and another resin piece were then added. A photomat was placed behind the flaps.

Page 2 has two corner pockets cut from background papers - I took an 8" piece of paper and then cut from one cover to 14.5cm along the bottom edge to give the first pocket. The remaining piece was then trimmed to give a pocket with a 14.5cm side and a 12cm side. These were adhered on two sides and then an embellishment cluster added as shown.

Page 3 has a top opening flap created using one of the square toppers from the big paper pad - to recreate it from the papers instock you will need to cut a piece of paper 14cm square and score at 1" from the top and then adhere the flap behind the base paper. On top of the flap I created an embellishment cluster and finally I adhered a photomat in place beneath the flap.
Pages 4 and and 5 are created in a similar way to page 1.

Pages 6 and 7 are triangular pocket pages like page 2.
Pages 8 and 9 are made the same way as page 1.

Pages 10 and 11 are made the same way as page 2.

Pages 12 is a top pocket page like page 3 and the inside back cover made the same way as the inside front cover.

To decorate the outside of the album I cut panels of paper slightly smaller than the album and adhered them in place. I then wrapped a piece of ribbon around the center of the album securing it as I added the decorative elements. For the front cover I added some paper panels the big hear some gauze, wooden shapes, paper elements and then the title resin before tucking in a ribbon bow.

For the spine I added a resin plaque and some paper images.

And finally on the back I layered some more paper pieces to neatly secure the ribbon in place.

I really do think that this collection is very pretty and so worth having in our crafty arsenal. I hope you like what I have created and it inspires you to create your own memory albums.


0 comments
Thank you for taking the time to leave a comment on our blog, we really appreciate it.
Note: only a member of this blog may post a comment.