
Garden House by Gill Humphrey
11:00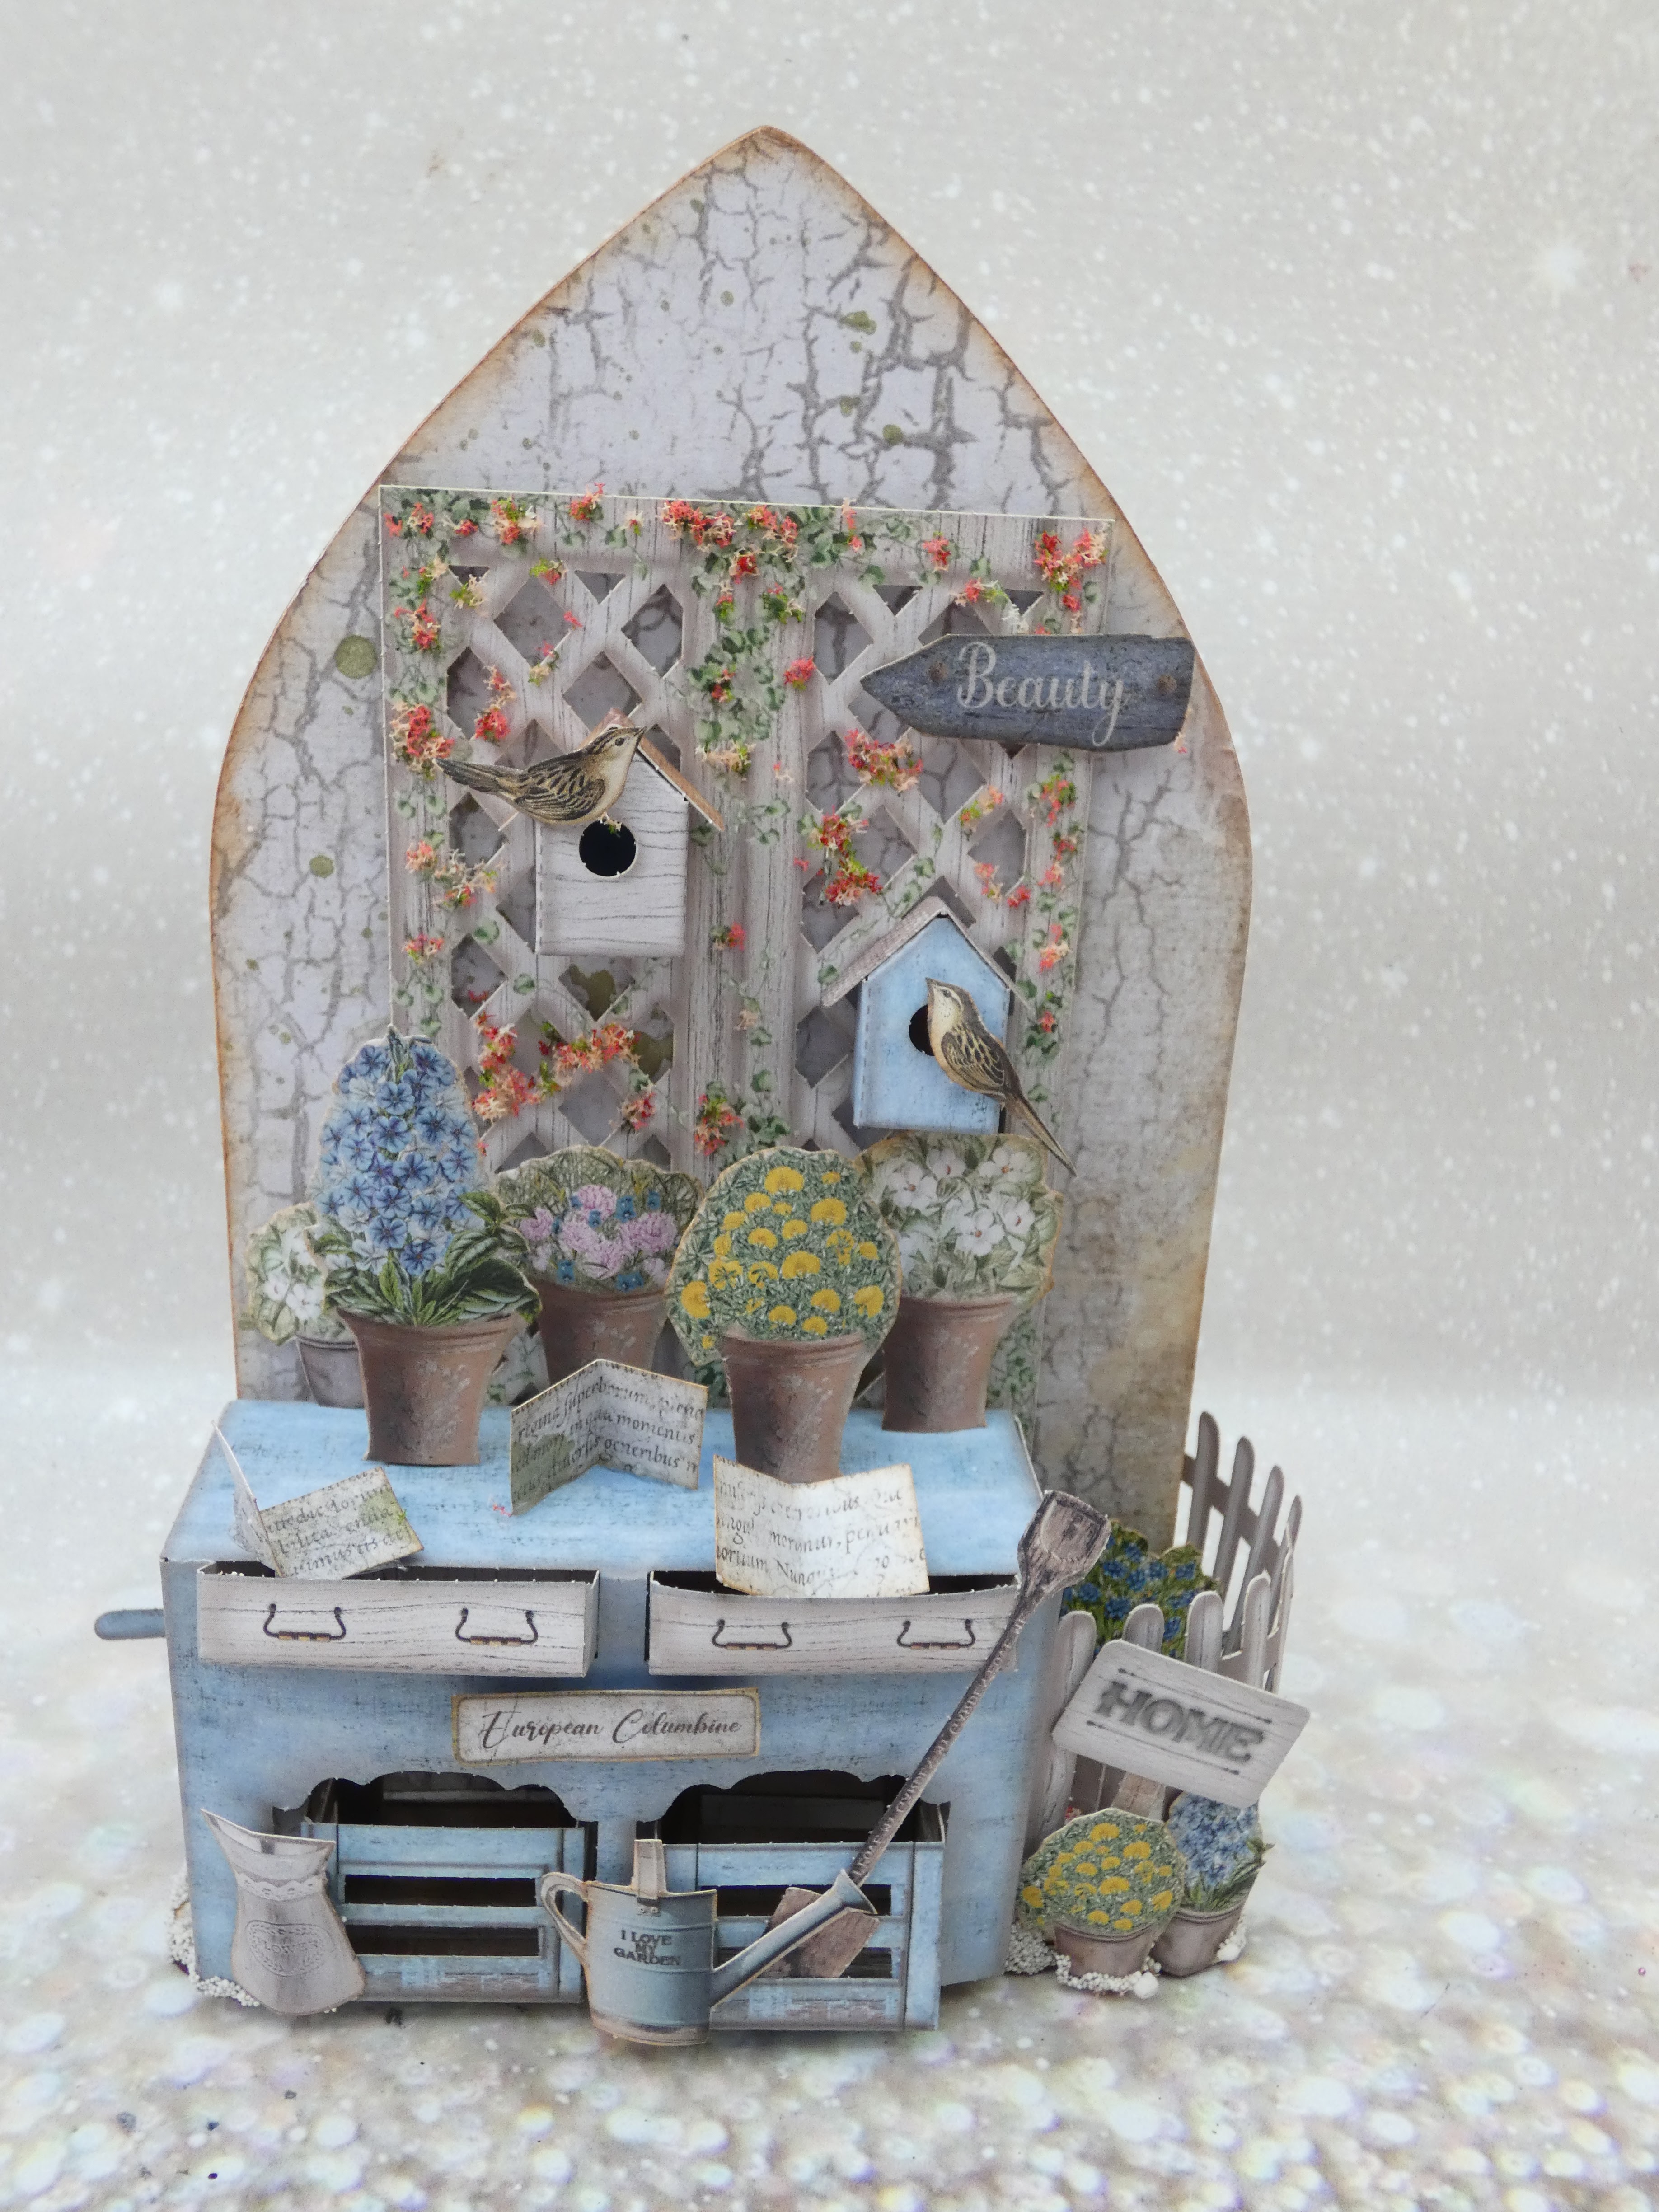
Stamperia have made a few kits now of 3D construction elements and I have seen almost no inspirations although I have done a custom pop up box with the Lady Vagabond set so for my blog today I have focused on the Garden House set along with papers from the 12 x 12, 8 x 8 and 6 x 6 collection capitalising on the different image sizes in the separate pads of paper.

The base of my project is an Arch Upright which I covered with papers from the 12 x 12 paper pad adhering them in place with multi purpose glue and then sanding back the edges to give a neat finish before edging with a little Vintage Photo Distress Oxide.
I then assembled the pieces of furniture from the kit. To find out how to do this please visit https://stamperia-e-academy.teachable.com/p/3dpaperkit-gardenhouse which is a free Stamperia tutorial. Some of the pieces fit nicely on the base and others do not so pick and choose the elements that will work for you - I was not worried about the bench over hanging or the pot stand slightly protruding but the rocking chair and table really did not work at all. Do not be afraid to alter the elements - the trellis on the back had tabs so you can use it to make a free standing feature however by chopping these off it sits nicely on foam pads on the back of the Upright providing a lovely base on which to build the composition.

I took floral pots from the papers and adhered them in place on the bench using dimensional glue or a folded piece of paper (like you use for pop up additions) to support the front pots. The "books" are simply pieces of card with text from the collection folded and adhered partly into the draws and onto the surface. The bird houses are in the collection and the birds were fussy cut from the smaller paper pad and then shaped before adhering with dimensional glue.

The fence being made of thick card remains pliable and so I was able to gently mould it to the base edge of the Upright. To fill in the base and add some texture whilst adding strength to the pieces that protrude and the area that the fence is glue to I added some glue and the sprinkled on a mixture of art stones. I also added some flower soft to the trellis for additional detail but you could punch tiny flowers from the papers and add them instead.

The beauty of this make is that it is truly viewable from all sides with something different depending on the angle you view it from.

I really think this would make a lovely gift for a garden lover - perhaps for Father's Day. Please do have a play with the kit and see what you can come up with.

PS I have a plan for the rocking chair and table so keep an eye out for another project.


1 comments
Fantastic, Love all the elements and how you have created it.
ReplyDeleteThank you for taking the time to leave a comment on our blog, we really appreciate it.
Note: only a member of this blog may post a comment.