
Under The Cover of Night by Gill Humphrey
11:00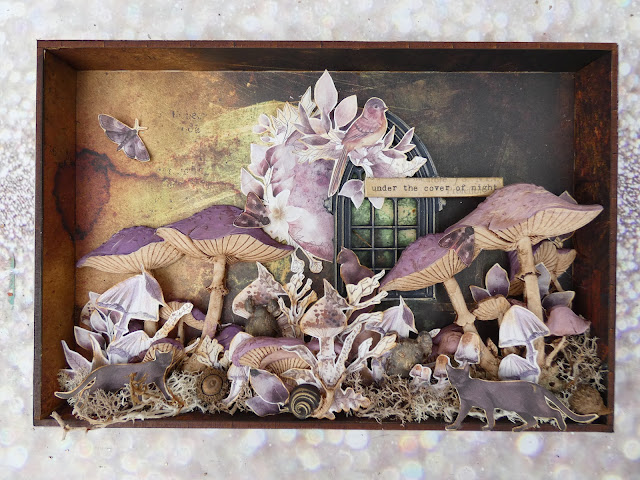
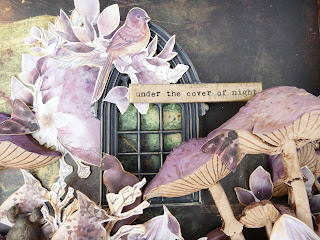
The That's Crafty! shop has an amazing collection of products - just perfect for mixing your brands up. The secret to making this work is to pick those that sit within one theme - here mushrooms and a limited colour palette taken from what ever paper collection you might be using. For this project I chose purples, creams and browns to work with from the Ominous Marshes paper collection that I wanted to work with as this has lots of toadstool/mushroom imagery just perfect for working with the Forest Floor mould.
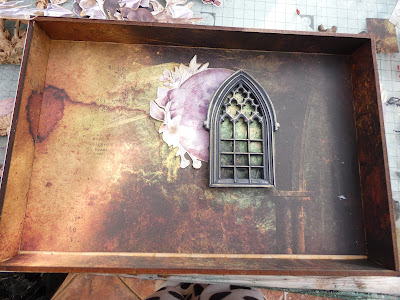
For the base of my project I constructed one of the large shadow box using multipurpose glue and then cut papers from the 12 x 12 papers to fit the inside and outside of the box edging them with Vintage Photo Distress Oxide before adhering them in place.
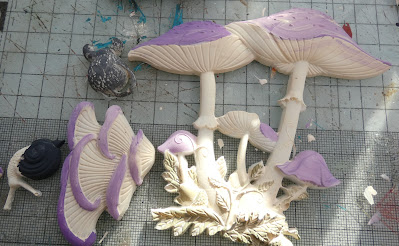
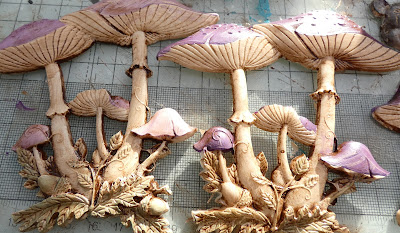
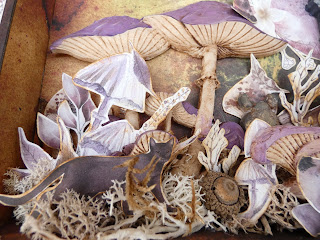
I cast a number of pieces from the Forest Floor mould using Amazing Casting Resin and also a window from the Sleeping Beauty Doors and Windows mould. Once the resin was cured I then set about painting the moulds to co-ordinate with my project. I started by painting the window mould with Anthracite paint and added highlights to the dried paint with gold wax. The snail and mice were decorated in the same way.

To decorate the mushrooms I added Old Ivory as shown below and for the mushroom caps I layered Bishop Purple with the Old Ivory to get some colour variation. Once these layers had dried I covered the mushroom pieces with Vintage Antiquing Paste ensuring every nook and cranky was covered. It helps if you dilute the paste with a solvent such as turps. I then wiped back the surface leaving the brown in the crevices so that all of the wonderful details in the mould are bought out. The paste also has the added benefit of covering the pastel purples and ivory into a more vintage hue just perfect for the papers.
Once all of the pieces were ready I chose images from the Ominous Marshes Extras Set and fussy cut them out. To cover any white edges I then used vintage photo distress ink around each piece.
Then all that was needed was to layer the pieces into the frame, add some moss and the caps from some acorns and a title which is a chipboard piece from quotes set.
I do hope you have enjoyed reading and learning how I achieved my shadow box and if you make something inspired by it please don't forget to share it to the That's Crafty! Creatives Facebook page.


0 comments
Thank you for taking the time to leave a comment on our blog, we really appreciate it.
Note: only a member of this blog may post a comment.