
Steampunk Flight by Gill Humphrey
11:00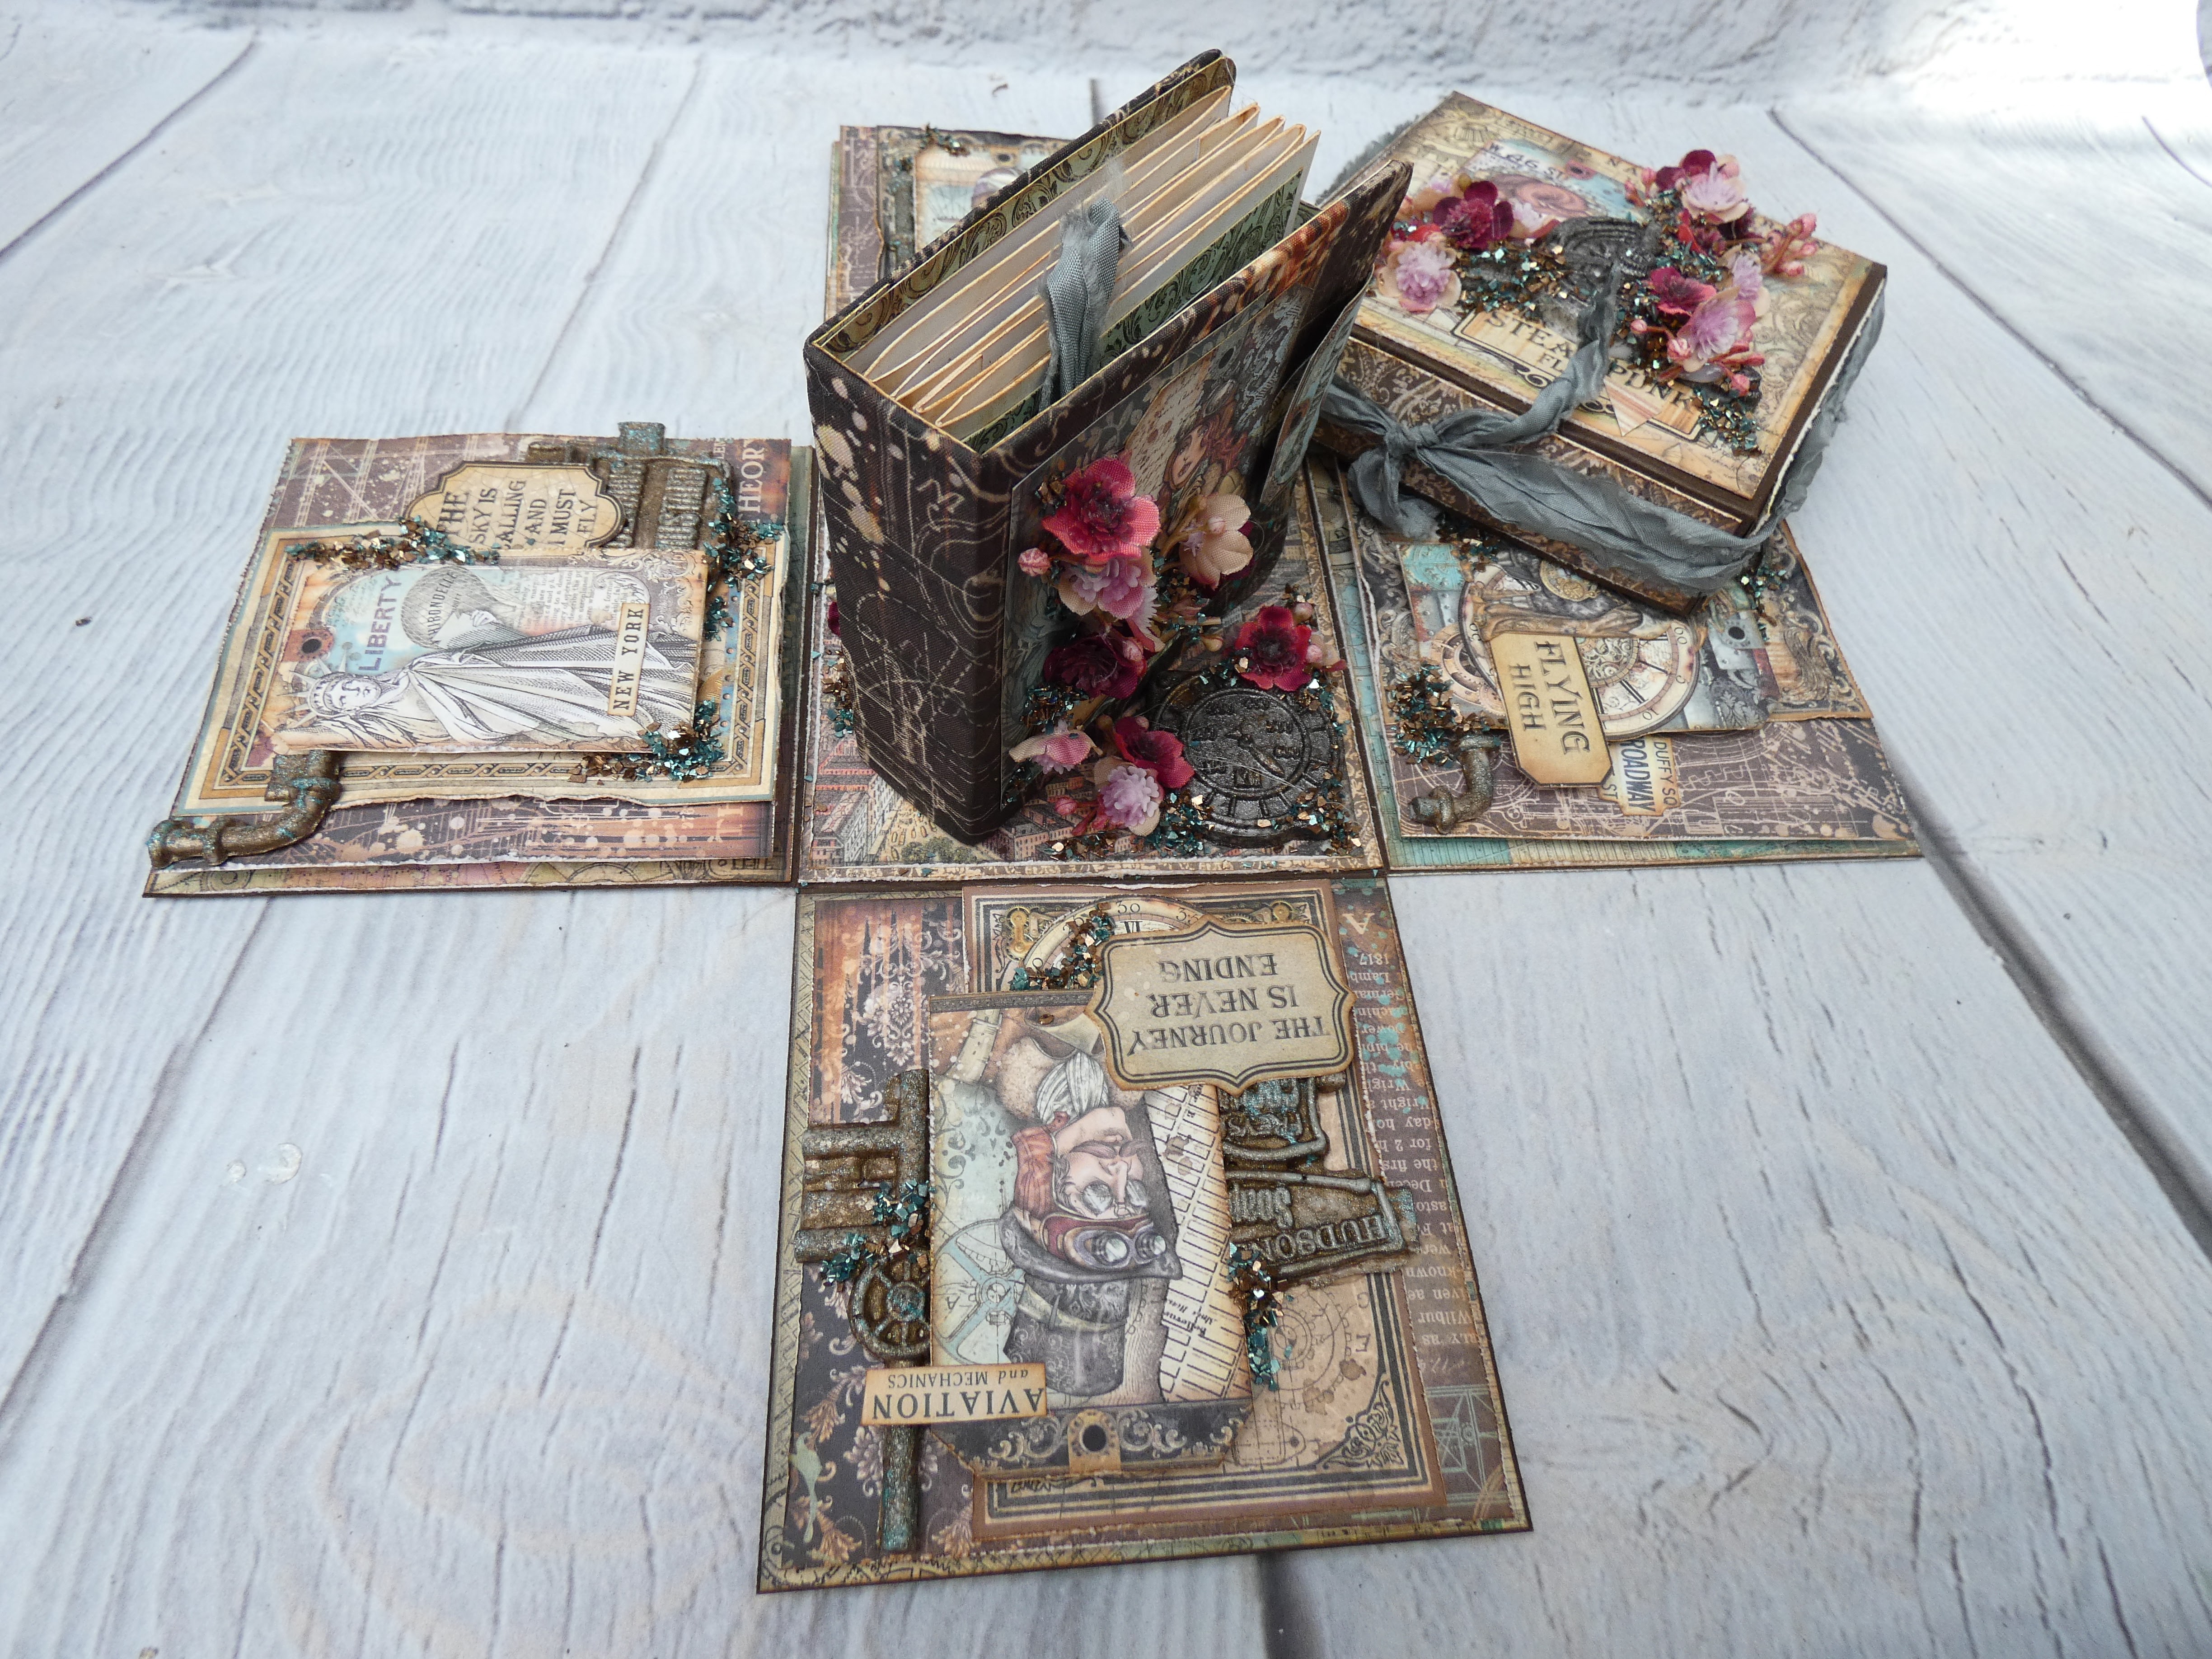
For my blog post this week I have created an exploding box which holds a minialbum and a little card to write your message on. My box has been created from scratch and the papers I chose to work with are Sir Vagabond Aviator 8x 8 and the co-ordinating 8x 8 background paper packs. All papers were distressed and inked with Vintage Photo Distress Oxide.
To make the base for the project I used 2 sheets of 12 x 12 card stock in a dark brown. For the base score at 4" along all four sides then cut out the corner panels.

For the lid cut a square that is 61/8" and then score at 1" along all sides. Cut into the corners and trim as shown in the photograph below:

Next choose the papers you are going to use to decorate the box and lay them out until you are happy with the composition.

I have chosen to add some moulds to my make. To make these I chose to work with the Amazing Casting Resin and the following moulds: Aviator Aircraft and New York Building. For the thinner impression mould if you are careful you can cast just parts of the mould so you don't need to waste resin and if you overpour slightly you can demould when the resin is still pliable and trim off any excess with a good pair of scissors. Once I had my pieces I then coloured the pieces from the impression mould with Truffle and Blue Deluxe Pastes but the Emerald that is in stock could just as easily be used as you only need a little. The propeller and dials from the thicker mould were coloured with Antracite Deluxe Paste.

Once the component pieces were ready I then layered the papers and resin pieces. The first layer of paper was cut at 10cm (just slightly smaller than the 4" base) and adhered straight onto the panel. The second layer was cut at 9.5cm and mounted on scrap cardboard to build dimension before the remaining elements were added on top. Where paper elements were laid overlapping resin pieces they were supported with more scrap cardboard pieces. Finally I added a mix of Burnt Umber and Turquoise Glamour Sparkles but the Blue would work just as well.


I then decorated the box lid with paper panels - for the top inside and outside I cut these at 4" and for the side panels at 7/8" wide by 4" long. On the outside I added some paper elements before adding the propeller and then flowers from my stash before a sprinkle of the same Glamour Sparkles.

For the inside lid I cut a belly band and then created a panel 31/2" tall by 7" long scored in half to create a little card.


Before adding anything more than the base piece of paper to the central panel of the inside box I created my album. To do this I cut a strip of blank Craftyboard 31/2" wide along the short length of the panel and then scored at 31/2" from both ends - when scoring I used by blade in my cutter as this does NOT go through the whole thickness of the board but allows the surface to be broken enough for the panels to fold nicely and maintain the integrity of the whole piece. To cover the outside of the Craftyboard I selected one of the fabrics from Sir Vagabond Aviator collection, cut it so it would cover the base and go round to the inside adhering it in place with glue. For the closure of the mini album I used one of the tags from the collection and two tiny magnets covered with circles punched out form the paper so they are hidden when the book is open.

The inside of the cover was covered with patterned papers which neaten the edges. Inside the album is a concertina fold. To make this I cut 3 strips of cardstock at 31/4 inches wide scoring at 3/1/4, 61/2 and 93/4 and then cut two of the strips at 10/1/4 so I had flaps to adhere the pieces together. The 3rd strip does not need a flap so was cut at 93/4. Once the long strip was together the edges were inked and 3" panels of decorative papers added - on some I created vertical pockets with 1/1/2" strips of paper and others horizontal pockets. Before adhering the concertina pages in place on the back cover I added a piece of ribbon so that the concertina pages could be held closed.


Having created the album I could then stand this in place and decorate the rest of the bottom of the box with the remaining resin elements, flowers and Glamour Sparkles.

I hope you have enjoyed reading this how too and wish you all a safe and enjoyable week.


1 comments
Beautiful
ReplyDeleteThank you for taking the time to leave a comment on our blog, we really appreciate it.
Note: only a member of this blog may post a comment.