A little Easter (Ostara) Shrine by Rachel Harries
11:00
I've used resin with the Prima Marketing Flower Queen mould, this was a first time for me and I have to say it was easier than I imagined, you could just as easily use air dry clay if you prefer.
The first thing I do with the face is to add a coat of matt finish acrylic I've used a Jane Davenport one that I particularly like as a base. The reason we are adding a matt acrylic base is so we can use more water based products easily on top as this will give us a slight key and also make it easier to remove any mistakes.
I used a Distress Marker in Spun Sugar to colour the lips and cheeks, I also added a little Spun Sugar to the end of the nose and the eye sockets, the eyes I coloured with some Ayeeda mist I had left on my mat from a previous project and when they were dry I used a water proof fine line pen to create pupils and also to follow the line of the eyelids to create the look of lashes. I used a Distress marker in Walnut Stain to shade the eyebrows, I didn't draw the line straight across rather I drew the tiniest line and then used a thin brush to drag it out, I used some metallic paints for her hair, crown, dress and hair ribbons.
Once I was happy with my face I pop it to one side and start work preparing the various elements of the project, firstly I took the flowers that were in the same mould as the fairy princess and painted them with some metallic paints.
I knocked the vividness of the paint a little with some opal wax.
I then took the grey board cogs and some more of me resin experiment, this time from the Stars and Moon Mould, I popped them in my spraying box and sprayed firstly with Ayeeda Mist Chalk Sap Green and then with the Ayeeda Mist Patina Bronze, as I am new to the world of resin I wanted to see how the sprays would be on those pieces and I can confirm that its not great coverage on the raw resin, I went on to pop some black gesso on those pieces.
for the next stage with these pieces I used the same technique with wax as I used in my previous post, remembering less is more I started with one colour of wax.
I then I use a second colour of wax again with the less is more approach.
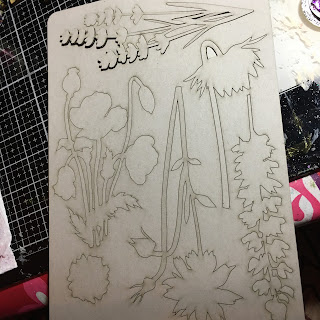
Next I have used one piece from the large grey board Wildflowers and a few pieces from the small grey board Wildflowers, I use metallic paints to paint these.
Next its onto the shrine itself and I will issue a note of warning its worth just piecing this together without the glue so you know which way is which when you are decorating. Once you have ascertained which way everything goes you need to pop the unassembled parts flat on your mat, I cover any assembly holes or tabs with a little piece of washiest tape to keep the clear of any paint that will make it difficult to put together later.
I then added a coat of very bright sparks paint from Finnabair in the colour "Fairy Wings".
I put the pieces fairly straight and close together and used a stencil over the top with some That's Crafty! Black Texture Paste.
I went through the same process with the front of the shrine, as you can see I made the mistake of not checking to see if the back of my stencil was clean before using it again but its okay as this is just going to add to the texture of the finished piece.
It's important to check the edges of all the pieces and just remove any excess texture paste as this will make it hard to assemble later. Next I pop the front of the shrine and the back plate in my spray box and give them a spray with Ayeeda Mist in Chalk Woodbine and then give it a little blast with a heat gun to dry it before dry brushing a little That's Crafty! Metallic Patina paint.
Then it assembly time, I start with the back panel and come up with something that is pleasing to me, to pop the face on I raise it with a couple of pieces of cardboard I've cut from some packaging, I use this method on all kinds of paper craft projects as I find it much more effective than foam tape.
I then work on the front of the shrine, it can be useful to use some of the small bits of greyboard that popped out from the elements used to add height where needed to help things balance.
Once the glue is dry I put all the pieces together and as a final touch I go over some of the elements with a touch more opal wax just to knock back the vividness a little more.
Products used in this project:


2 comments
A really beautiful shrine Rachel with such a lot of wonderful detail. A fabulous tutorial too and so well explained.
ReplyDeleteFliss xx
Thank you so much ❤️❤️❤️
ReplyDeleteThank you for taking the time to leave a comment on our blog, we really appreciate it.
Note: only a member of this blog may post a comment.