Well, I do think the title of this piece is very apt for the weather over the last few weeks and hope that by combining with flowers it will remind us that spring is not so very far away. This piece is a version of the shadow box that I created for my first shows on The Craft Store with some additions and a slightly different floral arrangement. I hope that the two pieces will show you how easy it is to change up a project just by raiding your stash for embellishments that would not necessarily come from a craft store.
I have used a set of shadow boxes for the base of my piece (if you might make the project I am doing next week as well as this or just love the idea of the set then you would do well to consider buying theset of two that is also available on the website). Firstly I constructed my large outer and the larger of the two extra boxes using multi purpose glue. I added a layer of stencilling using Abstract Chevrons stencil and Fine Texture Paste. Once the paste had dried I painted both of the boxes with a mixture of Teal and Lime paintwhich was then followed by a layer of dry brushed white gesso.
To create the background paper I used smooth white cardstock and spritzed it with Bluebell and Grass Green Flat Matte Sprays adding in someGold Lustre Spray before throwing some rock salt over the paper and letting it dry completely. The rock salt absorbs the liquid pulling the colour as it does so giving a beautifully textured background once the salt has been rubbed off. The paper was then cut to size and adhered inside the larger shadow box.
To create the flowers I filled a baking tray with really cheap shaving foam and then dropped in splashes of matte sprays in Saffron,Tomato, Rose and a really small amount of Bluebell then swirled them using a cocktail stick before pulling prints onto smooth card stock. Push the card stock onto the surface of the shaving foam then make sure it has all been in contact before lifting off and wiping off with the edge of a ruler the excess foam to reveal the print. You will be able to make lots of prints from one lot of shaving foam adding in my colour as you want to so it is worth making a batch of these for your stash.
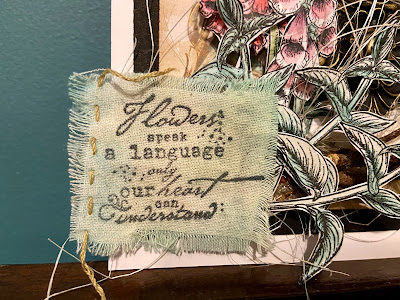
Once the paper was dry I wiped it over with an anti-static pad before stamping lots of elements from Melina's Florals Set 1 using Versafine Clair Nocturne ink. Once the ink was dry I added green colour in a mix of shades to the leaves and then fussy cut everything out. I also stamped the sentiment from Melinas Florals Set 2 onto a scrap of the card I created for the background, cut it out close to the sentiment and edges with black ink to give it more definition.
I placed the sentiment as shown adding in sisal and faux greenery around the smaller shadow box which is deliberately set with the flat side facing outwards rather than as a shadow box itself. I then shaped with my hands and a ball tool the fussy cut leaves and floral elements before adhering them in place.
Finally I added lots of berries from my stash for another textural element.
My original piece has the sentiment split into pieces and some stamping added to the background papers and onto the shadow box using the dandelion from Melinas's Florals Set 2. It also lacks both the faux greenery and the berries and so gives an alternative option if you do not have these pieces available to hand. Though I have to say I rather like the addition of the extra greenery and berries in the second piece I created the addition of the stamping to the first one helps to fill out the box and adds the extra layer of detail the piece needs.
Happy New Year, here's to a wonderfully creative 2022! It's great to be getting back to my weekly blog post, I really enjoy the process of coming up with a project to share. This weeks project starts by using Amazing Casting Resin along with the beautiful frame from the Finnabair Grungy Frames mould once my cast is cured I give it a coat of Black Gesso.
I then took a brush and a little water to start blending the stamped ink in the corner images I also added a tiny bit of salvaged patina with my brush.
I then used the text stamp from Katzelkraft Anthropomorphes Stamps with Distress Ink in Walnut Stain, Vintage photo would also work, I used first, second and third generation stamps on here and then also used my Blending Tool to blend the same ink around the edges of my background I then used a Spray Bottle to add a few drops of water to activate the ink and get the most from its properties, I then blotted the background with a piece of kitchen towel.
To colour the images I used the rather fabulous That's Crafty! Flat Matt Ink Spray in; Tomato, Rose, Orange,Aqua, Sage and violet. I just pop a small amount on my gladdest mat and use that as my palette. I then cut out the elements.
I added some Pentart Gold Wax to my frame and I cut a piece of black card stock to use as a matt for my background.
On a small piece of calico using the versafine Clair in Nocturn I stamped the text from Katzelkraft Flowers and Nature Stamps to which I added a little of the Salvaged Patina Distress Oxide and a little hand sewing. I then put my arrangement together with the inclusion of a few twigs and my favourite Sisal.
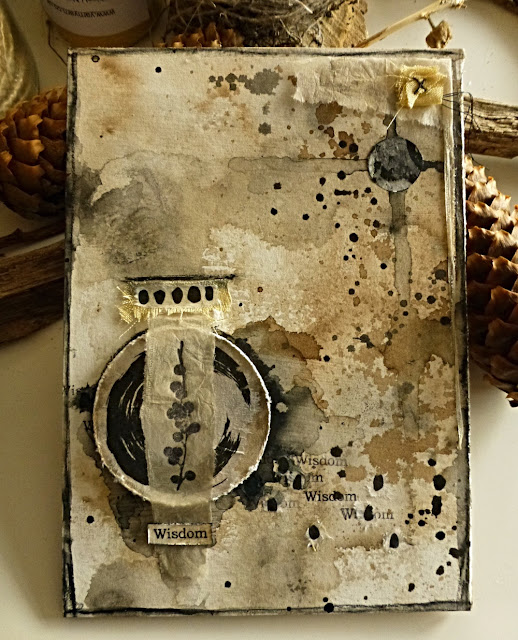
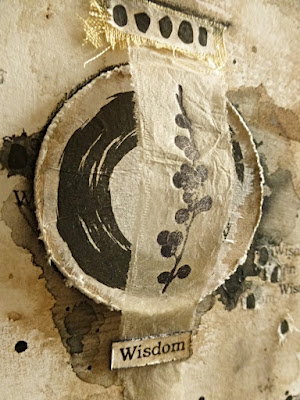
Wisdom - as the end of the year is rapidly approaching it got me to thinking about what, if anything, is learnt in the 12 months of a calendar year. Does each year bring new wisdom that we build upon or is wisdom ephemeral, that feeling of gaining wisdom only for it to suddenly disappear from our grasp. This was in my thought as I set about working on this project.
Although I used a MDF panel as the surface, this would work as a journal page which is an idea I might work on into the New Year.
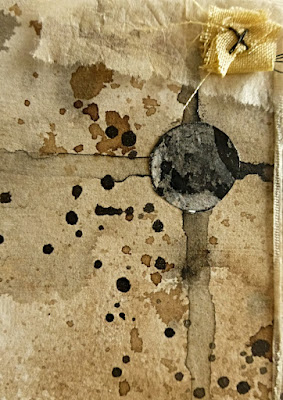
After cutting/tearing watercolour paper to size of substrate, it was misted with water, just lightly at this stage before applying walnut ink followed by the Pearl Inks, leaving flat to air dry. Once dry, Black Pearl Ink was splattered. This was then adhered to the MDF surface.
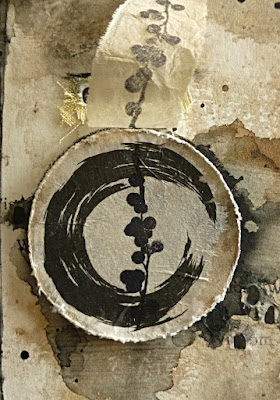
For the focal, a piece of painted, scrap cardstock was layered to a Craftyboard circle and to this, adhering one of the Dina Wakley Elements circles.
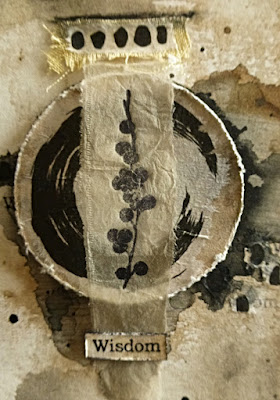
Selecting a stamp from the Katzelkraft set, it was first stamped onto the Craftyboard circle element and then again onto scrap piece of found paper.
Taking the found piece of paper with the stamped image, the top end layering scrap piece of fabric with a piece from the Tissue Paper. At the other end, the word Wisdom this time stamped onto scrap of painted cardstock and layered to the found paper.
Just before adhering the Craftyboard circle to the panel, the word Wisdom was repeatedly stamped a few times then to this, tearing some of the small marks from another sheet from the Elements Tissue Paper, adding a sprinkle of them.
Finally, a small circle was cut using the That's Crafty! A4 Circles Stencil - it was a piece of deli paper used as underpaper, catching Pearl Inks.
I just added a scrap of this and that with a primitive cross-stitch to bring detail to the upper corner and throughout, a black watersoluble pencil was used to create depth and definition.
For those who celebrate Christmas, I wish you the happiest of times and just to pause to thank you for your visits to the posts and for your support for my stamp designs. Also a shout-out to Laura and Graham, to all the D.T. at That's Crafty and Jo Channon.
Established in 2005, we are a craft retailer based in Essex in the UK. We sell a wide range of mixed media and papercraft supplies, as well as our own range of stamps, stencils paint, mediums and substrates.