
Christmas Mixed Media Mayhem by Gill Humphrey
11:00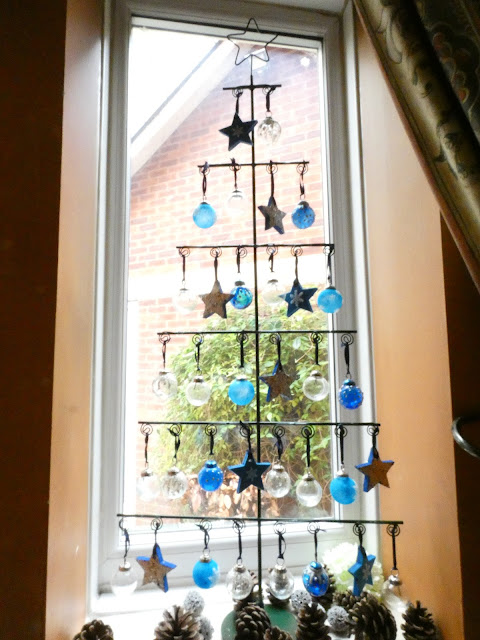
We all have our own Christmas traditions - some will bring out treasures collected over the years and others will choose new each year or a specific colour theme but what ever your preferred option is your craft stash will hold things that can be used to customise plain baubles so why not grab a pack of plain baubles and have some crafty fun. I have chosen a pack of small clear glass baubles plus some wooden stars but plain coloured baubles would work equally well depending on your colour choices.

The first of my decorations was creating by painting wooden star shapes with Vivid Blue chalky paint as this gives good coverage without the need to gesso first. Once the paint had dried I added a coat of Tacky Glue and then sprinkled a mix of Coarse Silver Eco Glitter and Confetti Rose Gold Eco Glitter.
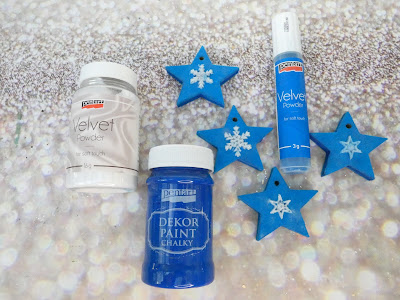
For the second set of stars the wood shapes I created star shapes by made by filling a Snowflake Impression mould with Snow Crystal Paste to do this I filled the cavities and left almost nothing on the flat areas. Once the paste had dried over night I then carefully peeled the snowflakes out from the mould - this requires patience but is totally do able. The wood shapes were covered with Vivid Blue paint and when that was dry with Tacky Glue. The snowflake images were then placed on the stars followed by the Blue Velvet Powder and a little White Velvet Powder - the powder needs to be rubbed into the surface. The colours of the Velvet Powders are more vivid if you pre colour the base with a similar colour to the Velvet Powder.
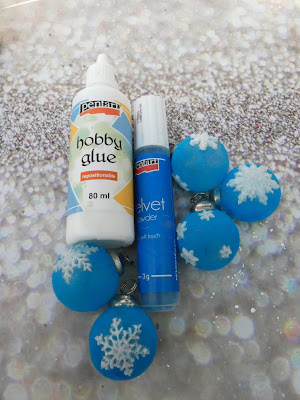
To change my clear glass baubles I coated the surface with a thin layer of Repositional Glue and once it was tacky added the snow flakes and then velvet powders - the clear bauble base makes the end result semi translucent when the baubles are hung against a clear backdrop such as a window.

For this variation I coloured the baubles with different shades of blue Alochol Ink and then added details with a Contour Liner Pen in silver but the Pearl which is available on the website would look just as pretty.

For my final variation I used the 3D Glue Pen to add dots to represent show flakes and also lines around the top with drops going down to resemble icicles before sprinkling with the Eco Glitters used earlier.
I do hope you have liked this tutorial and that you have fun creating some custom decorations. All of the products are safe to use so why not have a play session with your children or grandchildren as I think these would make ideal mini makes for young children or products to sell at school craft fayres.


0 comments
Thank you for taking the time to leave a comment on our blog, we really appreciate it.
Note: only a member of this blog may post a comment.