
Ocean Breeze - A Pop Up Box Card by Gill Humphrey
11:00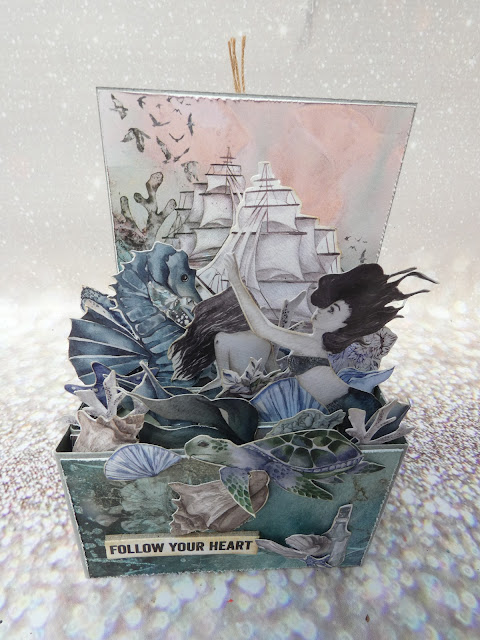
I have posted a number of customised pop up box cards over the last few weeks and several ladies have asked for a tutorial and so this post was born. It is perfectly possible to buy kits for this style of card but they are of limited size and typically have flaps on each side which for me always end up poking out and that irritates me intensely so I choose to make my own that way I can customise the size to fit the ements I whish to show case. The width, height and depth of the "box" can be customised thought it is worth thinking about the overall size when the card is flattened for posting to make sure it will fit in a standard envelope unless of course you are happy to make your own envelope.
For my make I have chosen to use Ocean Deep collection of papers and co-ordinating extras using papers from the 8 x 8, 12 x 12 and extras set. It does help if you have double sided papers as you will see both sides of your cut out elements depending on the angle the box is viewed from. The new extras packs from Craft O'Clock and the Collectables pads from Stamperia both available on the That's Crafty Website make this easier. I start my process by cutting out the elements that I want to use and then chossing the one that is the widest to judge how wide I want my box to be. For this make the element that is the widest is the mermaid which I tilted so she is semi recumbent.
Having determined the width of my make I then decide on the depth of the box - my width was 4" and I chose to create sides that were 2 1/2". I decided that I wanted the height of the comparment to be 2 1/2" so cut a strip of good quality white card measuring 21/2" wide by 10" long and then scored this at 1/2", 3", 7" and 9 1/2" along the long side and then used my bone folder to ensure that the fold lines were crisp.
The next step in my process is to determine the over all height of the box by measuring the tallest fussy cut element - in this case the boat. The boat will sit on the top of the first strip so the overall height of the back panel needs to be 2 1/2" + height of the boat and extra if you wish - I cut a strip of card 4" wide (the width of the box) and 6" tall.

Finally you need to decide how many panels you wish to put your elements on - I chose 3. I find it easier to make my strips slightly smaller than the box width to accommodate the thickness of card caused by folding but I have seen others make the strips the same as the box width. For my make I cut 1" strips of card 4 7/8" and scored 1/2" in from each end.
You now have all of the pieces required and its time to assemble. I apply glue to the one of the narrow tabs on the box front (2 1/2" strip) and adhere it to the biggest panel and once this is dry repeat this process for the second side.


The smaller 1" strips now need to be added. I add glue to the 1/2" tab at one end and then adhere it to the inside of the box - I find it easiest to add these back to front ensuring that they are evenly spaced along the side. Having secured all of the strips on one side I then apply glue to the opposite end and secure them - folding the box down helps with this. This can be a little fiddly and I use wet glue as it gives me wriggle time.


Your basic box has now been made and then its up to you how you choose to decorate it. I chose to create panels of paper 1/4 samller than the box and then adhered these in place. I also add small strips of paper to the 1" strips that cross the inside of the box as some of this will show depending on how much you put in.
My next step is to have a trial run at where I wish to position my elements - remember you have 9 potential places to glue them (front and back of the 3 cross bands, front and back of the box front and the back panel) and so you will need a fair amount of fussy cut elements. I position my largest elements first and then add in samller ones until I am happy with the appearance. There is no right or wrong way of adding your elements - I use a mixture of multipurpose glue and hot glue.


To add a space for a message I utilise the back of the box - here I added a pocket from the junk journal extras pack and then a tag from the 12 x 12 pack.
hope that this step by step explains my thought process and look forward to seeing your makes on the That's Crafty! Creatives page.


0 comments
Thank you for taking the time to leave a comment on our blog, we really appreciate it.
Note: only a member of this blog may post a comment.