
A Little Bit Grungy! by Helen Chilton
11:00I've used some of Amanda's papers and some of the new Craftyboard for this post.

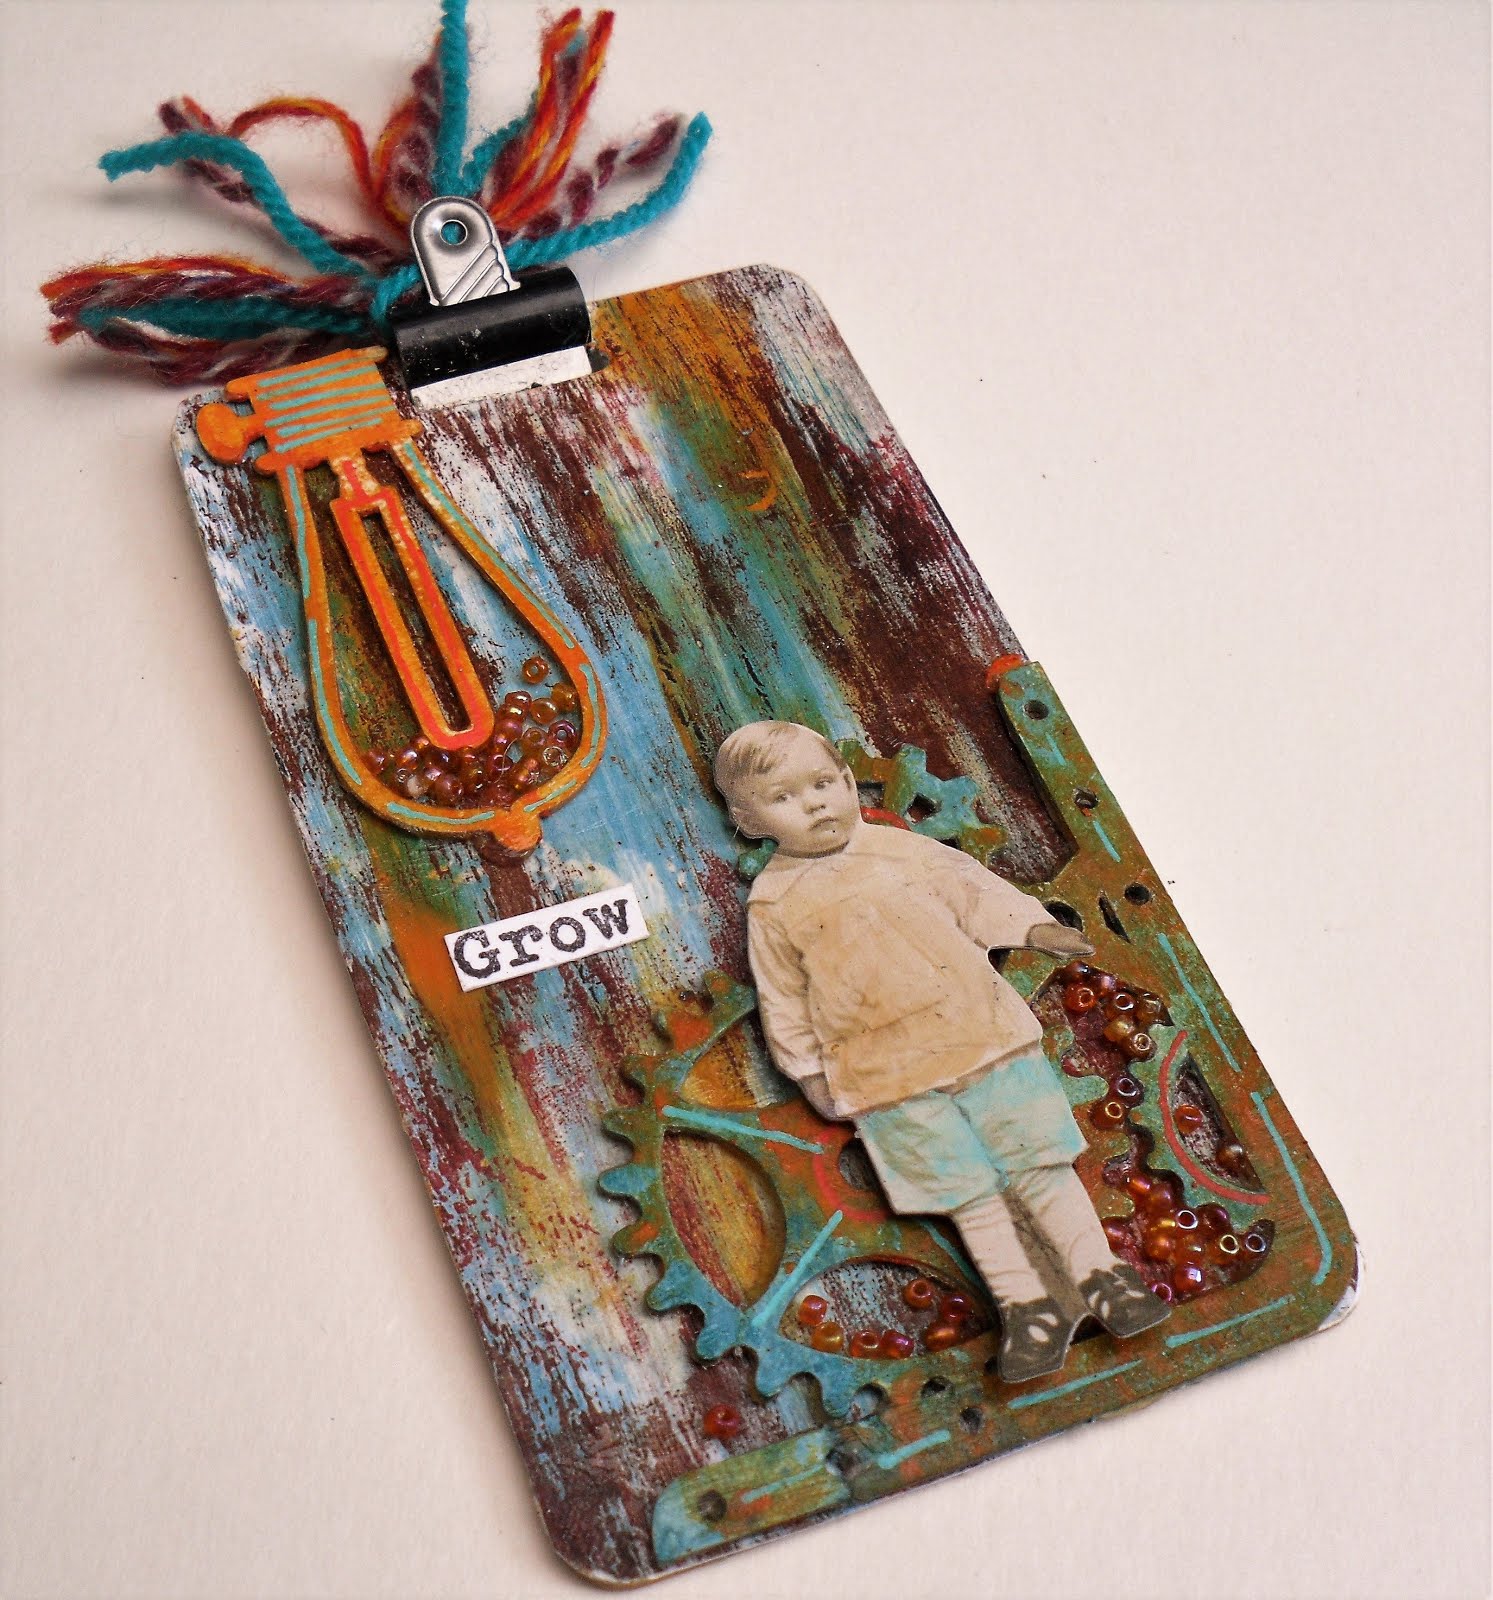
When you've got papers like these, half your job's done for you! I chose a tag, cogs and a lightbulb from the Craftyboard elements.

Just cover the tag. To cut out the hole at the top I used a hole punch for the curved bits and a knife.

I wanted a touch of orange on my background so just finger painted it onto the paper.

The lightbulb and cogs were painted in Teal, Ocean and Orange. I tend to paint all over and then punch out the holey bits.

I added a few details with my trusty Posca pens.

I wanted a bit of a sheen, so stuck them on with a coat of wax. While still wet, I added a few beads.

The little boy's clothes have been tinted very slightly in blue and orange just to tone it in.

Supplies:
That's Crafty! Clear Stamp Set - Lots of WordsThat's Crafty! A4 Paper Pack - Perfect Backgrounds Set 2
That's Crafty! Acrylic Liquid Wax - 60ml
That's Crafty! Surfaces Craftyboard: Tags, Cogtastic, Lightbulbs
That's Crafty! Multi Surface Paints: Teal, Ocean, Orange
Tim Holtz Paper Dolls Die-Cuts - Vintage
Posca Pens
Seed Beads
I love the detail you get in these Craftyboard embellishments. Any excess round the edges of designs can be punched out or die cut with your own designs.
Hope you've enjoyed this project.
Helen


1 comments
Gorgeous textures and details Helen and love the steampunk vibe.
ReplyDeleteFliss xx
Thank you for taking the time to leave a comment on our blog, we really appreciate it.
Note: only a member of this blog may post a comment.