Sunflower and Art Farm by Gill Humphrey
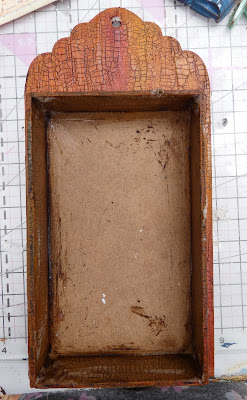
11:00This weeks post features the beautiful products from the Sunflower Art range and a scalloped shaped Shadow Tag. I started by constructing the tag which is really quite easy to do using the Multi Purpose Glue Pen for precise application and then left it for the glue to cure. Next I used a mixture of the Ochre and Red Clay paints in the Rust Effect Paint Set mixing the colours so they blended and gave colour gradiations as I went. My next step was to add the first step of the Classic Crackle to the painted areas and also the bare MDF on the inside walls of the shadow box element. Once step one had dried, I applied step two and let it dry. The details of the cracks were then highlighted by rubbing over and then wiping back Umber Antiquing Gel.
As I was looking for a muted background I decided not to prime with gesso the inside of the shadow box instead I cut down one of the A6 Rice paper backgrounds to size before adhering it in place with Rice Paper Glue. I then used the same glue to seal the surface of the rice paper.
To prepare the elements for the box I cut some images from the 8 x 8 paper pad and then prepared some resin pieces using Amazing Casting Resin and two different moulds - flowers and farm moulds. Once these had cured the resin pieces were primed with white primer paste before painting. The poppy was painted with red paint before distressing with Grey Vintage Patina and then highlighted with gold metallic wax. The poppy leaves were painted using Leaf Green paint before aging in the same way as the poppy.
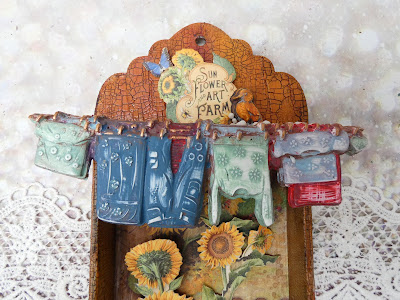
For the geese I added some orange paint to the eyes, beak and feet before using the Vintage Patina Grey to distress and bring out the details in the feathers. The clothes line image was then painted with a mixture of red, leaf green and Aviation Blue paint mixing the red and blue to make the purple shades seen on the piece. Once the paint was touch dry I then distressed it with Rust Vintage Patina before wiping back with a WET baby wipe as this also allowed me to lift off some of the paint giving the very distressed result I was looking for (if you don't want to lift off the colour use a DRY paper towel to lift off the vintage patina). I then added some more wax to the areas of the clothes line and pegs.
Having prepared all of the pieces I then placed them into the frame as shown:
using Matte Heavy Body Gel before adding a sprinkling of 3D Balls securing these with more of the That's Crafty! Multi Purpose Glue.
I hope you like my make this week and if you are inspired by it please tag me in your social media posts.


0 comments
Thank you for taking the time to leave a comment on our blog, we really appreciate it.
Note: only a member of this blog may post a comment.