Merry and Bright by Liz Wheeler
11:00There are lots of different tutorials available for this little album, and here's my favourite.
To make the structure you will need:
2 pieces of card measuring 15 x 9cm, score along the 15cm length of both pieces at 1cm.
2 pieces measuring 14 x 9cm.
6 pieces measuring 12.5 x 7.5cm, score along the 12.5 cm length of 5 of these pieces at 1cm.
I started by gluing the 2 longer pieces together where they had been scored to create the album cover.
I then created my zig zag accordion, starting with the unscored 12.5 x 7.5cm piece at the bottom and glued the 1cm fold of one of the other 12.5 x 7.5xm pieces to the left hand side.
I then glued the 1cm fold of the next piece of 12.5 x 7.5cm piece to the right hand side of that second piece of card, and continued gluing new pieces of card on alternate sides using the 1cm flap until I had a zig zag style accordion.
To decorate my book I used the amazing That's Crafty! Tea Bag Paper. If you have never used it before you will be amazed at the versatility of it. It takes ink so well.
I added a few drops of my Dina Wakley Acrylic Paints in Tangerine, Magenta, Turquoise, Ocean and Lime on a piece of tin foil and spritzed with a little water. I used my brayer to pick up some colour and brayered onto the tea bag paper. I kept spritzing the acrylic with water until the paint was gone and the paper had a great abstract background.
I ended with about 5 A4 sized pieces of various backgrounds to use on my album (because once you start playing with this you can't stop!). I used a ruler to tear the tea bag paper to the right size and glued to my zig zag pages and inside covers with my That's Crafty! Multi Purpose Craft Adhesive. I then glued my accordion to the inside back cover making sure it was flush with the bottom of the inside back page - as this helps the album stand straight when open.
For the outer front and back covers I used the two pieces of 14 x 9cm card and stuck to a piece of the background tea bag paper, cutting around it to leave a border of approx. 2cm, then wrapped around the back of each piece. These were then adhered to the front and back cover of the book with my Multi Purpose Glue.
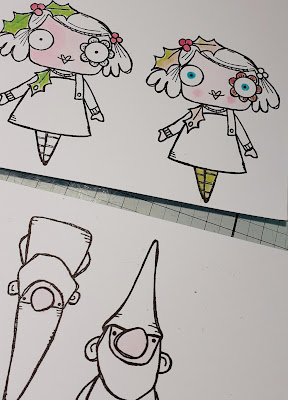
For the characters I stamped the Holly and Gnome characters twice on card and once on a piece of tea bag paper background. I then coloured the stamped images on the white card with the acrylic paint I had used earlier, so it all matched. I then cut out elements of the characters from the tea bag paper and layered onto the characters. The completed characters were then adhered to the pages of the album.
I hope you enjoyed this quirky piece. It's a lovely gift for Christmas, especially filled with lovely photographs x


3 comments
Sweet project ❤️
ReplyDeleteThank you xx
ReplyDeleteCute! TFS
ReplyDeleteThank you for taking the time to leave a comment on our blog, we really appreciate it.
Note: only a member of this blog may post a comment.