
Tis The Season To Be Jolly by Gill Humphrey
11:00
This week I have another piece of tag art but remember it could just as easily be a card front or an album cover so even if you don't like tags the concept is transferable to other projects. However it really would make a very decadent gift tag for a special friend so maybe it will tempt you to try something outside your normal crafting pattern.
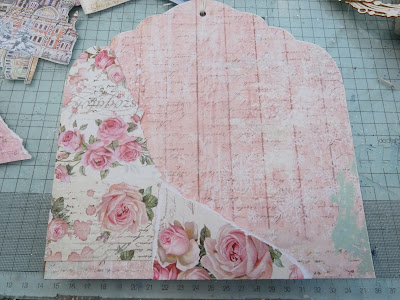
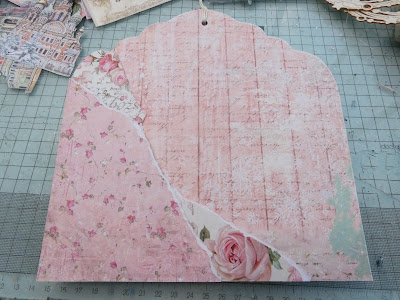
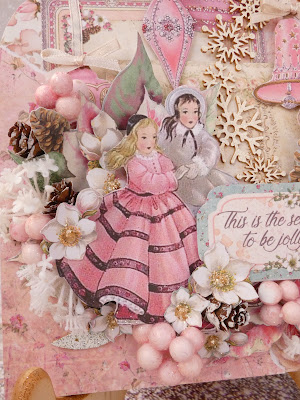
The base of the project is a shaped MDF Tag which I covered with paper from 12 x 12 Pink Christmas. I then added some torn scrap of paper to the left hand side before adding fussy cut elements from the same paper collection to the base, one flat, one on a single layer of cardboard and the third on 2 layers of scrap cardboard.
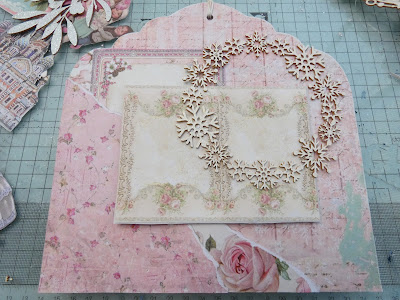
I chose a beautiful snowflake wreath from Christmas Wreaths and Stars Craftyboard set and embossed this with a Textured White embossing powder and then adhered it as shown above. Whilst I had my head gun and Versamark ink pad out I also embossed Mistletoe Craftyboard pieces with a very pale (almost white) embossing powder.
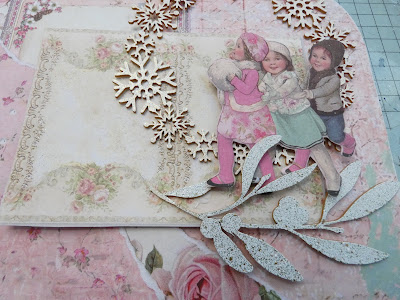
Before adhering the mistletoe pieces in place I added a fussy cut element from Pink Christmas Collectables in place - you can see from the photo that this piece is added over the snowflake wreath and to ensure that it sat comfortably I added some small pieces of scrap cardboard behind parts of the girls image.
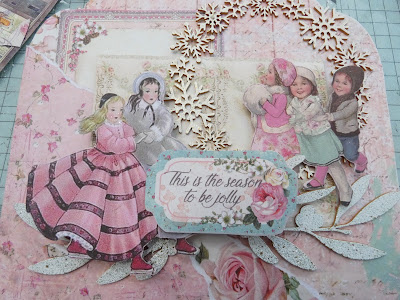
I then added more images as shown above again using scrap cardboard for stability and to build dimension.
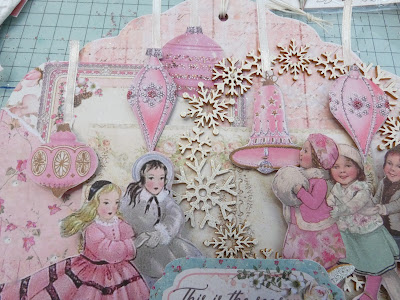
I felt the top of my tag looked empty (I am most definitely a more is more type of girl) and added fussy cut baubles adhering them at different levels on the tag and at different heights before adding thin ribbon as bauble hangers and adding a hand tied bow to the top of each.
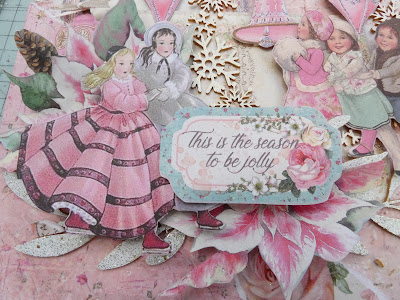
I then tucked in some floral elements from the Collectables pad - there is only one large pink poinsetta but you can make it go further as I have here by cutting it into two pieces and tucking the cut edges under existing elements.
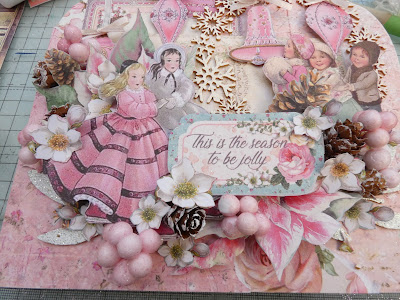
I then added small cones and pink berries from my stash before adding lots of small fussy cut Christmas roses from the papers to my piece, filling the centers of these flowers with Gold Glamour Sparkles.

I do hope you have enjoyed this step by step tutorial showing how I layer my pieces to create lots of interest for the eye on pieces that are really not so large.


1 comments
Very beautiful xx
ReplyDeleteThank you for taking the time to leave a comment on our blog, we really appreciate it.
Note: only a member of this blog may post a comment.