The Palmist by Rachel Harries
11:00I start off by applying gesso to the edges of the Upright, once dry I stick some AB Studio paper on both the back and base plate, once the glue has dried I sand the edges to get a nice finish and ink them a little before sticking these pieces together.
I stamp the figure out twice and cut her out whole once and with the second image I use a 1inch circle punch to push the face and I cut the arm section and the heart from the bodice separately.
I also cut out some butterfly wings from an ABStudio paper.
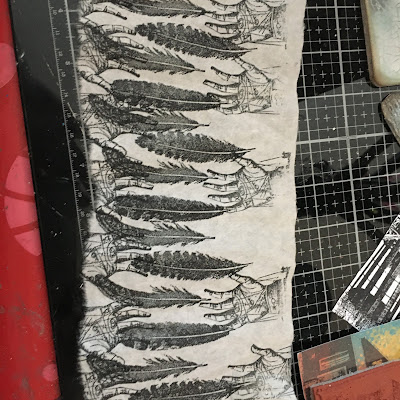
I colour all these elements in a way that is pleasing to me. I tear a piece of the teabag paper that is a similar height to the skirt section of the image and cut it about two to two and a half times the width. I stamp the tea bag paper with images from the stamp set and colour it with my blending tool and inks. I then gather the paper at the top, I use a staple to hold this in place, you could easily just use glue or you could use thread and pull a running stitch across the top of the skirt all these methods will essentially give you the same result and you will be covering the top of the skirt with the extra arms that you cut from the second image.
I adhere the skirt to the body, I pop the face into a bottle cap (this is just a standard bottle cap from a bottle) and stick the body together using the extra hands and arms to cover the top of the skirt.
I popped a little sparkling embossing powder on the heart before sticking it in place and I popped the larger cog behind the head and pop her on the back plate with the window that I created earlier.
I like to add at least one more independent element that is not stuck to the back plate as I feel this adds dimension to the piece and highlights the depth of the base, to do this I make myself supports which are just pieces of cardboard folded into blocks which support other elements.
I added the extra element from the stamp set in this way.
and there she is.
I hope you like this project I have really enjoyed putting her together. Please remember to check out all the other amazing projects on the blog, stay safe and see you next week.


4 comments
A beautiful piece Rachel, love how you've dressed your character.
ReplyDeleteLove
Amanda X
Thank you so much she really was a delight to put together ❤️❤️❤️
DeleteA stunning piece of artwork Rachel. Your art doll is simply amazing and love the added skirt you created for her.
ReplyDeleteFliss xx
Thank you so much I do really love her she was a real delight to put together ❤️❤️❤️
DeleteThank you for taking the time to leave a comment on our blog, we really appreciate it.
Note: only a member of this blog may post a comment.