
Freedom by Amanda Southern
11:00
Hi Everyone
I hope that you've all had a lovely Easter weekend be it one that would have been so different than normal, at least we have had lovely weather here in the UK.
For this weeks make I have gone all grungy and rusty and have had my first play with Tim's new embossing glazes.

Here's What I Did:
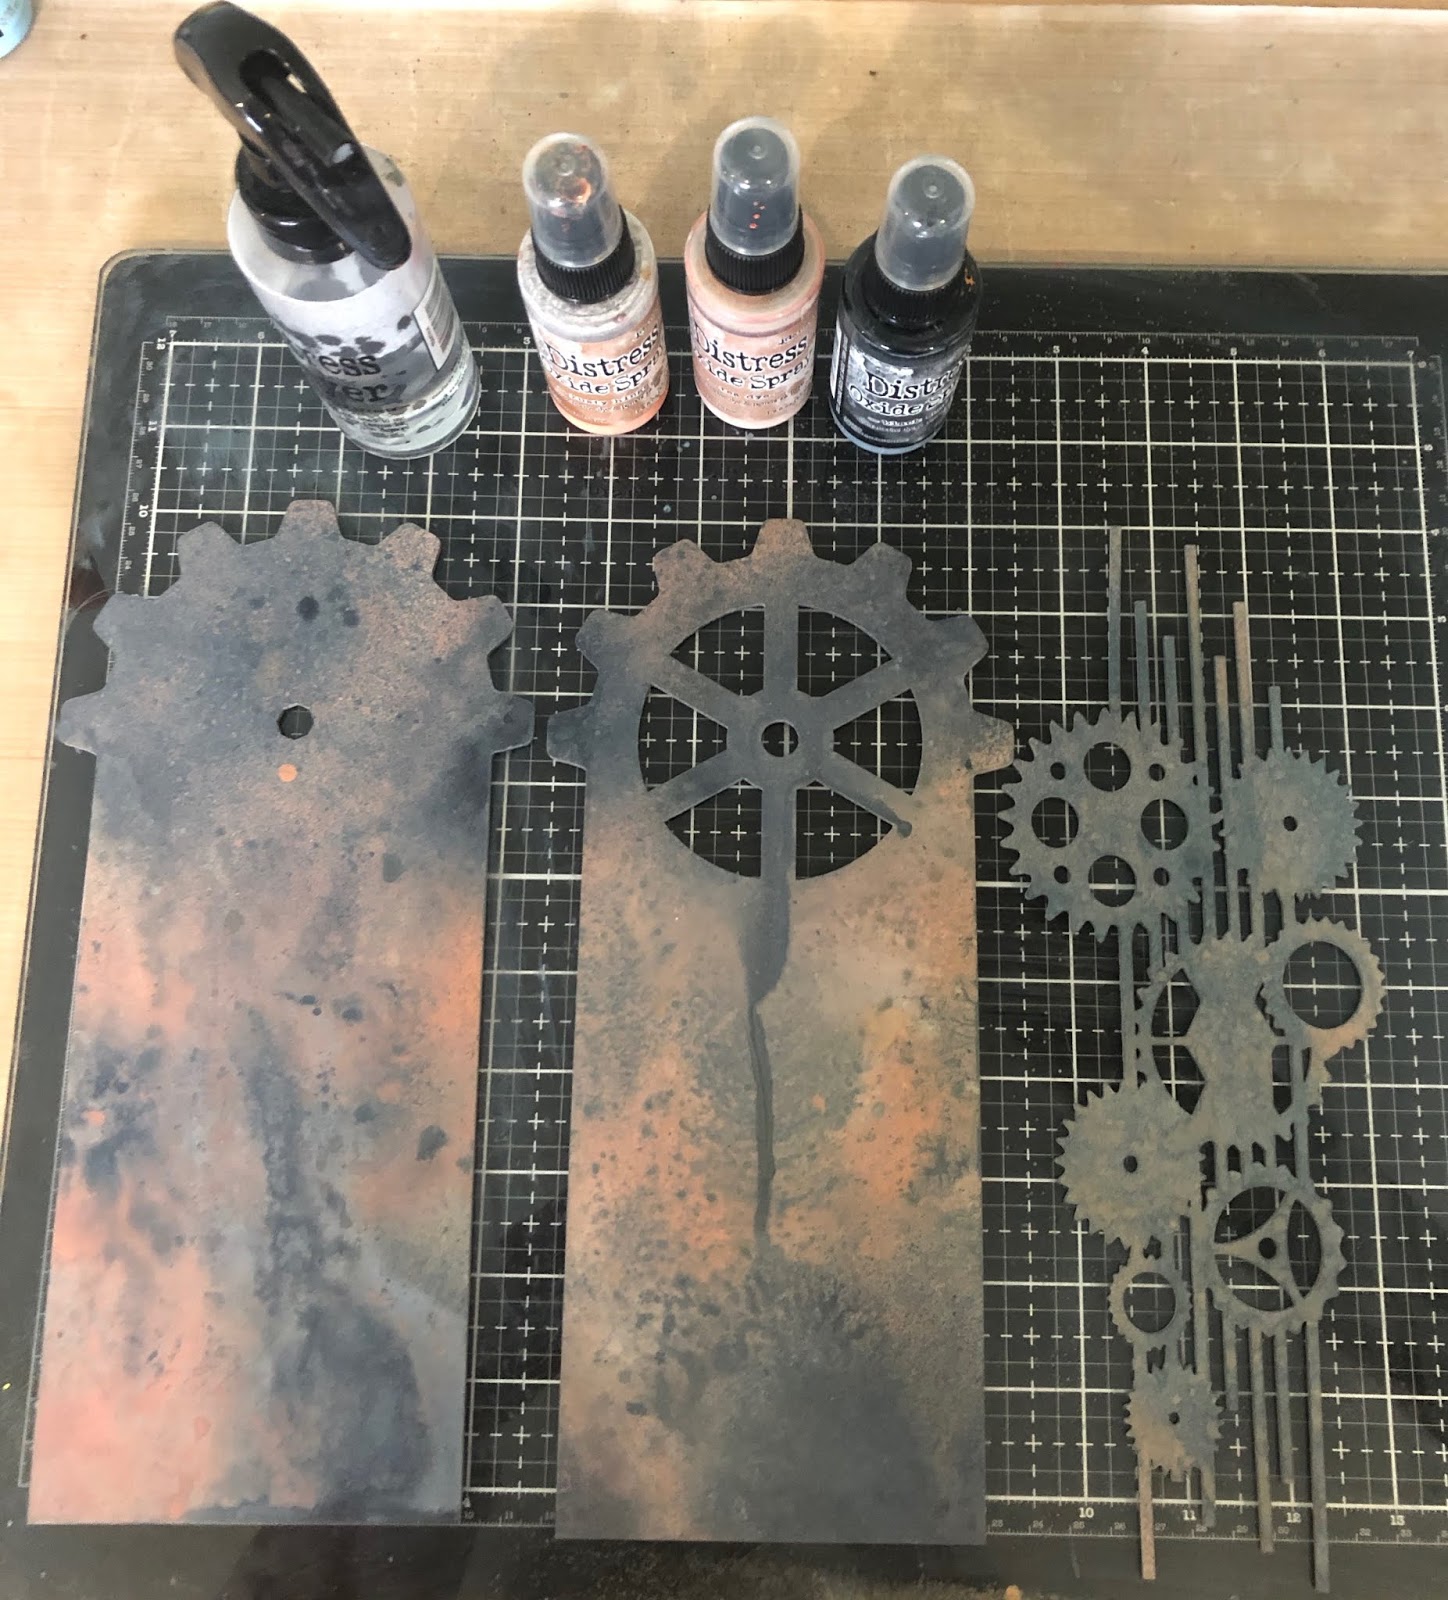
I started by giving 2 of the That's Crafty! MDF cog tags and the ABstudio chipboard cog line a covering of Grey Multi Surface Paint along with some of the MDF cogs that come with the cog tags.
.

To start with my grungy rusty effect I decided to achieve this with Distress Oxide sprays for a change, my normal go to would be to use acrylic paints but I decided to take a different approach for the effect. Choosing Black Soot, Tea Dye & Rusty Hinge D.O. sprays I set to spraying each colour, sometimes drying each colour before adding another and sometimes allowing the colours to mix together, this I kept repeating until I had achieved an effect I was happy with.
Next I added Distress Crackle Texture Paste around the edges of the cog tag that would sit on the top and randomly onto the cog line. Onto this I then sprinkled on rusty hinge embossing glaze and left to dry. This technique comes from Tim Holtz himself and you will find detailed tutorials for his new glazes and texture pastes on his website HERE.
Once the paste starts to crackle all over you heat the glaze.

The glaze gives you a glossy effect so to dull it down I rubbed in Distress Crayons in Rusty Hinge and Walnut Stain. You could also remove the shine by adding a layer of matt medium. Here you can see the effect on the chipboard cog line.

Next was to layer up the 2 cog tags and I wanted an even gap so to ensure that the tags were level I glued together some of the waste pieces from the cog line and added to the base tag before gluing to top tag on.

Before adding the cog line to the top tag I added a little stencilling using white gesso, the fact that the gesso was going onto Distress Oxides the paint picked up the colours that I had laid down so they looked dirty which was the look I intended, a little distress crayon added to the dirty look.
I then added the cog line on top, again glued to add dimension.


Next was to create my background paper to stamp my butterflies on. As I was spraying Distress Oxides previously I had picked up the residue sprays as I went onto a piece of heavy card, onto that I also added some Broken China Distress Oxide. The fact it was Oxides the colours were quite muted and chalky, which is what makes the Oxides so different, however I wanted a bolder coloured effect so using a spiced marmalade distress ink pad I smeared it onto my glass mat, misted with water and smooshed my Oxide coloured paper through it for a brighter colour.

The left piece is just the Oxides and the right after I had added the Distress ink.
Next was to stamp and cut out my butterflies and I chose to use an oldie but great range of stamps from Prima designed by Finnabair (still some of my favourites and nice to give an outing again).
Each butterfly I gave splashes of Broken China Distress Oxide spray. The sentiment "Freedom is a state of mind" is also from one of Finnabair's stamp sets and I think suit the current situation that we find ourselves in.

Once I had put it together I thought it needed a little colour contrast so to the edges and some touches to the cogs I added some Broken China Distress Glaze powder to matt medium and added around with a stiff paintbrush to add some patina effect.

The individual cogs I coloured in the same way and slipped them between the 2 tag layers, the bigger cogs I cut in half before glueing them in place.
Here you can see the dimension of the piece

Here's What I Used:
Distress Oxide Sprays - Black soot, Tea Dye, Rusty Hinge & Broken China
Distress Ink Pad - Spiced Marmalade
Distress Embossing Glaze - Rusty Hinge & Broken China
Versafine Clair Ink Pad - Noctourne
Distress Crayons - Rusty Hinge & Walnut Stain
Heat Gun
Have a fabulous crafty week and I will see you all next Tuesday.
Stay Safe
Love
Amanda X


3 comments
This is an amazing project, I love all the detail ❤️❤️❤️
ReplyDeleteScrumptious rusty grungy piece, Amanda! I love it, right from the sprayed drippy background to the encrusted Glazed crackle to those fabulous butterflies. Altogether a real treat.
ReplyDeleteAlison x
Fabulously grungy artwork Amanda. The rusty effects look amazing and all the layering gives a stunning finished piece of industrial style art.
ReplyDeleteFliss xx
Thank you for taking the time to leave a comment on our blog, we really appreciate it.
Note: only a member of this blog may post a comment.