
Just Go by Amanda Southern
11:00
Hi Everyone
Following last weeks make I still seem to be stuck in a somewhat nautical mind set and also in the fabulous blue and brown colour combo but in a different arty direction than last week.

Here's What I Did:
I selected the bubbles ATC shrine, from the pack of 4 that also includes a further 3 different MDF designs of shrines, and before assembling the ATC I covered the inside and side with 13 Arts paper being careful not to cover the bits that slot together. Again, before I glued it all together I added layers of paint using a brayer on top of the paper. Once all that had dried I then glued the box together using the best glue for the job which in my opinion is That's Crafty's own glue. This part I would then come back to to complete.
I next started preparing the front bubbles piece, and first gave the whole piece a complete covering with That's Crafty! Multi Surface Paint in Ivory, no need to gesso this as the paint coverage is that good it doesn't need it. Over that I then stippled the teal and the chestnut brown paint using a piece of washing up sponge until I had achieved the amount of coverage I was happy with. I then wanted to fill each bubble hole, to achieve this I had to back the whole piece as these are cut holes. I did this by covering the front from behind with another piece of 13 Arts paper. again using That's Crafty! glue. Once that was completely dry I had to cut around the entire piece including some of the cut out pieces within the MDF. This took a very sharp knife and a small file to get a clean edge.

Here you can see most of it cut out with just a little on the bottom left still to do, now that was a labour of love. I then had to add embossing ink to each hole, which was made easier by using an embossing pen, and sprinkle in the embossing powders which I did a couple at a time. I used a small paintbrush to brush off any powder that landed on the frame as I only wanted it in the holes. I then heated from underneath to melt the powders to give a more glass finish and also to stop the powder blowing out of the holes. I continued with this until all the holes were filled with the 2 colours.

I love the transparency of these powders that you can still see the design of the paper underneath.

Onto a piece of stamping card I stamped the Octolady and coloured her with Prismacolour pencils, obviously you could colour her using whatever colouring medium you like. I then added her to the front using That's Crafty! glue.

Next back to my ATC box which this will be attached to, I stamped part of the AALL & Create for him stamp as I only wanted the anchor from it so I cut this out from the design, coloured again with pencils, cut out and added a little Quinacridone gold for a touch of rust this I added into the ATC box along with some bits and pieces I had collected on a beach walk, bits of old rope and dried seaweed.
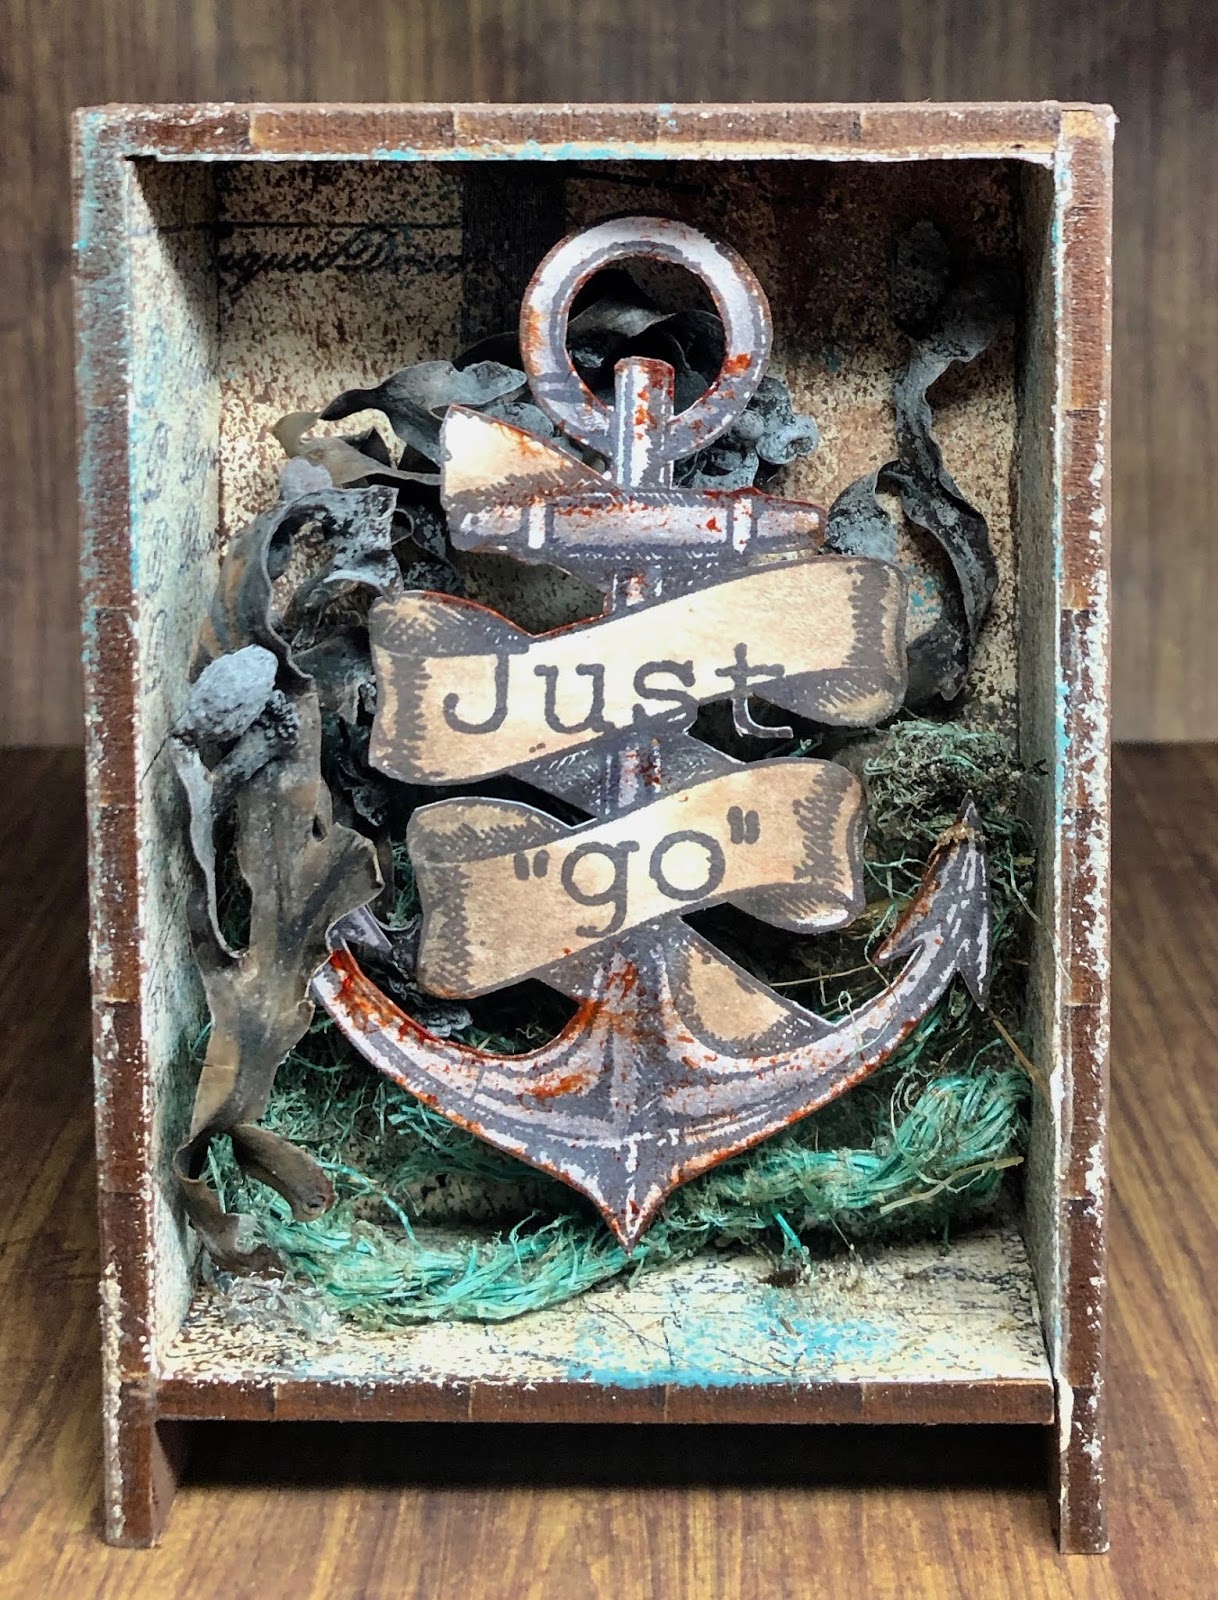

The front piece was then glued onto the ATC filled box to finish. Sadly when put together you couldn't see the old fishing rope that I had put in the box.
Here's What I Used:
That's Crafty! Multi Surface Paints - Teal, Chestnut brown & Ivory
Emerald Creek Seth Apter Baked Texture Embossing Powder - Vintage Beeswax
AALL & Create Border Stamp - #236 Octolady
AALL & Create A4 Stamp Set - #196 For Him
Versafine Clair Ink Pad - Noctourne
I coloured with pencils but you could choose any colouring medium lots of choices HERE
Decoart Media Fluid Acrylics - Quinacridone Gold
Kuretake Zig Clean Pens - #065 Mid Brown
That's Crafty! Acrylic Wax 225ml also available in 120ml HERE
Precison Craft Knife
Beachcomber bits from my stash
Washing up Sponge bits
Metal File
Have a fabulous week and I will see you all here next Tuesday
Love
Amanda X


2 comments
Absolutely stunning bubbles and well worth all that effort! Love how you can see the paper through the melted powders. Shame the ropes are hidden but I love the shadow box too regardless. A nautical treat.
ReplyDeleteAlison x
Playing a bit of catch up Amanda and absolutely love this stunning shrine. The bubbles perfectly suit the octolady image and the amount of detail you're added on there is totally amazing!
ReplyDeleteFliss xx
Thank you for taking the time to leave a comment on our blog, we really appreciate it.
Note: only a member of this blog may post a comment.