
The Gnome Dome by Fliss Goodwin
11:00

Hello!
This week I have a project to share that's actually easier to make than you might think as clever Kelly O'Gorman creates the most versatile detailed images that do quite a lot of the work for you but it's good to be able to make them really yours as I've done here.
Step by Step:
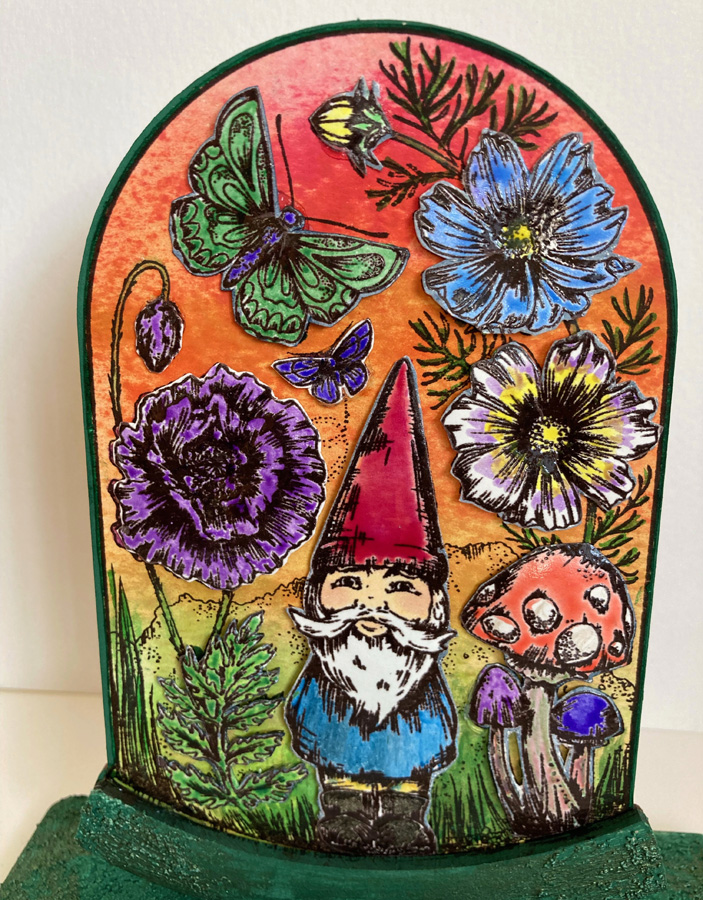
I stamped the gnome cloche on a piece of smooth white stamping card with black ink and coloured just the images (leaving the surround as it was) as I planned on cutting them out to give a more dimensional look to my project.
I coloured a piece of smooth cartridge paper with Flat Matte Sprays using Green and Yellow at the base going up to Orange and Pink at the top. I then stamped the cloche image on with black ink and cut it out.
Laura and Graham designed a very clever MDF shape which matches the cloche exactly. I painted the top section of the MDF piece black and glued my stamped image in place. I cut the extra coloured images out and rounded them with an embossing ball tool before sticking them in place.
I then prepared the bottom section on which I used a spatula to apply sand texture paste roughly all over. Once it was dry, I painted the pieces with Evergreen Multi Surface Paint.
I glued all the sections together to finish.
Supplies:
Have a great weekend and see you next week.
Fliss x


0 comments
Thank you for taking the time to leave a comment on our blog, we really appreciate it.
Note: only a member of this blog may post a comment.