
Universe by Gill Humphrey
11:00
For my make this week I have gone back to my paper crafting roots and decided that I would make a flag book. The inspiration for this piece came from the star sign cards within the Cosmos Collectables paper pack. In addition I have also used papers from the 8 x 8 Backgrounds, a sentiment from the 12 x 12 Cosmos Infinity papers and some of the Ephemera pack. To decorate the cover I used one of the icons in the Sun and Moon mould. To start this piece I took a piece of A4 black card and scored it along its long edge at 2", 3", 4" , 5", 6", 7", 8" and 9" - it does not matter that the piece left is smaller than the 2" piece at the start. The paper was then folded to give valley and mountain folds. 
Next cut 4 pieces of black card the 4" using the short side of the card for the height of the pieces. These pieces were then adhered onto the front and back of the end areas of the concertina folded card to give covers.

Next choose papers from the 8 x 8 collection cutting panels for the cover panels 33/4" wide and for the zigzag fold 3/4" wide inking the edges with Navy ink before adhering in place.

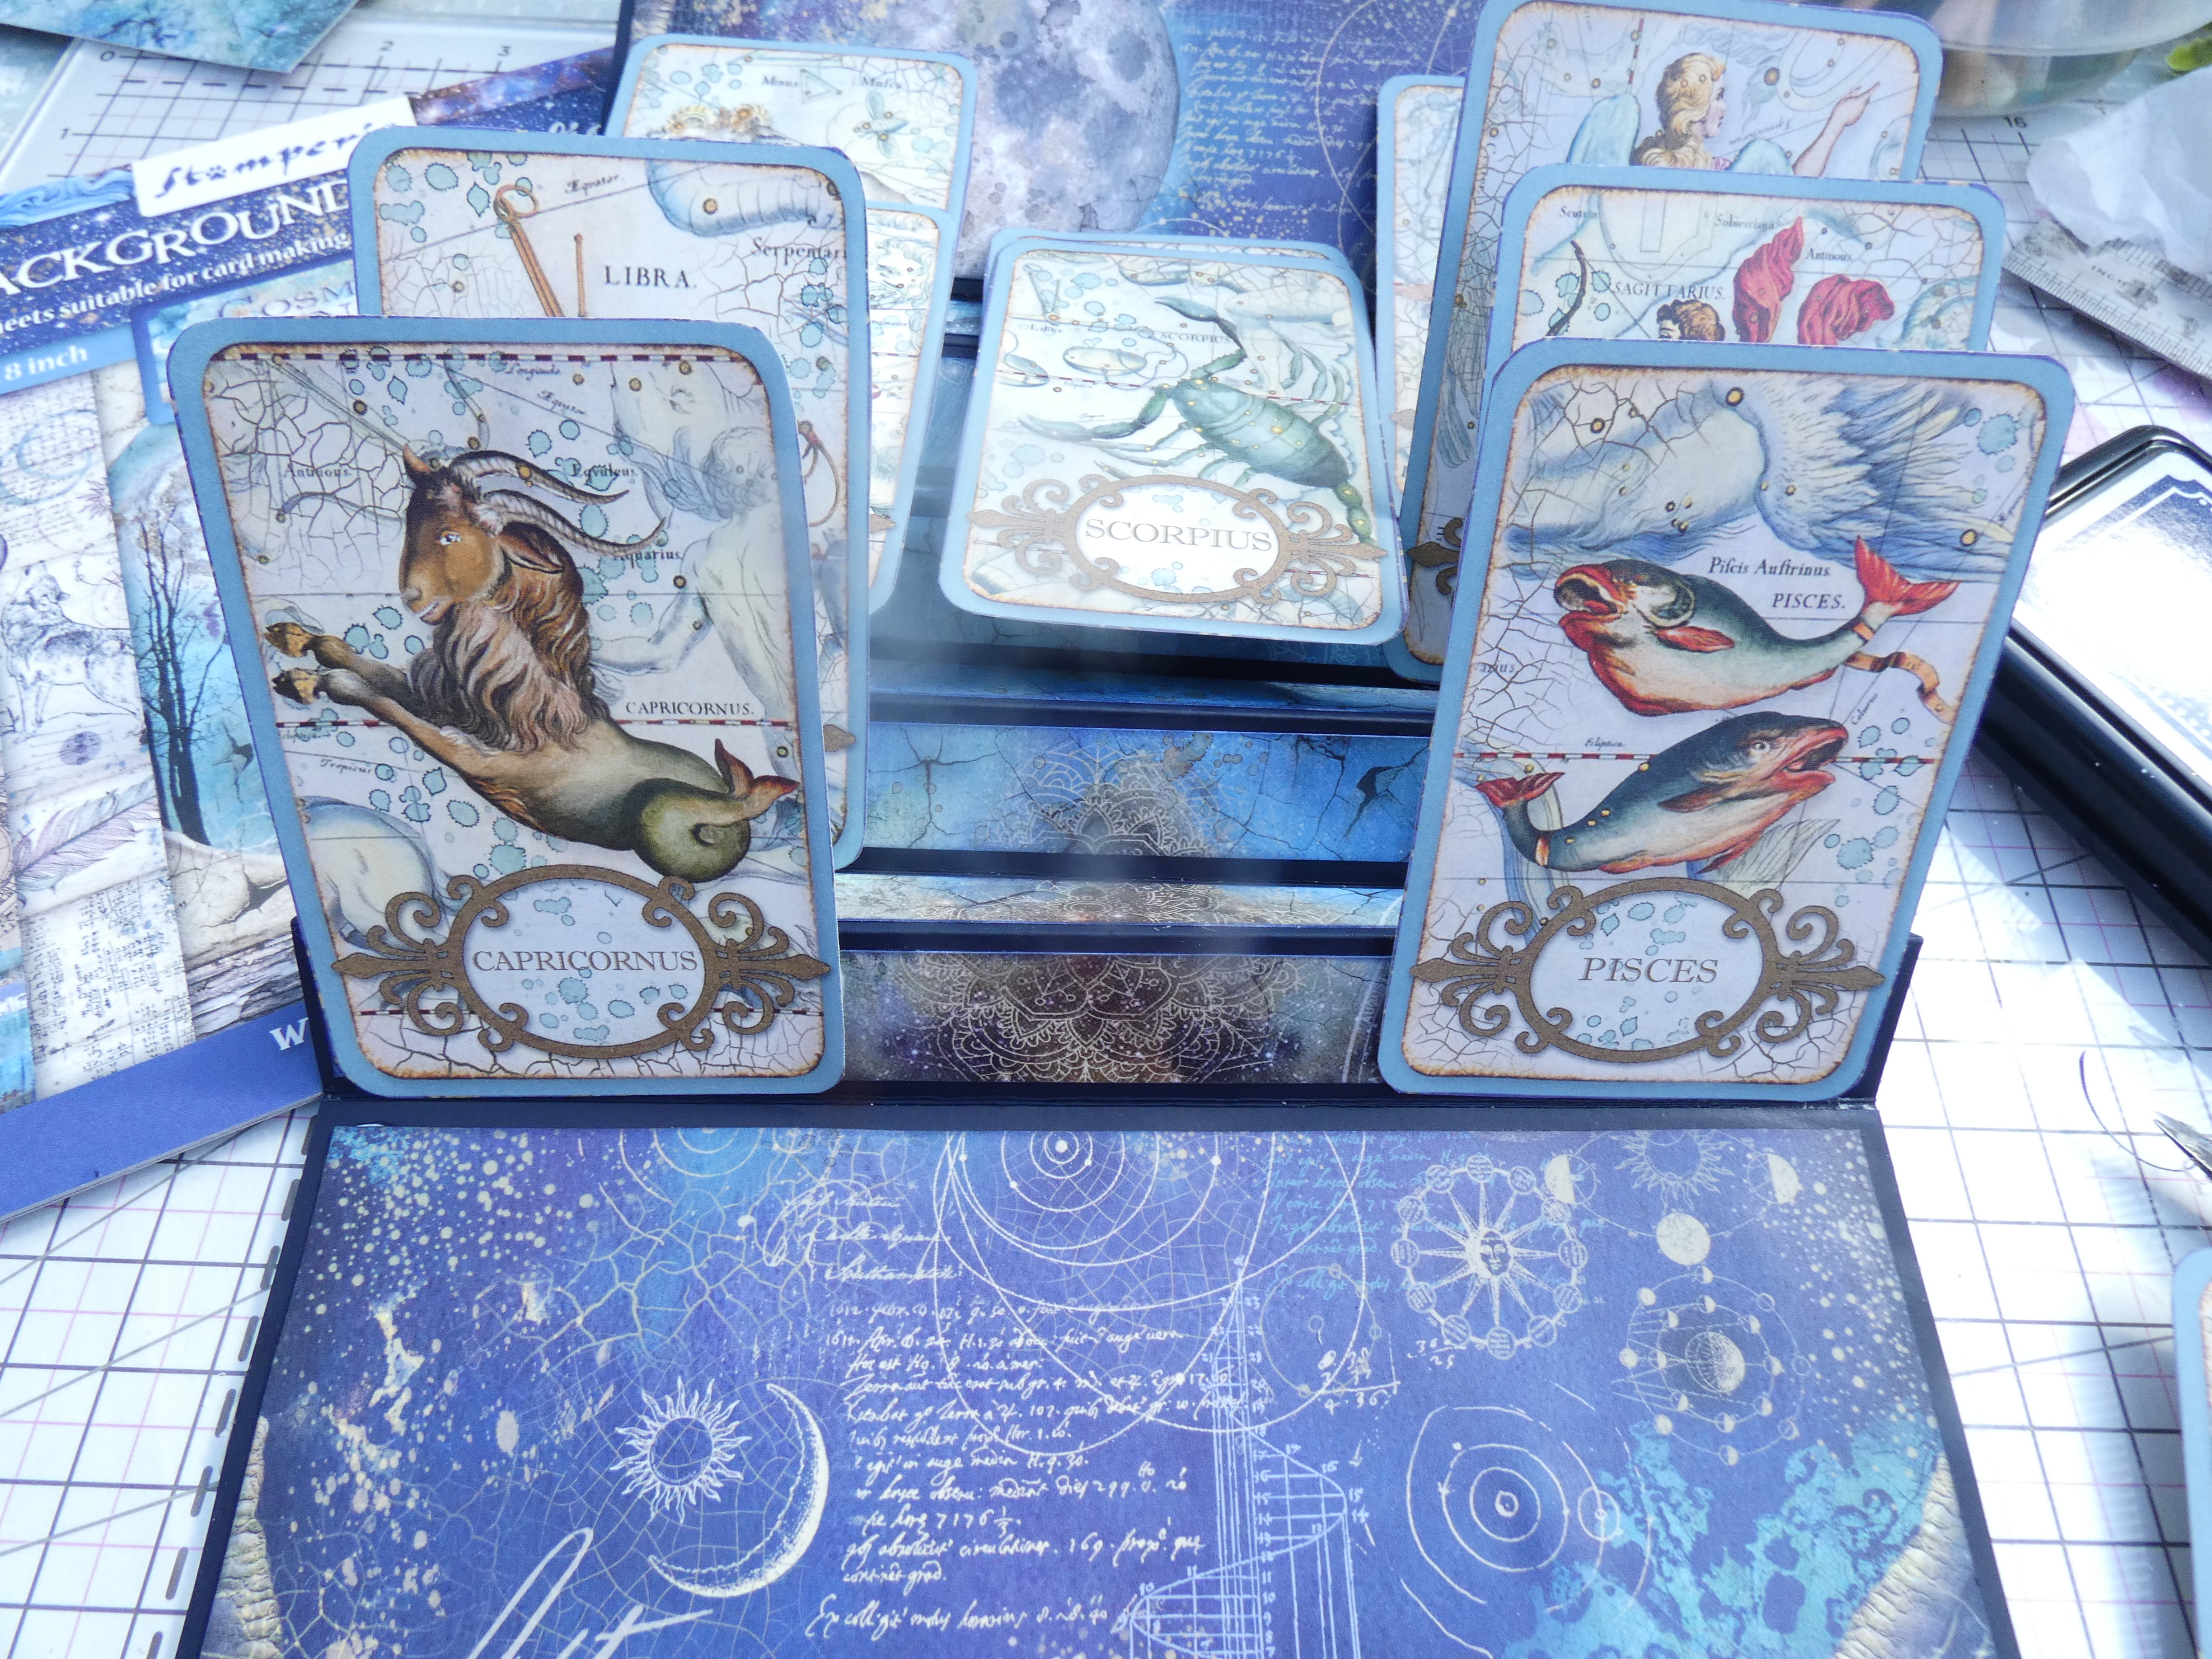
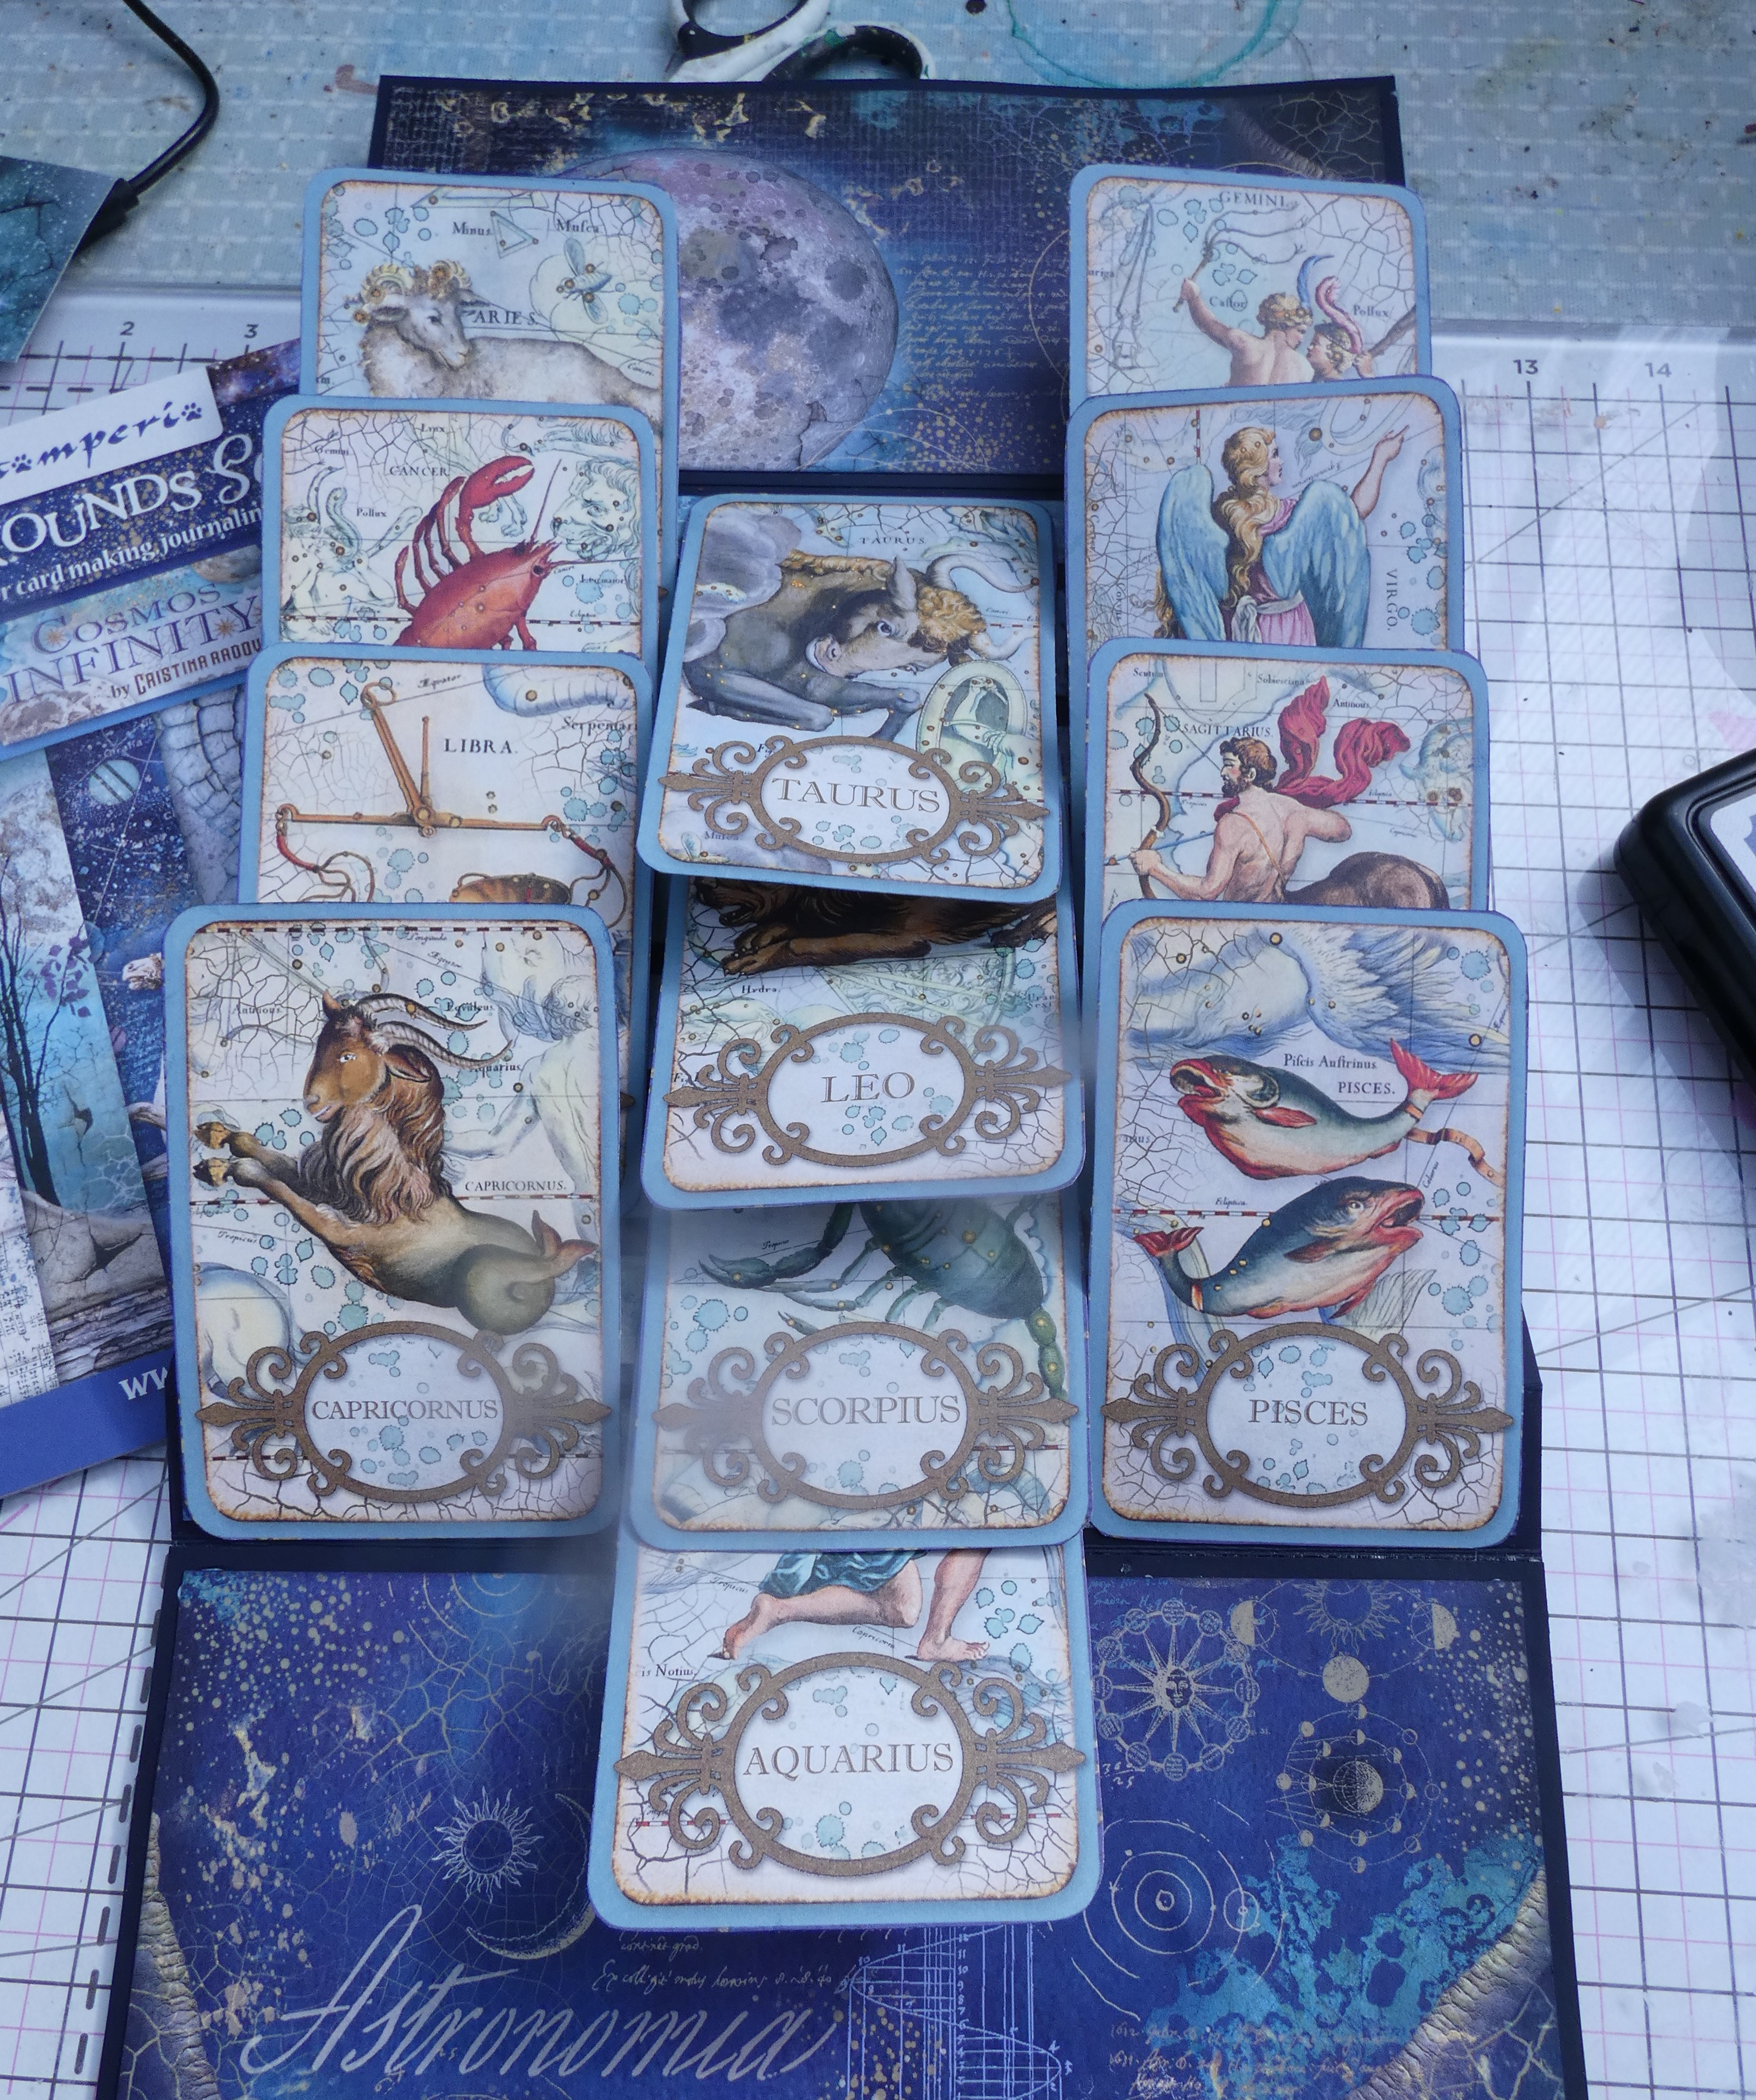
Now decide how you want your zodiac signs to align and to make this work you need to adhere the two outer ones to the front of a mountain and the the third one to the back of the mountain - be careful how you do this so that the words are in the correct direction when the book is completed (See photo below). 

Once all 12 of the star signs are in place and the card is stretched out your piece will look like:
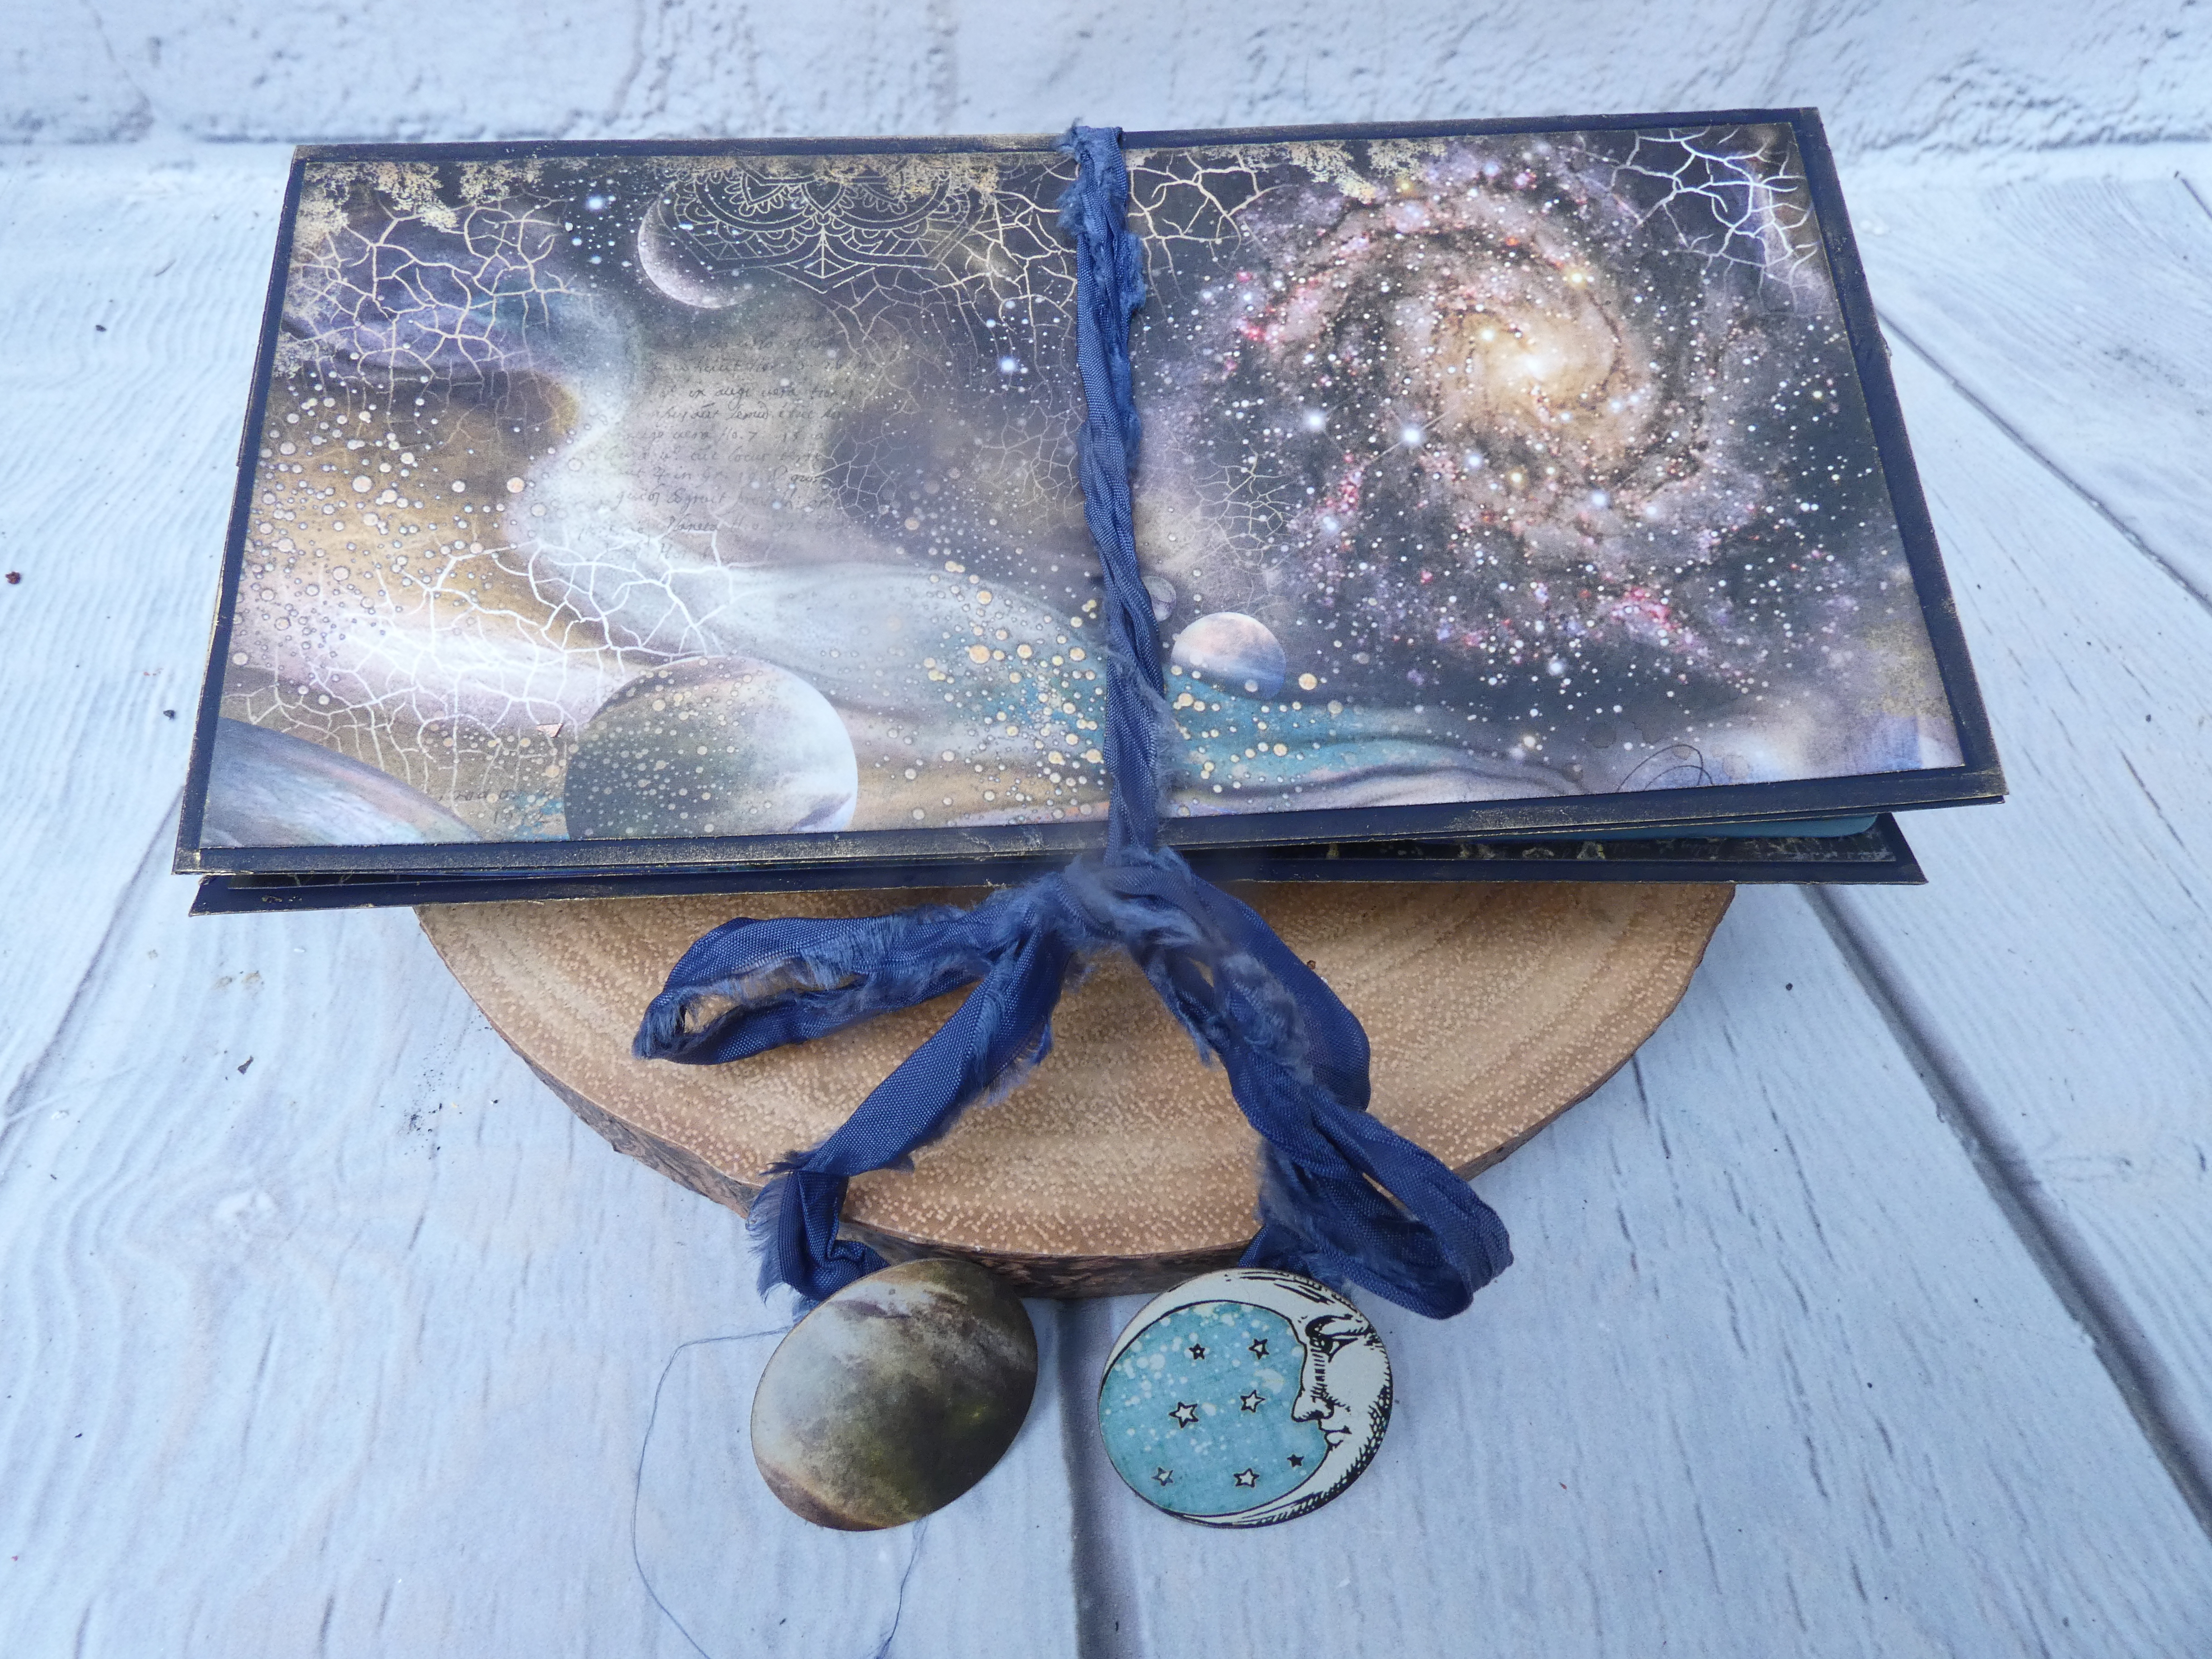
 I then added icons from the Collectables paper pad to the backs of the cards as the eagle eyed will notice that some of the imagery is upside down and adding the icons helps disguise this. For the front of the book I sandwiched a piece of co-ordinating ribbon in place as I adhered my chosen paper piece to the front of the book leaving the ends free so that they can be pulled around the back to close the book.
  I chose the astrological star signs mould and made my piece using Amazing Casting Resin. Once set the resin was covered with Black Primer Paste. I then coated the whole piece with the copper paint in the Patina Paint Set before stippling over the shades of blue. Finally I highlighted the details with Pentart Gold Metallic Wax (Daily Art Gold Wax will work very well). Before adhering the resin piece in place I added some extra paper elements from the Collectables and some of the Ephemera pieces adding the resin piece to the center using Heavy Body Gel Matte. I added more Ephemera pieces to the ends of the ribbons inking areas not covered with the Navy ink. Finally I took some more of the gold wax and added it to the edges of the book.


For my make this week I have gone back to my paper crafting roots and decided that I would make a flag book. The inspiration for this piece came from the star sign cards within the Cosmos Collectables paper pack. In addition I have also used papers from the 8 x 8 Backgrounds, a sentiment from the 12 x 12 Cosmos Infinity papers and some of the Ephemera pack. To decorate the cover I used one of the icons in the Sun and Moon mould.
To start this piece I took a piece of A4 black card and scored it along its long edge at 2", 3", 4" , 5", 6", 7", 8" and 9" - it does not matter that the piece left is smaller than the 2" piece at the start. The paper was then folded to give valley and mountain folds.

Next cut 4 pieces of black card the 4" using the short side of the card for the height of the pieces. These pieces were then adhered onto the front and back of the end areas of the concertina folded card to give covers.

Next choose papers from the 8 x 8 collection cutting panels for the cover panels 33/4" wide and for the zigzag fold 3/4" wide inking the edges with Navy ink before adhering in place.

Now decide how you want your zodiac signs to align and to make this work you need to adhere the two outer ones to the front of a mountain and the the third one to the back of the mountain - be careful how you do this so that the words are in the correct direction when the book is completed (See photo below).

Once all 12 of the star signs are in place and the card is stretched out your piece will look like:
I then added icons from the Collectables paper pad to the backs of the cards as the eagle eyed will notice that some of the imagery is upside down and adding the icons helps disguise this.
For the front of the book I sandwiched a piece of co-ordinating ribbon in place as I adhered my chosen paper piece to the front of the book leaving the ends free so that they can be pulled around the back to close the book.

I chose the astrological star signs mould and made my piece using Amazing Casting Resin. Once set the resin was covered with Black Primer Paste. I then coated the whole piece with the copper paint in the Patina Paint Set before stippling over the shades of blue. Finally I highlighted the details with Pentart Gold Metallic Wax (Daily Art Gold Wax will work very well).
Before adhering the resin piece in place I added some extra paper elements from the Collectables and some of the Ephemera pieces adding the resin piece to the center using Heavy Body Gel Matte. I added more Ephemera pieces to the ends of the ribbons inking areas not covered with the Navy ink. Finally I took some more of the gold wax and added it to the edges of the book.


0 comments
Thank you for taking the time to leave a comment on our blog, we really appreciate it.
Note: only a member of this blog may post a comment.