
Altered Stone Paper Notebooks by Gill Humphrey
11:00
For my blog this week I have two altered stone paper notebooks - whilst the gold which features in the second book is in stock you can just as easily make your own booklets using the plain or silver Stone Paper sheets combined with any of the Journal It Templates designed by Liz Wheeler.

I started my white notebook by taking a sheet of the ITD Violet rice papers and tearing it into pieces before adhering them to the stone paper using Matte Decoupage Glue and Varnish. I made sure that I had not only applied glue underneath the rice papers but also over the surface to ensure that the papers were properly sealed in place.

Once the glue had dried I used a spatula to drag white crackle paste over the blank areas of the cover also taking it over the edges of the rice paper pieces to blend the edges in to the surface.

Next I took one of the MDF Frames and covered the filigree element with some ivory embossing powder (Desert mixed with a little Metallic Gold) using Versamark on to the naked MDF to stick the powders in place. I used two layers to give a good thick coverage. For the central element I covered the oval with white soft gesso leaving it to dry before adding a focal image from the rice paper pack with more decoupage glue.
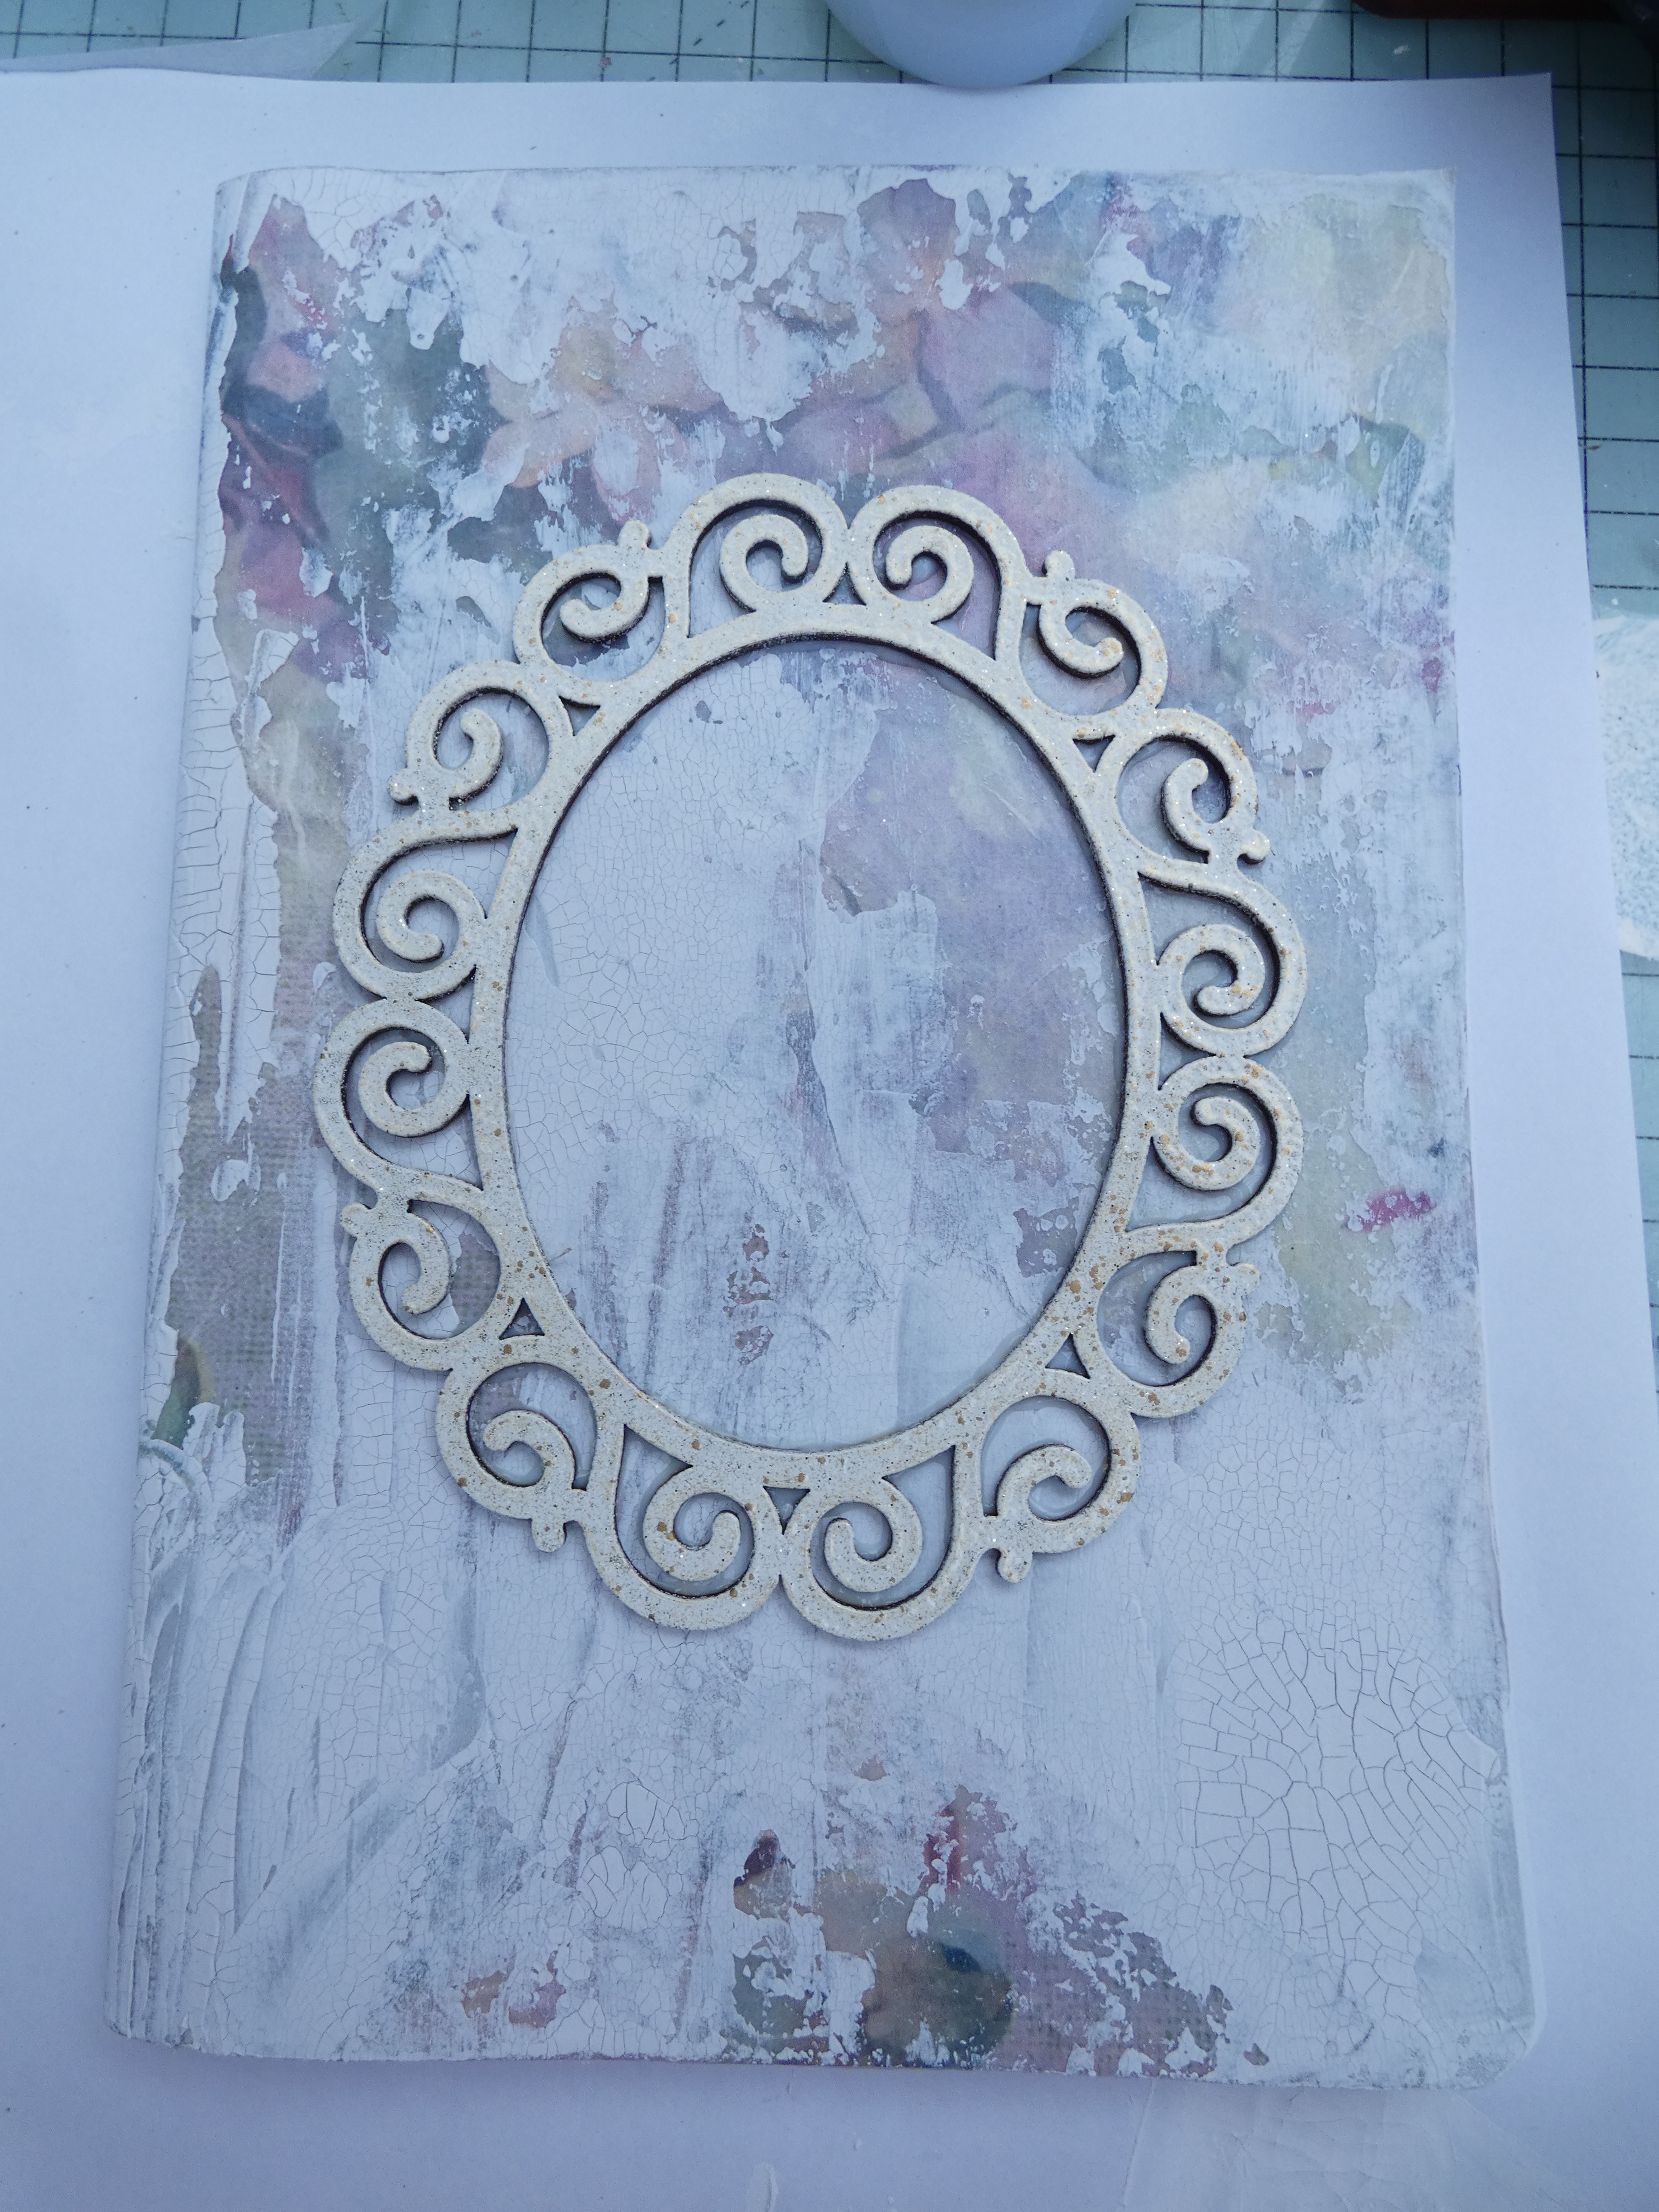
I then glued both the frame and the oval with focal image in place but still felt that the piece looked a little empty. My solution was to take the numbers from Elements stamp set and add these using first second and third generation stamping with Black Archival Ink.
For the second option of my duo of notebooks I took the gold notebook and roughly dragged black Antiquing Gel over the surface deliberately leaving elements of the gold showing through. The antiquing gel sets to give a permanent surface.

I then adhered one of the rabbits from ITD directly to the central oval of another of the frames and dragged archival ink around the edges to give a seamless distressed appearance.

I then added gold metallic embossing powder to the frame and once it was heat set added some shading round the edges with more black Archival ink.

Extra detail was then added to the notebook using the script stamp from the elements set and gold metallic embossing powder before adhering the rabbit and frame in place.

I hope that this tutorial shows that by taking the same core elements and varying the colours/papers you can create projects with very different feels - the real joy of creating for yourself as it allows you to create bespoke gifts for those you love.


0 comments
Thank you for taking the time to leave a comment on our blog, we really appreciate it.
Note: only a member of this blog may post a comment.