Time Flies by Rachel Harries

11:00


I have to admit to being just a little bit obsessed with these tiny uprights, I will use other surfaces but they really are superb if you like dimensional pieces and this size is just fab for not taking up all the space in my crafty corner.

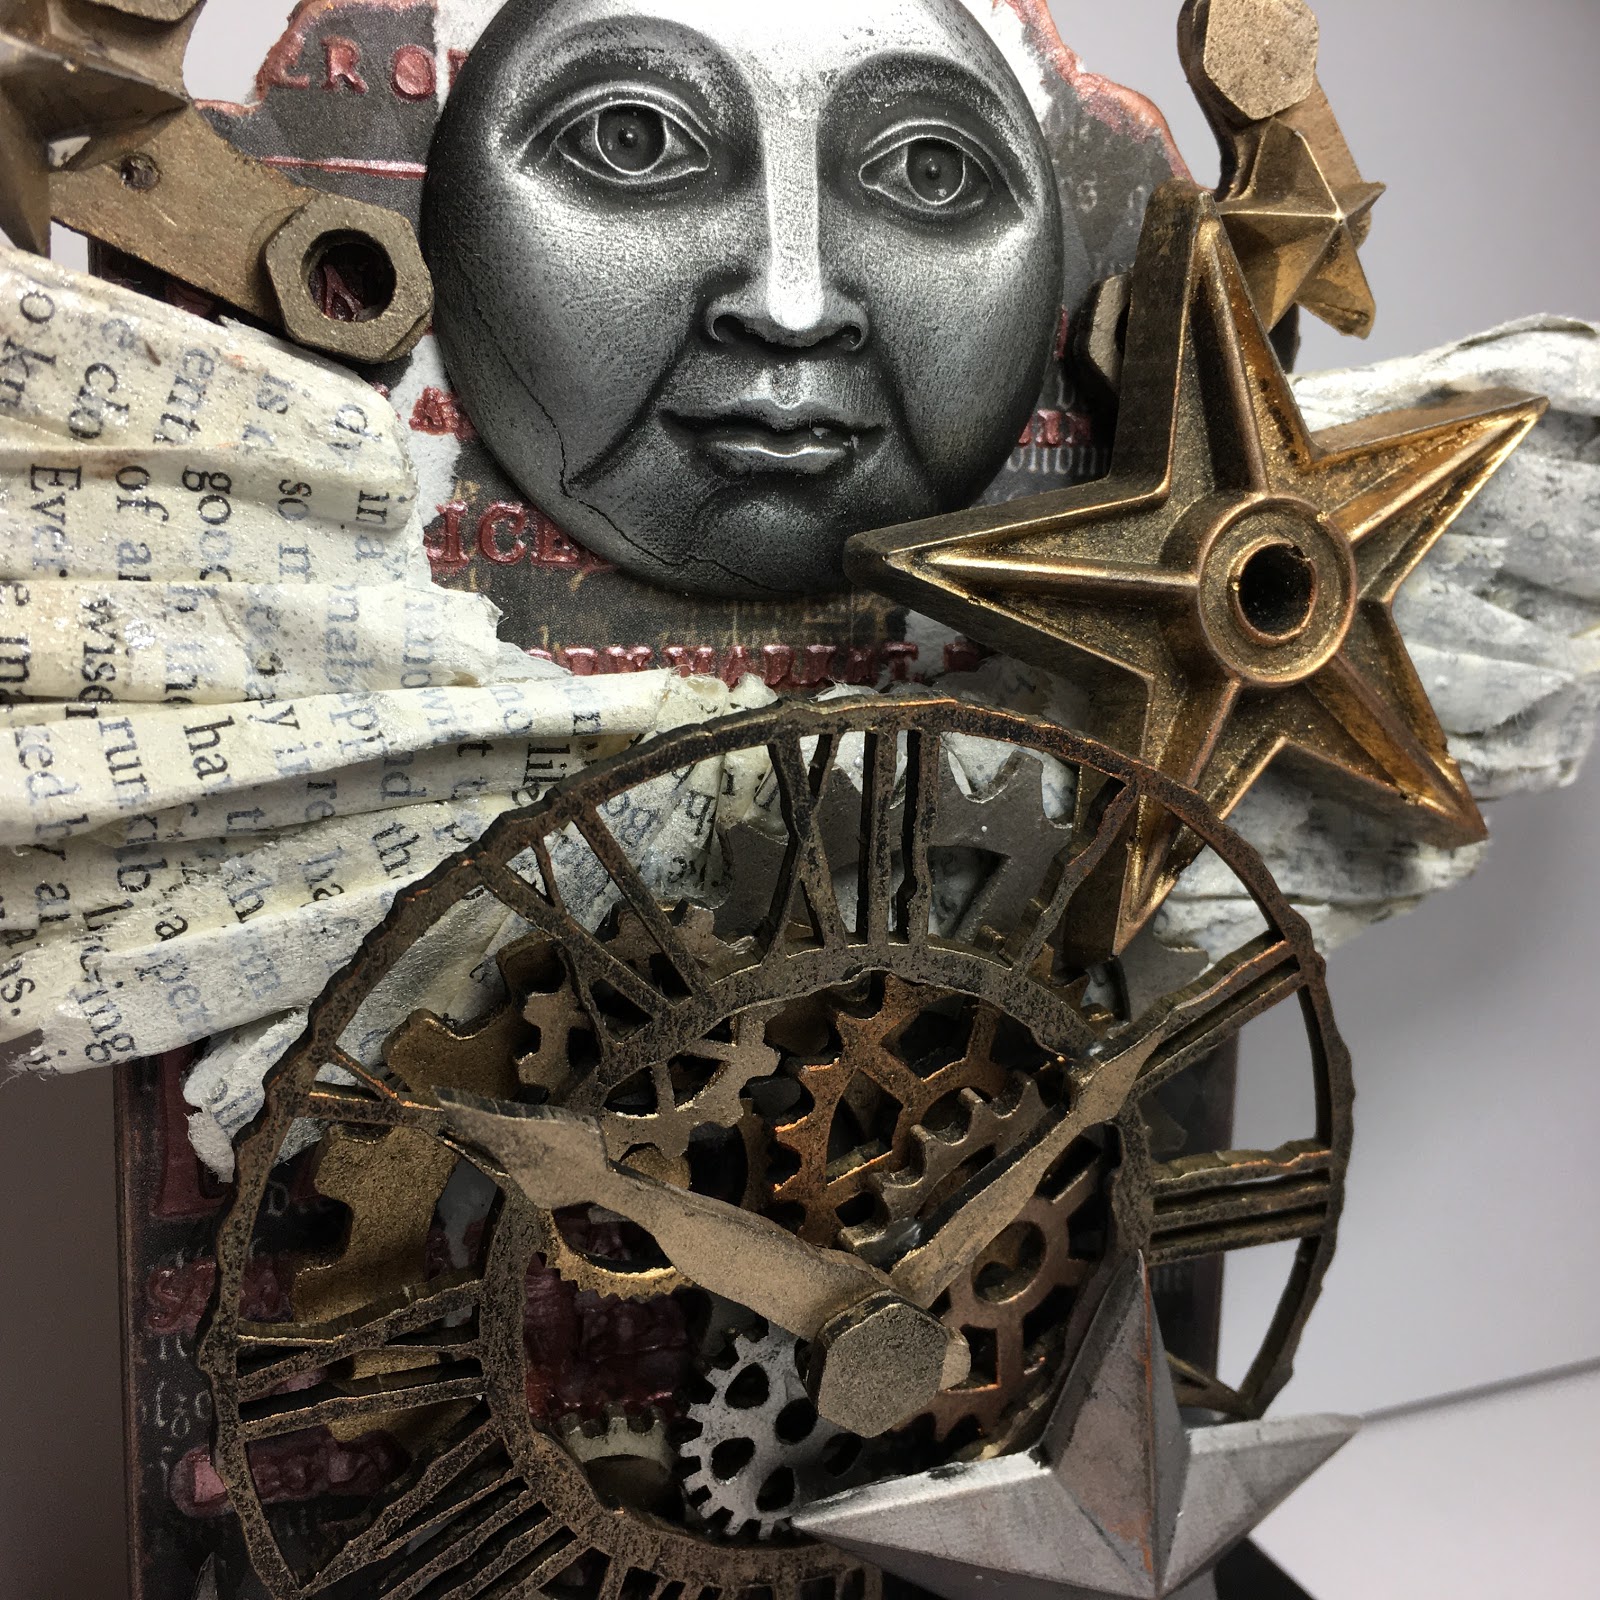
I start off with some greyboard small gears, a greyboard clock face, greyboard wings, some resin pieces I cast, these could be air drying clay, or just something completely different, the nice thing about these sort of projects is that they are really easy to make your own. I also have one of the Dinky Uprights and I set to by using black gesso on everything apart from the wings and the middle of the Upright as both of these will be covered.


I put these to one side and start on my wings, I like to take an old book page and roughly roll small pieces which I stick down in layers corresponding to the shape of the wings, I'm not at all precise about this as its the texture that I want.


I use a little amount of gesso and gentle dry brush the wings, you could use just a smidge of paint, I dry brush as I don't want to loose the text from the book pages, I then give a gentle spray with Daily Art Silver Glimmer Ink Spray.


I pop the wings on the side to dry and take the upright in two pieces, I ripped some pieces of paper I liked from the 6x6 13arts Victoriana pad and glue them to the back board, Im mindful not to cover the bottom tabs that will slot into the base other than that Just roughly cut around after its glued as once the glue is dry I will use a sanding block to give a nice finish.


Next I use one of the 13arts stencils and some Finnabair icing in rose gold on the back board and base


I smooth a little of the icing paste around the edge of the base, I will do the same with the back once it is dry and sanded. in the meantime this can be put to one side to dry. I took all the cogs, the clock face, hands and the resin pieces and used a variety of different metallic waxes, if you don't have these you could use some metallic paint.


Once the back plate is dry I used a sanding block and went around the edges, I then used my finger to go around the edge of the back plate with some of the icing paste I then stuck the pieces together.


I then started by glueing my wings in position with all projects like this there is no precise way of doing it, the wings have to go down first otherwise they would cover the mechanism and the clock face and hands with go down last but everything else is just a matter of going with your intuition put things where they are pleasing to you, don't over think it, don't worry about there being a right or wrong, it is your project and you can make it however you like.


I hope you've enjoyed this project as much as I enjoyed making it, stay safe and I'll be back next week.

That's Crafty! Surfaces MDF Dinky Uprights
That's Crafty! Surfaces Bits n Pieces - Small Cogs
That's Crafty! Surfaces Bits n Pieces - Grungy Clock Faces
That's Crafty! Surfaces Bits n Pieces - Wings
Prima Finnabair Stars and Moon Mould
Amazing Casting Resin
Air Dry Clay
That's Crafty! Black Gesso
That's Crafty! White Gesso
That's Crafty! Multi Purpose Adhesive
Prima Finnabair Icing Paste
13arts 6x6 Victoriana Paper Pad
13arts Stencil Vintage Newspaper

You Might Also Like

2 comments

  1. This really is absolutely stunning Rachel. Such amazing 3D elements and the textures on the wings look amazing. Really love this!
    Fliss xx

    ReplyDelete
  2. Thank you so much I really appreciate your support ❤️❤️❤️

    ReplyDelete

Thank you for taking the time to leave a comment on our blog, we really appreciate it.

Note: only a member of this blog may post a comment.

Related Posts Plugin for WordPress, Blogger...

Like us on Facebook