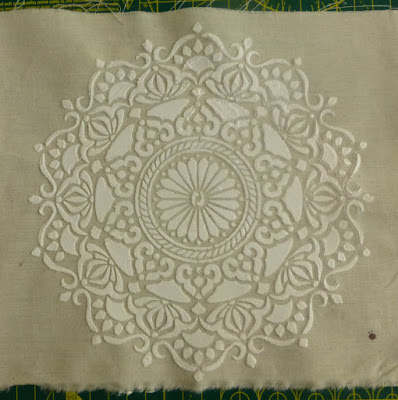
A Journal With Mandala Stencilled Calico by Lynne Moncrieff
11:00Hello
This week I return to two favourites: the Mandala stencil and books.
Using the full size of this glorious stencil, I could see possibilities for it featuring on the covers of a handmade journal.
Supplies
That's Crafty! Stencil Mandala 8"x8" TC8014
That's Crafty! Texture Paste
That's Crafty! Clear Stamp Set Textures Collection Set 3
That's Crafty! Mixed Media Paper/Card Kit (Calico)
That's Crafty! Surfaces Greyboard Tags Pack of 8
That's Crafty! Flat Matte Spray Walnut
That's Crafty! Walnut Ink Crystals
That's Crafty! Multi Purpose Craft Adhesive
Archival Ink Ranger Designer Series Potting Soil
Palette Knife
Craft Knife
Gesso
Binder Clips (HERE are Mini Craft Clamps)
Paintbrush
Instant Coffee Granules
Hot Water
Old Roasting Tin
Handmade Paper Concertina
Instructions
Stencil Mandala onto calico with Texture Paste.
Two panels required.
Allow panels to dry thoroughly before progressing.
Dissolve instant coffee granules in old roasting tin.
Place stencilled panels into the coffee bath.
Remove panels from coffee bath, laying onto flat surface. Allow to air dry.
Now to give attention to cutting the greyboard tags. Two tags are required, for front and rear covers of journal. The size I cut them to was determined by the size of the paper I would be using as the pages. Cut away excess greyboard from both tags, you can see that I didn't cut into the side with the punched hole.
Paint Gesso onto the greyboard.
Onto the other side of each panel, the stained, stencilled calico was adhered.
Apply adhesive to one side of the concertina panel.
For the purpose of showing this step, I decided not to paint the greyboard with Gesso until after adhesion, otherwise it would be difficult to differentiate between the paper and Gesso'ed greyboard.
Mist the paper with Flat Matte Spray Walnut, at this stage only onto the panel adhered to the cover.
Attach clips to ensure good adhesion.
Follow through by spraying the full length of the concertina paper, both sides.
Use the same Walnut spray to bring depth to the stencilled covers.
Also spray excess, coffee stained calico. The strips were torn from around the edges of the stencilled calico.
On the completed journal you will see that I scribbled onto the stained calico. I did this with Dark Brown Acrylic Drawing Ink which I have decanted into a fineliner bottle.
You might to need to use a Crop-a-Dile or tool to help make a hole in the calico covers to align with the hole in the greyboard tags before threading through piece of prepared calico length for each hole.
I happened to have two pieces of torn edges from a handmade photo album (which I am re-cycling by using the handmade paper pages). The pieces had already been stained and the holes already existed. With the same bottle of Dark Brown ink as used on the calico strips, I scribbled some thoughts about journaling onto the paper. I liked the grungy, loose feel achieved. Then simply thread two small pieces of stained calico through the holes before adhering to left edges of both covers.
Another final touch was stamping, randomly and mostly second generation stamping, the beautiful script stamp from the That's Crafty! Textures Collection.
This completed book has 8 panels, for both sides. For me, by staining with the Walnut Spray and the hint of the stamped script, removes the terror (!) of blank pages facing out at me but that is only a personal choice.
Until next week,
Wishes
Lynne


3 comments
Oh it is so very beautiful, dear Lynne,- the stenciling so perfect, and love them, after the coffee bath. A wonderful concertina to add thoughts and memories into, and to even be displayed standing !! XXX
ReplyDeleteA really beautiful journal Lynne. Such lovely texture from the stencil (my favourite one too) and love the vintage shabby chic effect from the walnut spray and crystals.
ReplyDeleteFliss xx
Your mandala stenciled coffee stained book covers are gorgeous , Lynne . Inspiring creativity as always . Tfs x
ReplyDeleteThank you for taking the time to leave a comment on our blog, we really appreciate it.
Note: only a member of this blog may post a comment.