
Choose To See The Good by Amanda Southern
11:00
Hi Everyone
Sorry I wasn't here last week, life just got in the way which meant no crafty time. However, thankfully, I'm back this week and I have been playing with another of the recently released stamp sets from Katzelkraft.

I have created a wall hanging on a That's Crafty! 4" x 6" x 1" MDF Chunkie.

Here's What I Did:
I had recently been playing with the Gel Press creating some backgrounds and the background for this piece was pulled by adding a layer of paint over the remnants of blue paint that were dried onto to my gel press, also a fabulous way to not only create another background but also cleans your gel press at the same time. I glued together the 4" x 6" MDF chunkie and started covering it with the clean up background.

I always start with the sides, glueing the piece and trimming with a sharp craft knife, then the top and bottom and finally the front, this way when covering it you don't get an edge of the card showing at the front.

I then added Distress inks to the edges and to darken the colour a little, this also covers up the white edges of card of the gelli print.
Next was to lay out the chipboard pipes into a formation that fit onto the front before I painted them with Sandstone paint and aged and rusted them with Chestnut paint and my trusty washing up sponge pieces which is the best way, for me, to add the rust speckles.
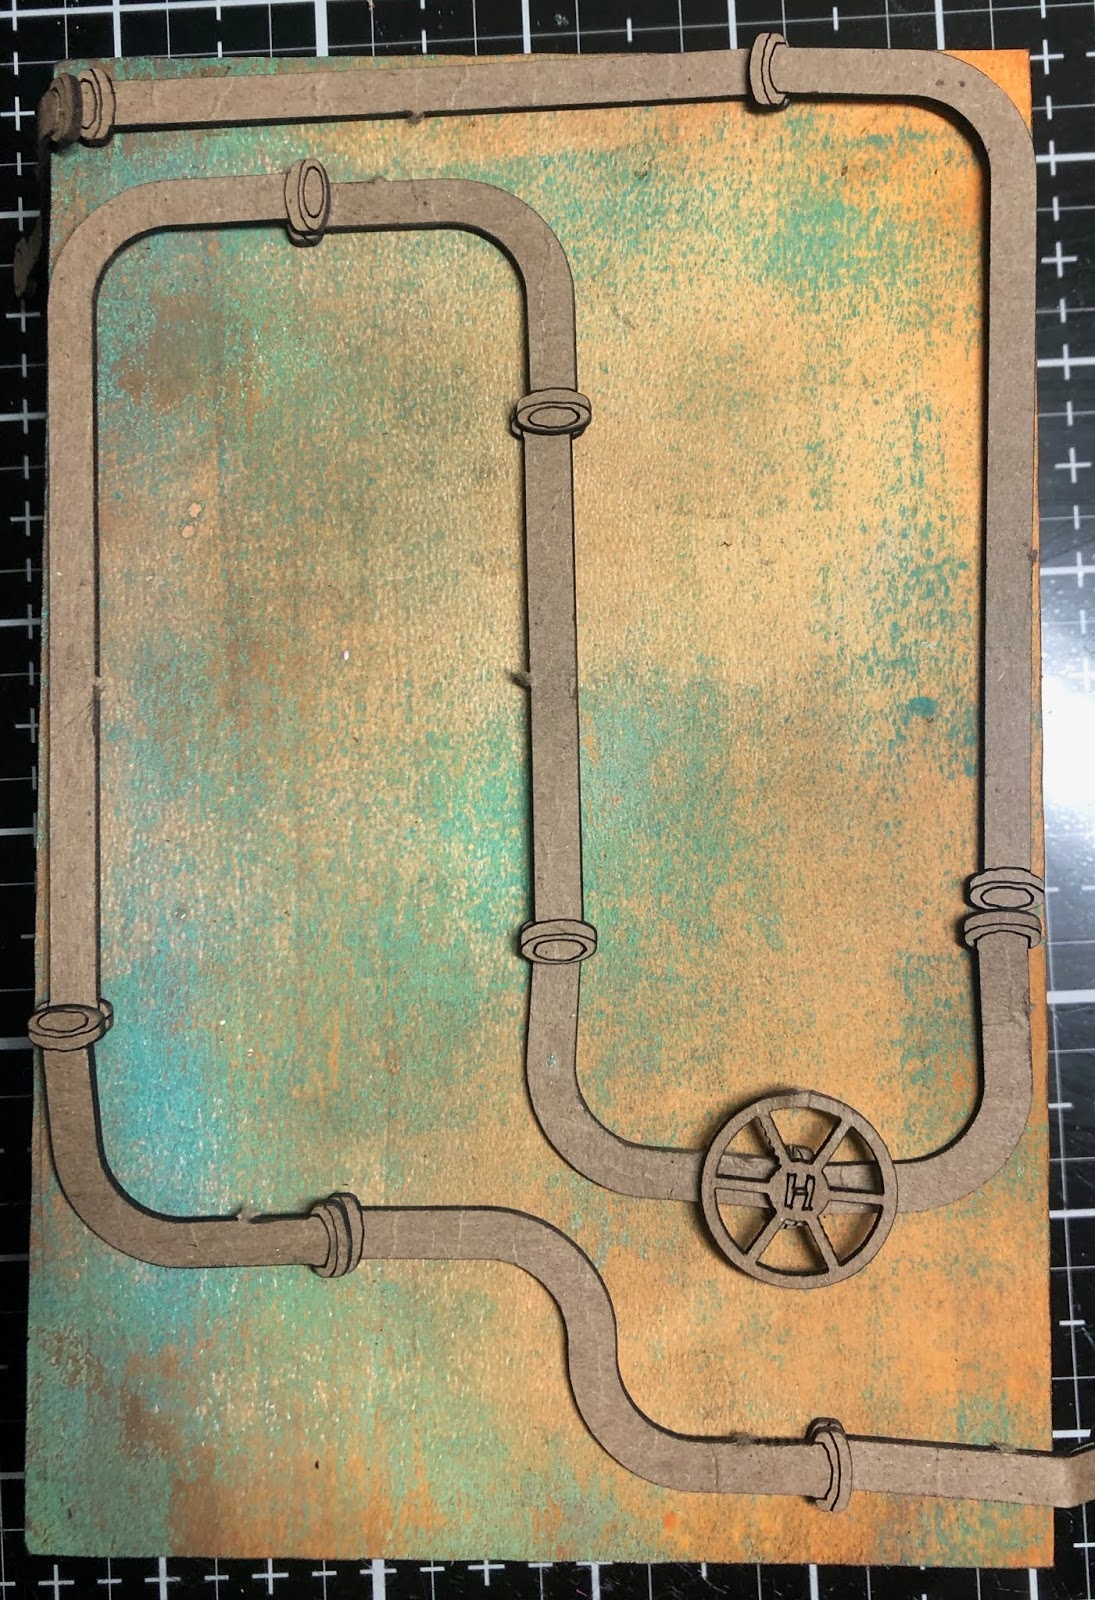
I took the picture to remind me how my pipes went back together after I had painted them.

Next, as my pipes dried, was to add some interest to the background which I did with a combination of stencils and stamping the texture with paint. Stencilling is with both paint and red Stazon ink and I have grunged up the stencilling with more Chestnut paint.

I then placed back the now painted pipes to finish the background.
Next was to stamp the insect characters onto stamping card using black archival ink and then again onto a piece of acetate using Black Stazon ink. If you are wondering why onto acetate it is because there are so many legs and things on these guys that would be impossible to cut out without leaving a white border so I cut out the bodies of each insect, after colouring with coloured pencils and glued the body onto the stamped acetate version and cut out so now they all have their little legs and hairs as per the original image.


A Tim Holtz Chit Chat sticker "Choose to see the good" finishes it off, the meaning behind that on this piece is that most of us don't like insects but without them we couldn't survive.
Here's What I Used:
Gel Press (available in various sizes)
Acrylic Paints - I used a combination of Dina Wakley and Paperartsy Paints on the Gel Press
Distress Inks - Rusty Hinge & Gathered Twigs
That's Crafty! Multi Surface Paints - Sandstone, Chestnut Brown & Yellow
13@rts Stencil - Dots & Numbers
That's Crafty! 7" x 7" Stencil - Alphabet
That's Crafty! 8" x 8" Stencil - Alphabet
That's Crafty! Dinky Stencil - Chevrons 029
StazOn Ink Pad - St. Valentine and Black
Archival Ink Pad - Jet Black
That's Crafty! Clear Stamp set - Textures Collection Set 4
KatzelKraft A5 Stamp Set - Les Nounounes
Blendable Coloured Pencils like THESE
Sheet of Acetate
Washing Up Sponge
Have a fabulous week and I will see you all next Tuesday
Love
Amanda X


2 comments
An absolutely fabulous piece of artwork Amanda. The Gelli print background looks fantastic as do the rusted pipes and the tip for the insect legs is very clever so thanks so much for sharing it.
ReplyDeleteFliss xx
Brilliant! The sponging really does create the perfect rusted texture, and all the little critters looks as though they are making themselves at home amongst the pipework. Great tip about the acetate stamping for the fiddly bits, and an amazing background too, of course.
ReplyDeleteAlison x
Thank you for taking the time to leave a comment on our blog, we really appreciate it.
Note: only a member of this blog may post a comment.