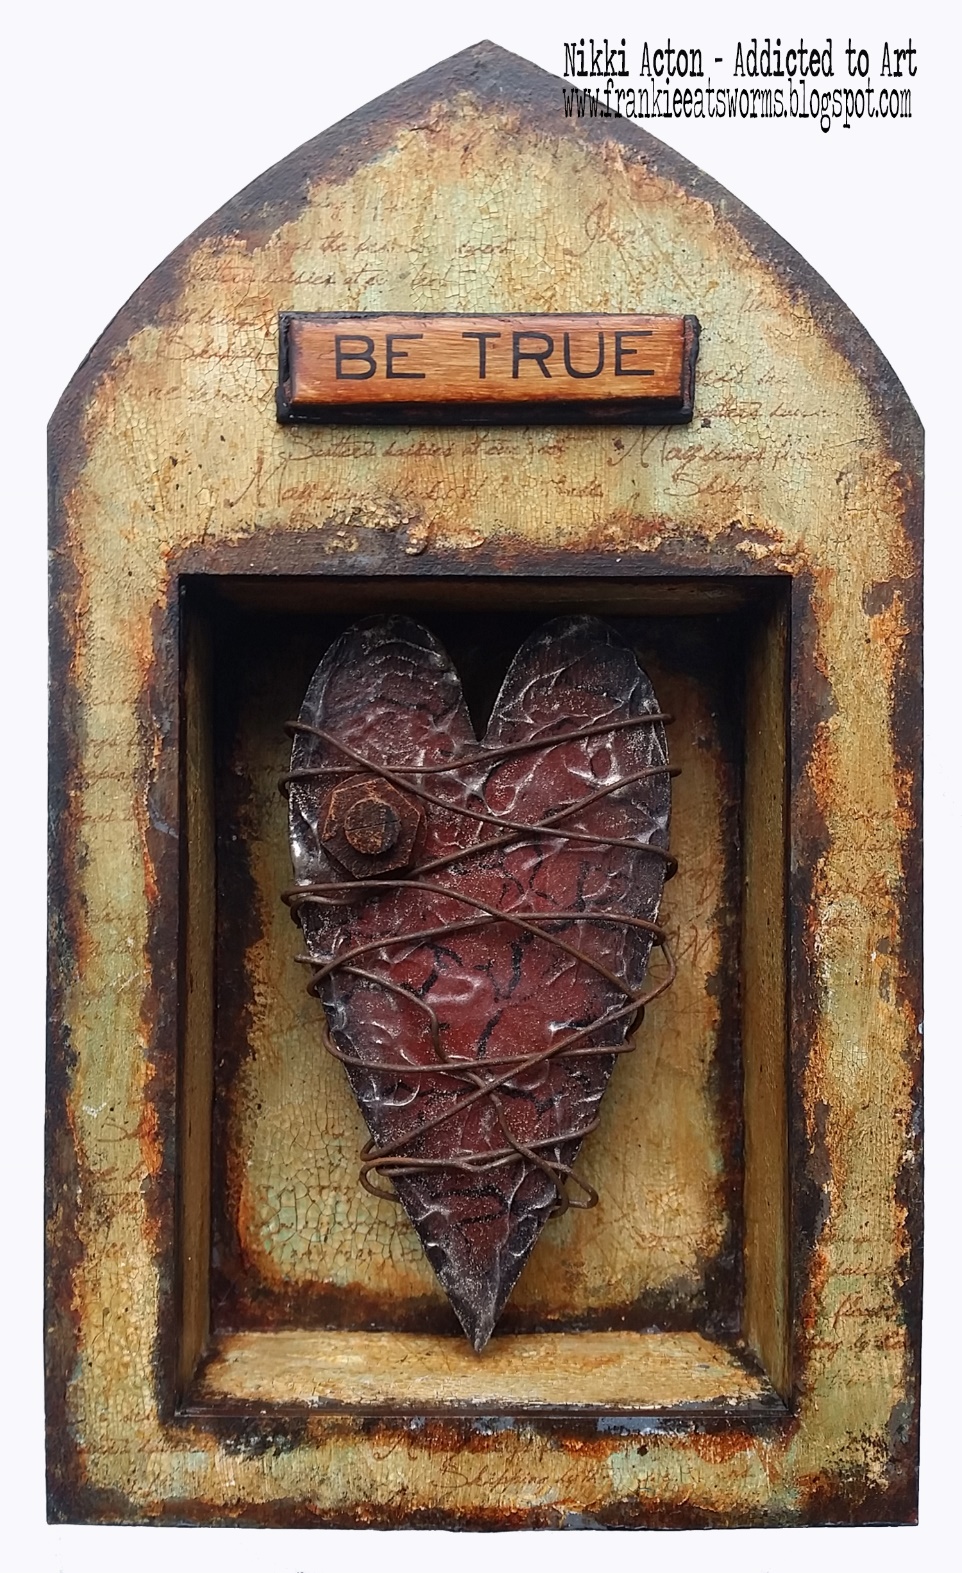
Today’s creation features one of That’s Crafty! MDF Shrines (this one is ATC size with the arch top) and the forever useful MDF hearts (size #3). I began by coating all the pieces in grey chalk paint (I used PaperArtsy Little Black Dress and Chalk combined). I then took some Vaseline and lightly added to the edges of the shrine panels with my finger. (This will later be removed producing the chipped edge effect – an Andy Skinner technique). I then added DecoArt white crackle paint to the surface – quite thinly – it is not important to get a consistent coverage – it is an aged, worn effect I was after!
I left
this to dry and worked on my heart. This one had been painted already in brown
but I gave it a coat of Red Iron Oxide and added some black to the edges. Once
dry I stamped with the cracks stamp from the That’s Crafty! Textures stamp set
in black Archival. I then took transparent texture paste and added randomly to
the surface with my finger and set aside to dry. Once dry I added a little
gilding wax to highlight the texture.

Back to the shrine – once the
crackle paint had dried I removed all the Vaseline with a babywipe. I added a
wash of Cobalt Teal Hue, then Yellow Iron Oxide and finally Quinacridone Gold
around the edges. I stamped with my current ‘go to’ script stamp (Lin Brown/PaperArtsy). Before putting the shrine together I made sure all the edges were
black adding a little paint with my finger where required.

To finish I took one of the
chipboard quote chips and added some Quinacridone Gold and Paynes Grey to
colour it. I took some rusty wire and a previously rusted nut and bolt from my
stash and secured them to the heart.

See you
next week
Nikki
Supplies
DecoArt Media Fluid Acrylics – Quinacridone Gold, Yellow Iron Oxide, Paynes Grey,
Cobalt Teal Hue, Red Iron Oxide
PaperArtsy Fresco Acrylics – Little Black Dress and Chalk
Archival Ink – Sepia, Black
(From my
stash – Vaseline, grey board nut/bolt and rusty wire)