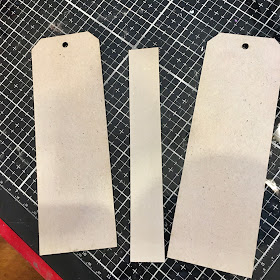
you can use any adhesive you like, for my project I'm going to use double side adhesive sheets. I place and draw around the pieces to cut the size of adhesive sheet I need. When I'm doing this it's important to leave a gap between the pieces I put a piece of the greyboard between to give me a bit of a guide. If you don't do this your sides will not be able to fold.
I stick this to the Art by Marlene collage paper that I'm using to cover this I then use a craft knife to trim around the edges and I repeat the process on the other side, so both sides are covered.
I ink the edges and add an eyelet this could just as easily be any type of fastening that you prefer.
The next job is the spine mechanism and this really is a kind of universal formula that you can use to put pages in anything. cut slightly shorter pieces than you want your pages to be and cut;
I then use a score board to score half an inch in on each side of these pieces.
cut the corners on each edge as this will give you a nicer finish and the I adhere these pieces together into the spine of the book.
these are the flaps that I the adhere pages to.
I used Art by Marlene die cuts to add a few extra elements to my book and also a couple of Tim Holtz paper clips.
I hope you enjoyed this project and that the technique will be useful to you, stay safe.


Fantastic tutorial and the final tag book looks great
ReplyDeleteLove
Amanda X
What a fabulous idea Rachel. A really great tutorial and love the pretty bright pages to your little book.
ReplyDeleteFliss xx