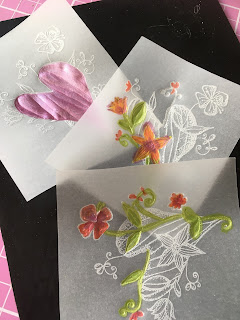
I started out by stamping the image 3 times directly onto the parchment, using a white pigment ink pad. Then, working on the stamped side I embossed using a very small ball tool. By working on the stamped side the finished image was reversed.
Still working on the back of the design - in traditional parchment craft style - I painted the different sections using That’s Crafty! Pearl inks. These inks are perfect for parchment because they dry so quickly and don’t ‘cockle’ the parchment paper.
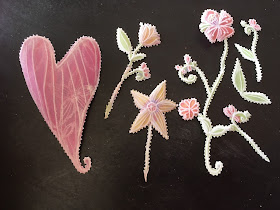
The next job was to prick and cut the individual pieces, taking care to get a nice picot edge.
I stamped the heart onto some card stock in order to use it as a template to make the frame, choosing only parts of the image and embossing straight lines for the rest of the frame.
All that was left to do was to make a sentiment and stick the whole thing together, matting and layering with blue cardstock, then stick It onto a 5” square card blank.
That’s Crafty! All Purpose Craft Glue is perfect for sticking parchment. It’s strong enough to apply it to the very edges where it won’t be seen and still hold well.
A few Swarovski AB crystals gave that little extra ‘je ne sais quoi’. Et voilà! Mon Joli Coeur certainly is very pretty.
Products used:
That’s Crafty! Pearl Inks - Deep Pink, Red, Leaf Green, Yellow
Parchment Paper and Tools
Blue and White Card Stock
Swarovski Flat Backed AB Crystals


Love it Shellie and so clever to parch it xx
ReplyDeleteThis is so very pretty Shellie and looks so lovely done on parchment. Just love it.
ReplyDeleteFliss xx
A lovely card , Shellie . YOur parchment work is wonderful . x
ReplyDeleteShellie, You have such a feminine feel to your creations. This is stunning xx
ReplyDelete