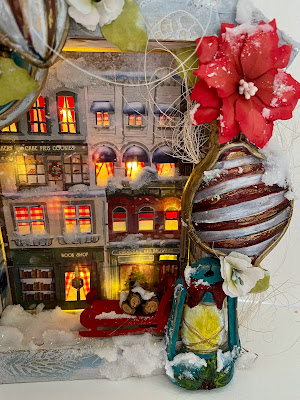
I am still feeling Christmassy this week, I've used the Stamperia Romantic Christmas Paper Pad which has a page with this fabulous town scene.
I started off by repurposing a That's Crafty! Tree Shrine that I had used for another project but I wanted to use it for this one so I stripped it down. (I've said it before and I'll say it again) I truly love the quality of That's Crafty! MDF because it means I can reuse it whenever I want, its not flimsy single use its sturdy and able to take all manor of mediums. I gave the shrine a coat of White Gesso there had already been a little stencilling on it using That's Crafty! Light Texture Paste with Stamperia Christmas Pinecones Stencil I added a little more with the Stamperia Patchwork Balls Stencil.
I used some moulds to create casts with Air dry clay I used Romantic Christmas Balls Mould and Winter Tales Garland Mould. which I then painted with Black Gesso before painting with Multi Surface Paint. I also like to add a touch of Pentart Glossy Varnish to the Baubles and the glass area of the lantern.
I cut the paper for the shrine interior for the sides and the back, I then take a craft knife and cut out some of the window areas.
I add some Clear Acetate to the window area I then added some pieces of ribbon to serve as curtains and blinds. I popped my bottle lights down on the back and then attached my buildings using some foam pads just to lift them slightly.
I used a little Teal multi surface paint with a dry brush and also gently rubbed some Pentart Gold Wax in places.
I then added my elements along with some paper flowers I made, I used Tea Bag Paper for the smaller flowers as I find this works well I also like to use Sisal in my arrangements.
I then decided I needed a sledge so I drew the side of one then cut it out and drew around that as my template and then put a piece in the middle I then painted it red added some little pieces of twig and added some Holographic Fine Texture Paste to give a snowy effect.


No comments:
Post a Comment
Thank you for taking the time to leave a comment on our blog, we really appreciate it.
Note: only a member of this blog may post a comment.