Hi Everyone
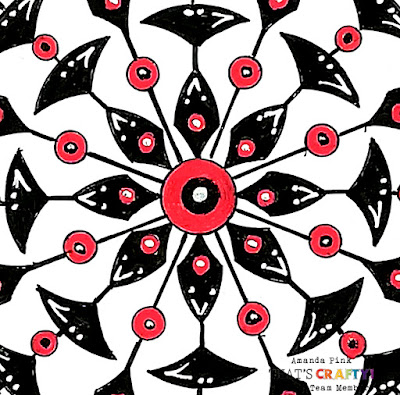
For todays post I have 2 cards to share featuring 'penned patterns' that I've designed and created using some of That's Crafty! round dinky stencils.
Something a little different for me you may think but truth be told designing and creating my own patterns (mainly freehand/ freestyle, sometimes with stencils) is something I've enjoyed doing BTS for many years.
I've worked with a classic 'news print' colour palette of black, red and white- its a favourite of mine as I love the impact those colours have together but colour palette options for something like this are endless as are the choice of colouring mediums.
I'll start with my first pattern
I cut a panel of That's Crafty! ultra smooth card to size, placed That's Crafty! 'Daisy' round dinky stencil in the centre of the panel, drew round each of the elements of the 'Daisy' and coloured them in using a black micron pen, the centre circle with a red posca pen.
Then working around the stencilled daisy I began extending the pattern out using just one element of the daisy repeatedly, each time drawing and colouring with the black micron pen.
I also introduced some circles to my pattern using That's Crafty! 'Bubble Circle' round dinky stencil. They were penned in black and coloured in red using a posca pen. It was a great stencil to use as the 3 different sized circles sallowed me to switch up the circle size depending on where they featured within my pattern.
The stencilled elements were joined with simple lines penned with the aid of a ruler.
Creating something like this is very much intuitive and I find you tend to go with what you think works best each time you extend your pattern. It's one of those things too that stops only when you think it's time to because you like the pattern as it is at that point or of course if you have little room left to add more.
This first pattern was a bit of both.
Now for my second pattern
I followed the same creativity steps using the same pens, inks and words for my second pattern.
The only thing that changed was one of the stencils. I swapped That's Crafty! 'Daisy' round dinky for That's Crafty! 'Daisy Explosion' round dinky.
I also kept the second pattern more open leaving lots of space in and around.
Just as before I started by penning and colouring the 'Daisy Explosion' stencil.
Then extended my pattern out using the two different elements of the 'Daisy Explosion' stencil, incorporating various sized circles using the 'Bubble Circle' round dinky and penning lines with a ruler
The finishing touches for both penned pattern's were some white and black pen mark making, hickory smoke distress ink blended around the sides of the patterned panel and the ink stamped words:
Limited Edition.
Tim Holtz Distress Ink: Hickory Smoke currently o/s.
That's Crafty! Round Dinky Stencils: 'Daisy' (TC123) , 'Bubble Circle' (TC126), 'Daisy Explosion' (TC134)
Posca Pen: Red, White
I hope you've enjoyed my stencilled pen pattern creativity today and that it may inspire you to create some of your own patterns with your stencils.


Stunning!
ReplyDeleteWhat a creative way to use the stencils. Love the colourway and the use of the 'extensions'
Thank you so much for sharing.
Thank you Christine for your lovely comment and for taking the time to pop by . x
DeleteGorgeous patterns!
ReplyDeleteThank you so much Matilde for your kind comment and for stopping by xx
ReplyDelete