
Hello its Monday again and I've gone a bit owly for my post this week, it also runs in conjunction with a Facebook live making this project in the Thats Crafty! Creatives group, so if you if you would like to see this project put together in video format you can find it in the group, on the media page if you are on a computer or in the photo section if you are on your phone.
I started of by pouring just a little Pentart Glass Resin to which I had added the tiniest drop of Resin Tint this comes in many colours but I opted for the yellow, into the Owl Mould I only poured a little as there are only a few areas that I want the resin to have prominence. I also added some Microbeads at this stage too, the microbeads come in lots of colours, I opted for gold. I poured the resin I had left into a couple of key moulds, I don't mind that they are yellow as I will be painting them. this resin then needs to be left to cure for 24/36 hours depending on humidity etc. I know some people will prefer a faster drying resin but for this this is perfect as I'm quite a slow worker it gives me time to pour carefully without worrying about wasting half of it and I also have time to pop things into the mix without rushing, but there are other resins on the website with an almost immediate curing time.

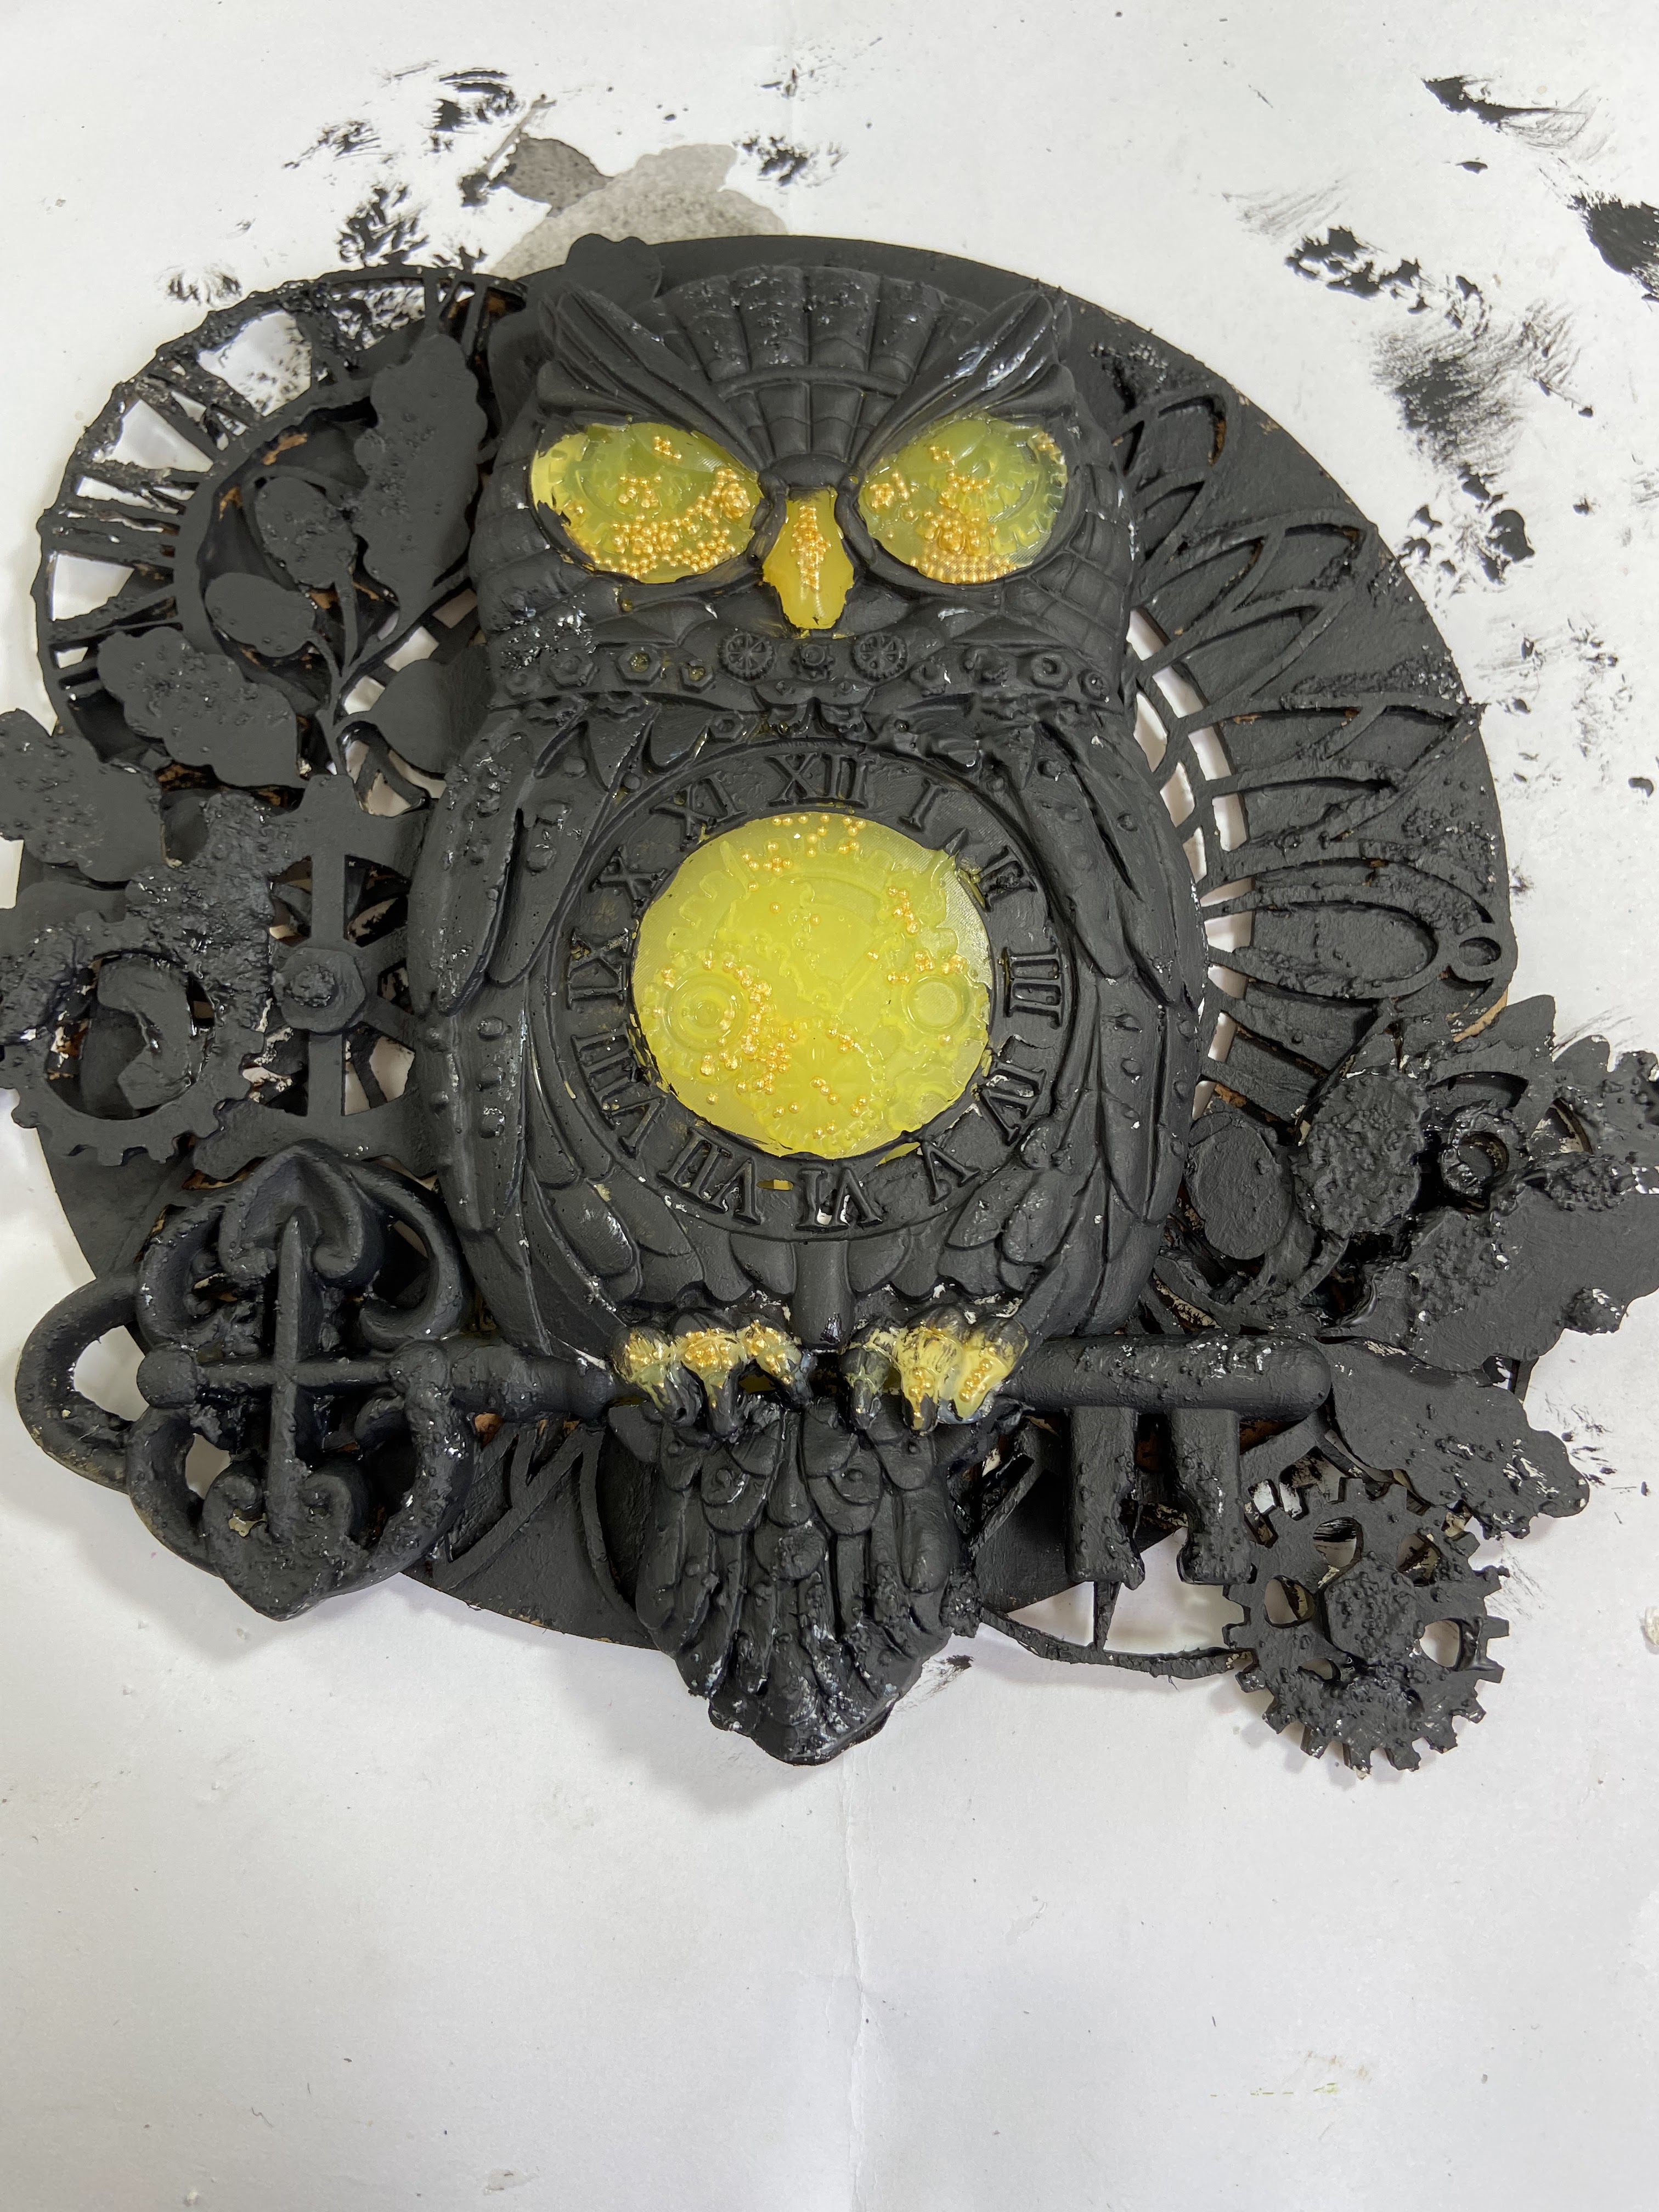
Once the resin is dry I can add some Air Dry Clay to the rest of the mould being mindful to leave space behind some of the resin areas as I want the light to be able to shine through, I apply a coat of black gesso every where except the part that I want the light to shine through.


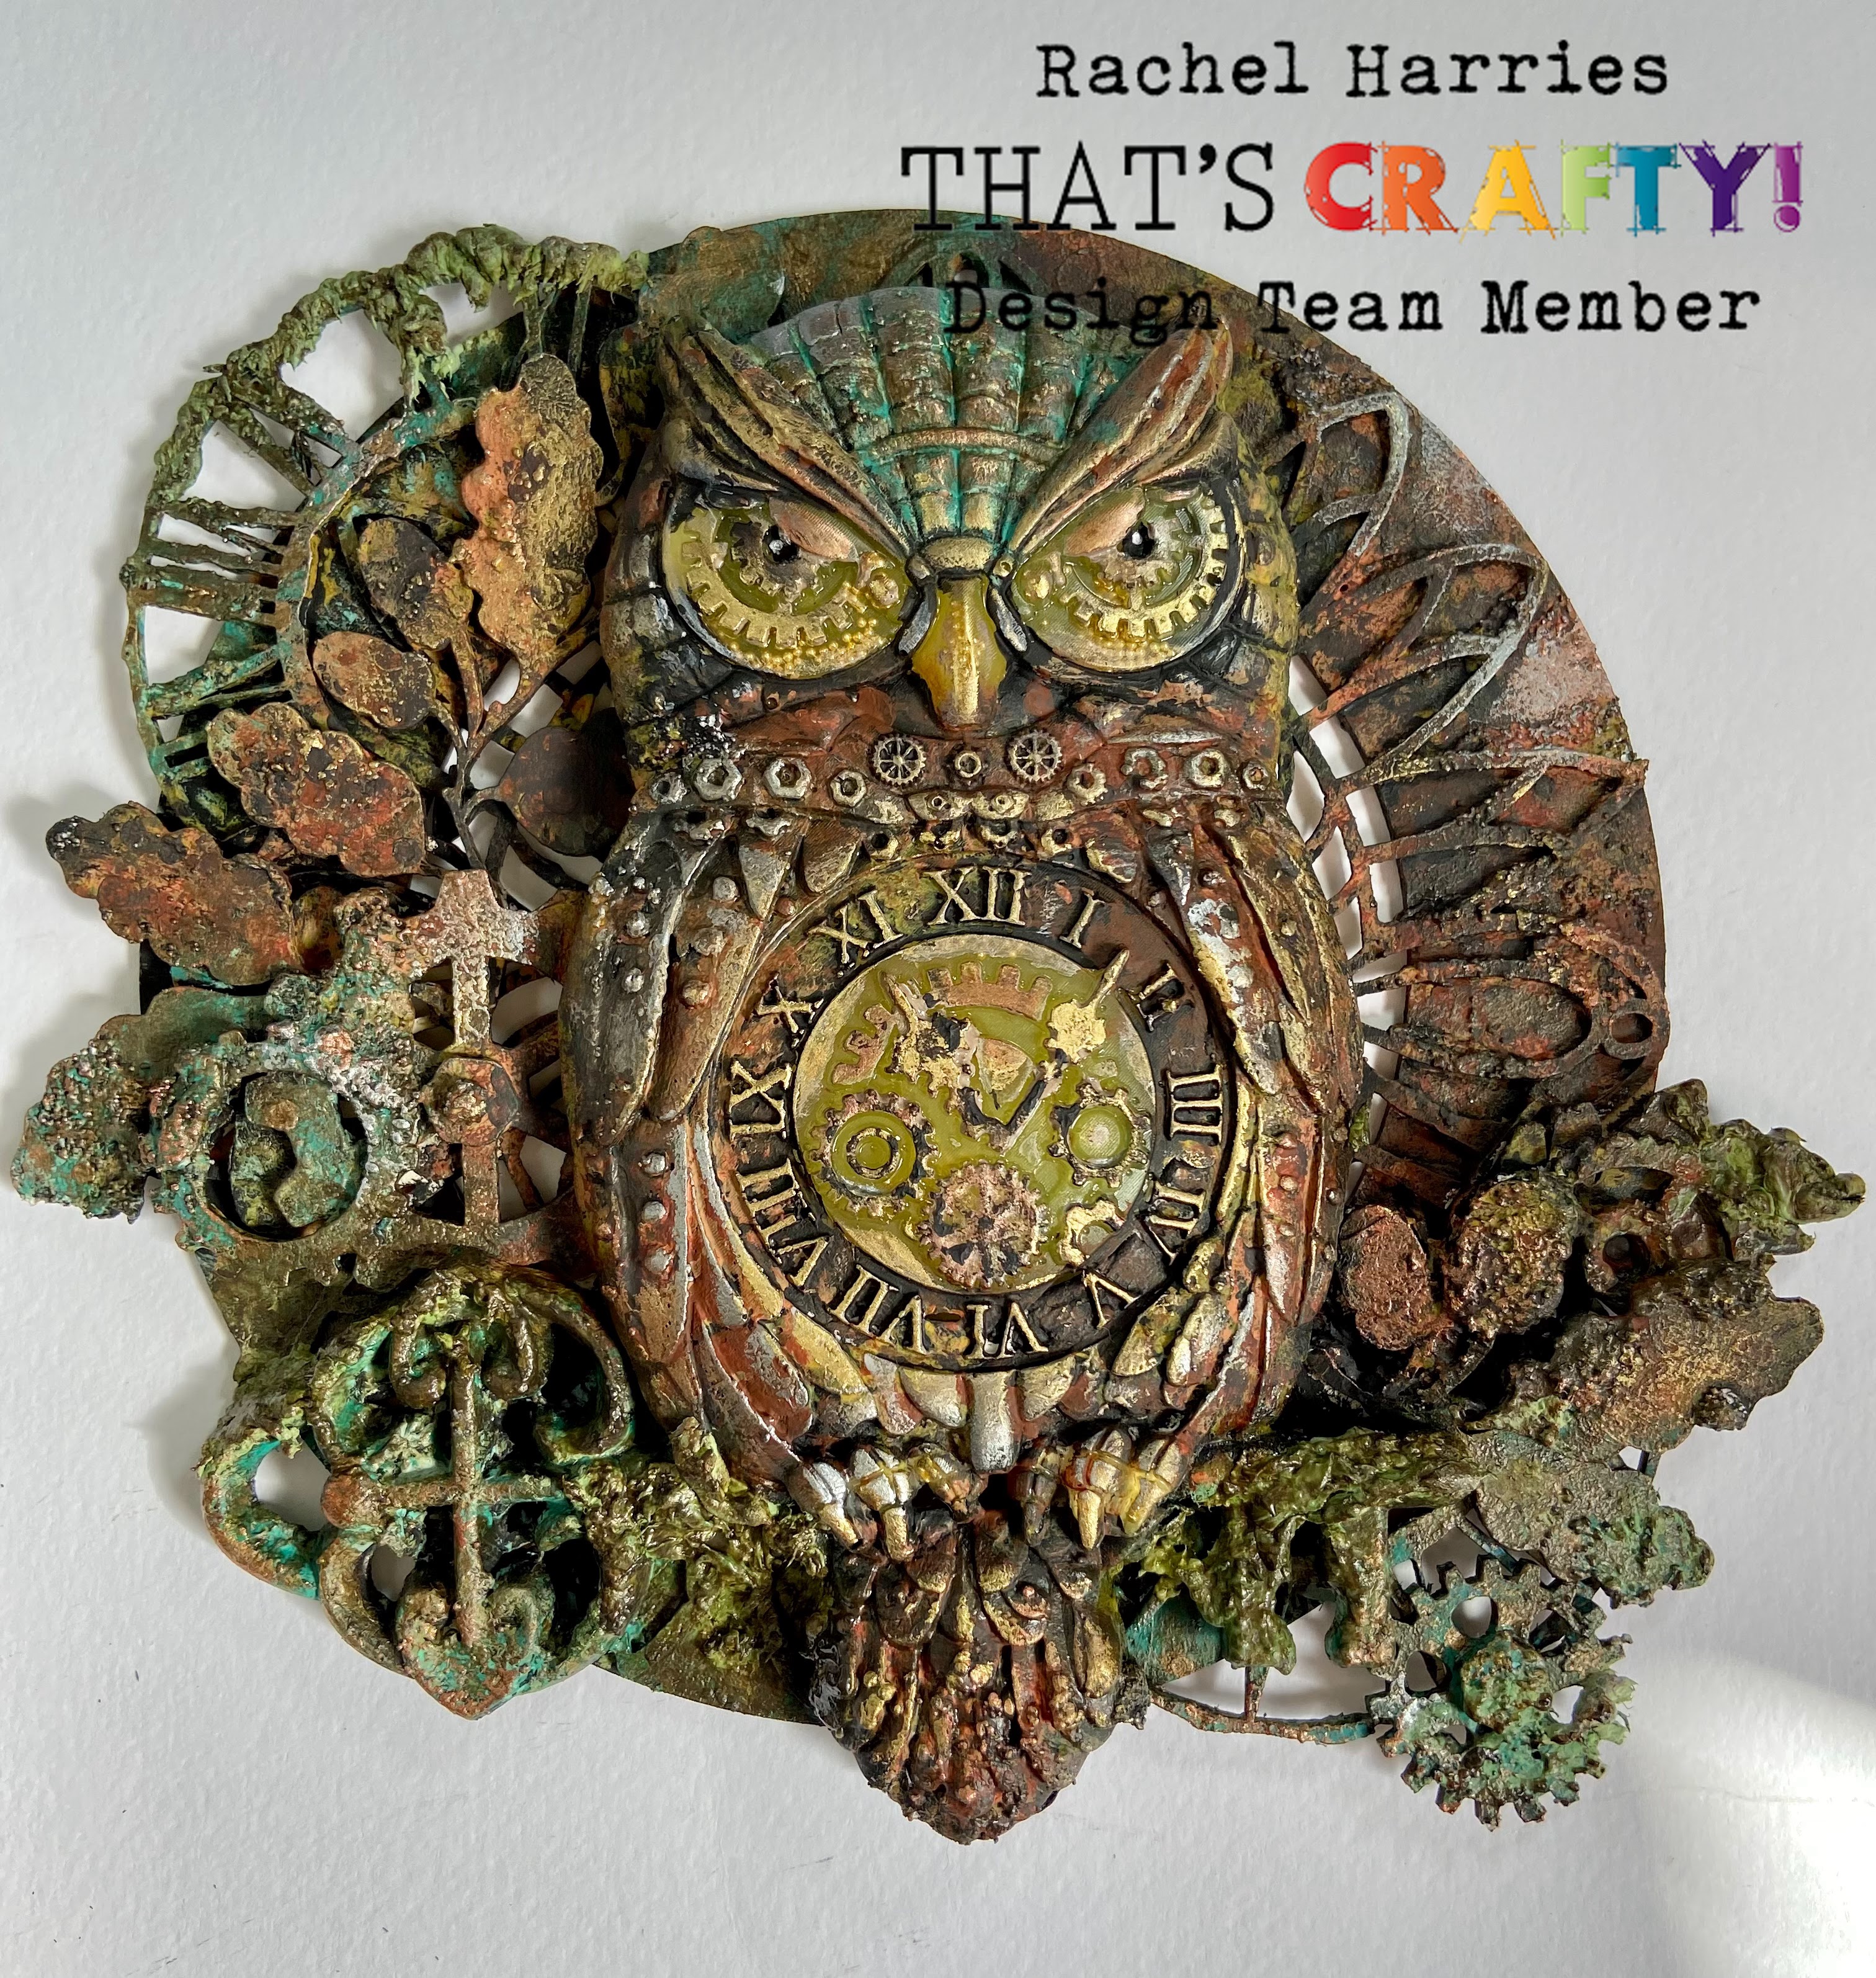
I then take one of the MDF wreaths and start to create my composition. It's really good at this point not to stick anything down but to just play about with positioning until you are happy. I've used a Crafty board Mandala, Greyboard Acorns and Leaves, Greyboard Clocks, Greyboard Cogs and I've used a combination of Adhesive and Heavy Body Gel to adhere everything. Once I was happy with positioning I have also taken some time to cut the original branch out from the owl as I want to replace it with the key its no problem to cut this at an angle so it fits back together nicely it just takes a little patience to try the fit a few times. I add some of my favourite Sand Texture Paste just using my finger in places. I then make sure everything is touch dry and add a layer of black gesso.


I then used the Rust and Patina Effect sets from Pentart, I like to use Royal and Langnickel Brushes when I'm doing paint effects and other mixed media projects as not only are they a great price but they do not shed bristles and they take some real abuse.

I also added a little Wax in places just to finish off.

No comments:
Post a Comment
Thank you for taking the time to leave a comment on our blog, we really appreciate it.
Note: only a member of this blog may post a comment.