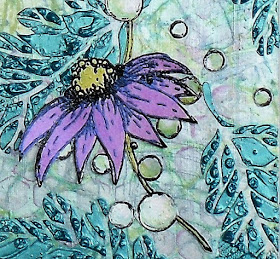
Today I've gone all shimmery, using two different types of shimmer paints on a whiteboard tag:
I started by painting the tag with the Pearl paint:
Then thought I'd build up layers of stencilling using three different colours of the Shimmer paint - Turquoise,
Yellow and Dark Blue. Each layer uses a different stencil and removes some of the previous layer:
I've just gone over and over,
finishing with some of the pink pearlescent ink:
I then swapped to some Pebeo Iridescent paints:
These are thicker so are great for spreading thickly through a stencil:
You can leave it to dry as is or add more texture by heat drying:
After that just finish off with some stamped, embossed and painted flowers
and a label stencilled with black texture paste.
Supplies:
That's Crafty! A6 Clear Stamp Set - Grunge Flowers - Set 3
That's Crafty! Shimmer Paints: Yellow, Turquoise, Dark Blue, Pearl
Pebeo Studio Acrylic Paints: Iridescent Green Blue, Iridescent Green Yellow, Iridescent Violet BlueThat's Crafty! Pearl Inks: Deep Pink
That's Crafty! 6ins x 6ins Stencils and Masks: Leaves, Knotted Circles, Knotted Curves
That's Crafty! 7ins x 7ins Stencils: Allsorts
That's Crafty! 6.5 x 7.5 Stencils: Lynne's Affirmations 2, Honeycomb, Skeleton Leaves
That's Crafty! Black Texture PasteVersaMark Watermark Stamp Pad
Hope you enjoyed this post. 'Til next week. Helen


Wonderful Tag with such a lovely glimmering finish . Great step by step - tfs x
ReplyDeleteSuch a pretty tag Helen, the textures are gorgeous and the colours so lovely.
ReplyDeleteFliss xx